This guide will walk you through installing EzCAD laser software on your Windows computer, ensuring your laser marking machine is properly connected and ready to use. Following these clear, step-by-step instructions will help you set up the software smoothly and avoid common installation issues.
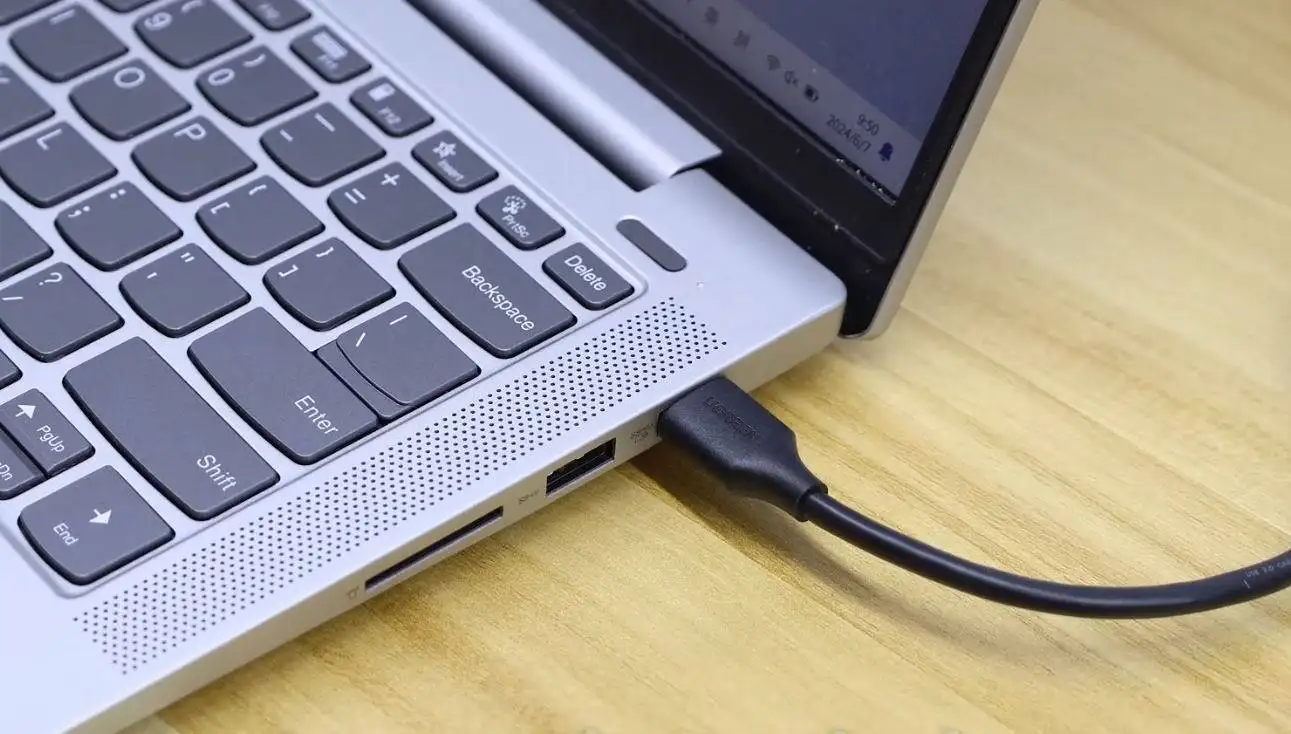
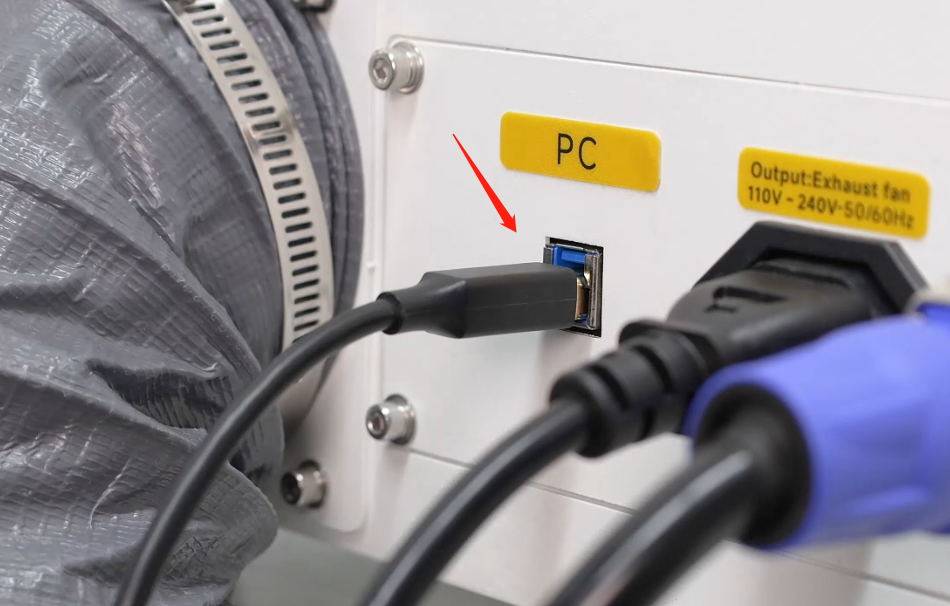
Step #1: Connect the Machine to the Computer
Begin by using a USB cable to connect your laser marking machine to your Windows PC. Ensure the connection is secure to allow proper communication between the device and the computer.
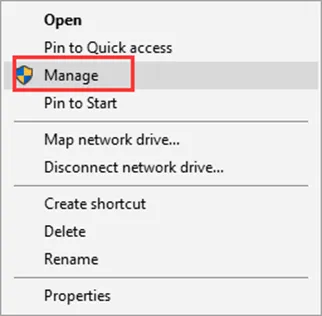
Step #2: Open Device Manager
On your computer, right-click the Start button and select “Device Manager” from the menu. Device Manager allows you to manage hardware and install necessary drivers.
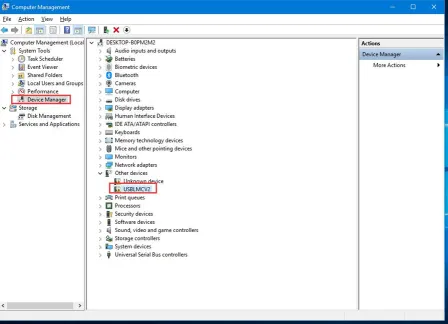
Step #3: Locate the New Device
In Device Manager, look for the newly connected device. It may appear under “Other devices” with a yellow warning icon, indicating that the driver is not yet installed. This is a normal part of the installing EzCAD laser software process.
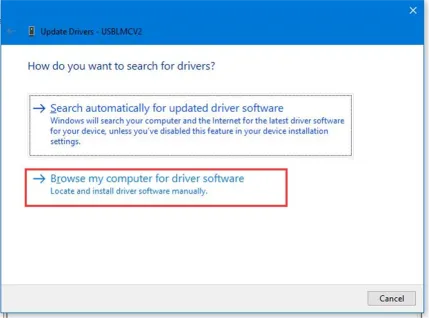
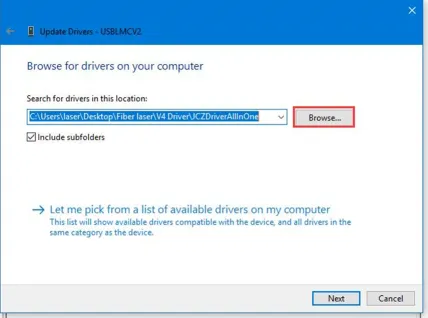
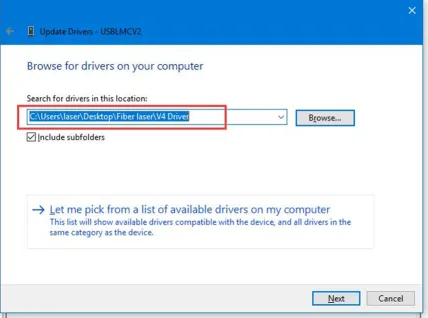
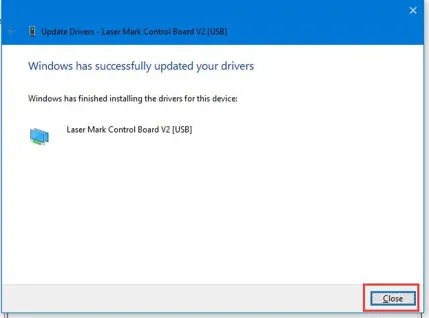
Step #4: Install the Driver
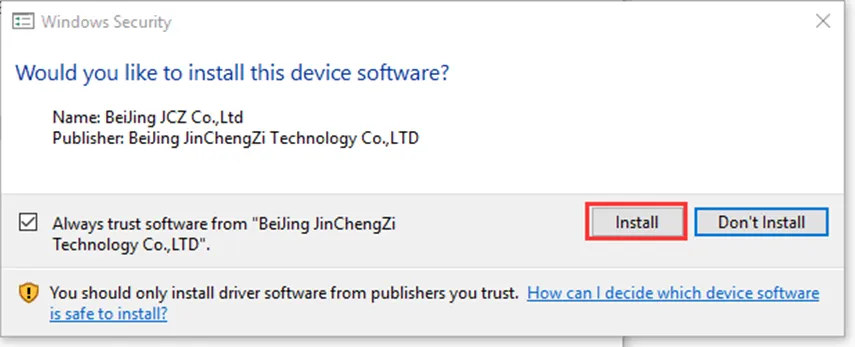
Right-click the new device and select “Update driver.” Choose “Browse my computer for drivers.” Navigate to the driver folder located on the provided USB drive under: USB Drive > AURORA 8/AURORA 8 UV/AURORA 8 PRO > Fiber software/UV software > Driver >. Select the correct driver file and follow the on-screen prompts to complete the driver installation.
Step #5: Complete the Installation
After installation, the device should be listed in Device Manager without any warning icons. This confirms that the driver has been successfully installed, and your laser marking machine is ready to interface with the EzCAD software.
You have now completed the process of installing EzCAD laser software. Launch the software to begin controlling your laser marking machine and start your engraving projects with precision and efficiency. Make sure to explore the features and settings to optimize your workflow and achieve the best results.

.png "laser cutter Globle") International
International
 United States
 Brasil
 Canada
 Costa Rica
 Mexico
 Česká
Česká
 Romania
 Polska
 Ireland
 Italia
 Lietuva
 Россия
 Deutschland
 Britain
 Україна
 France
 Sverige
 Norway
 Denmark
 Ελλάδα
 Portugal
 한국
한국
 中国
中国
 中国香港
中国香港
 Israel
 中國臺灣
中國臺灣
 ジャパン
ジャパン India
India
 پاکستان
 پශ්රී ලංකා
 ประเทศไทย
 Australia
 New Zealand
 South Africa