I. Introduction
Clocks are commonly used timers in our daily lives to keep track of time. In Chinese history, there are four generations of timekeepers recorded: sundial, hourglass, mechanical clock, and quartz clock. Nowadays, common clocks on the market include mechanical clocks, electronic clocks, atomic clocks, etc. Among them, electronic clocks are the most common, with various styles and materials found in homes, dormitories, and offices.
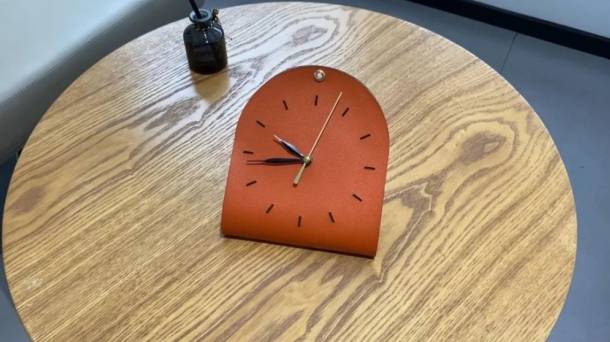
In this issue, we will bring you a course on how to design creative clocks. Through this course, you can design the creative clock that you love and that is not available on the market! The laser expert will bring you the work “DIY Creative Clock”!
II. Work Analysis

III. Materials List
IV. Laser Modeling
1. Clock Design
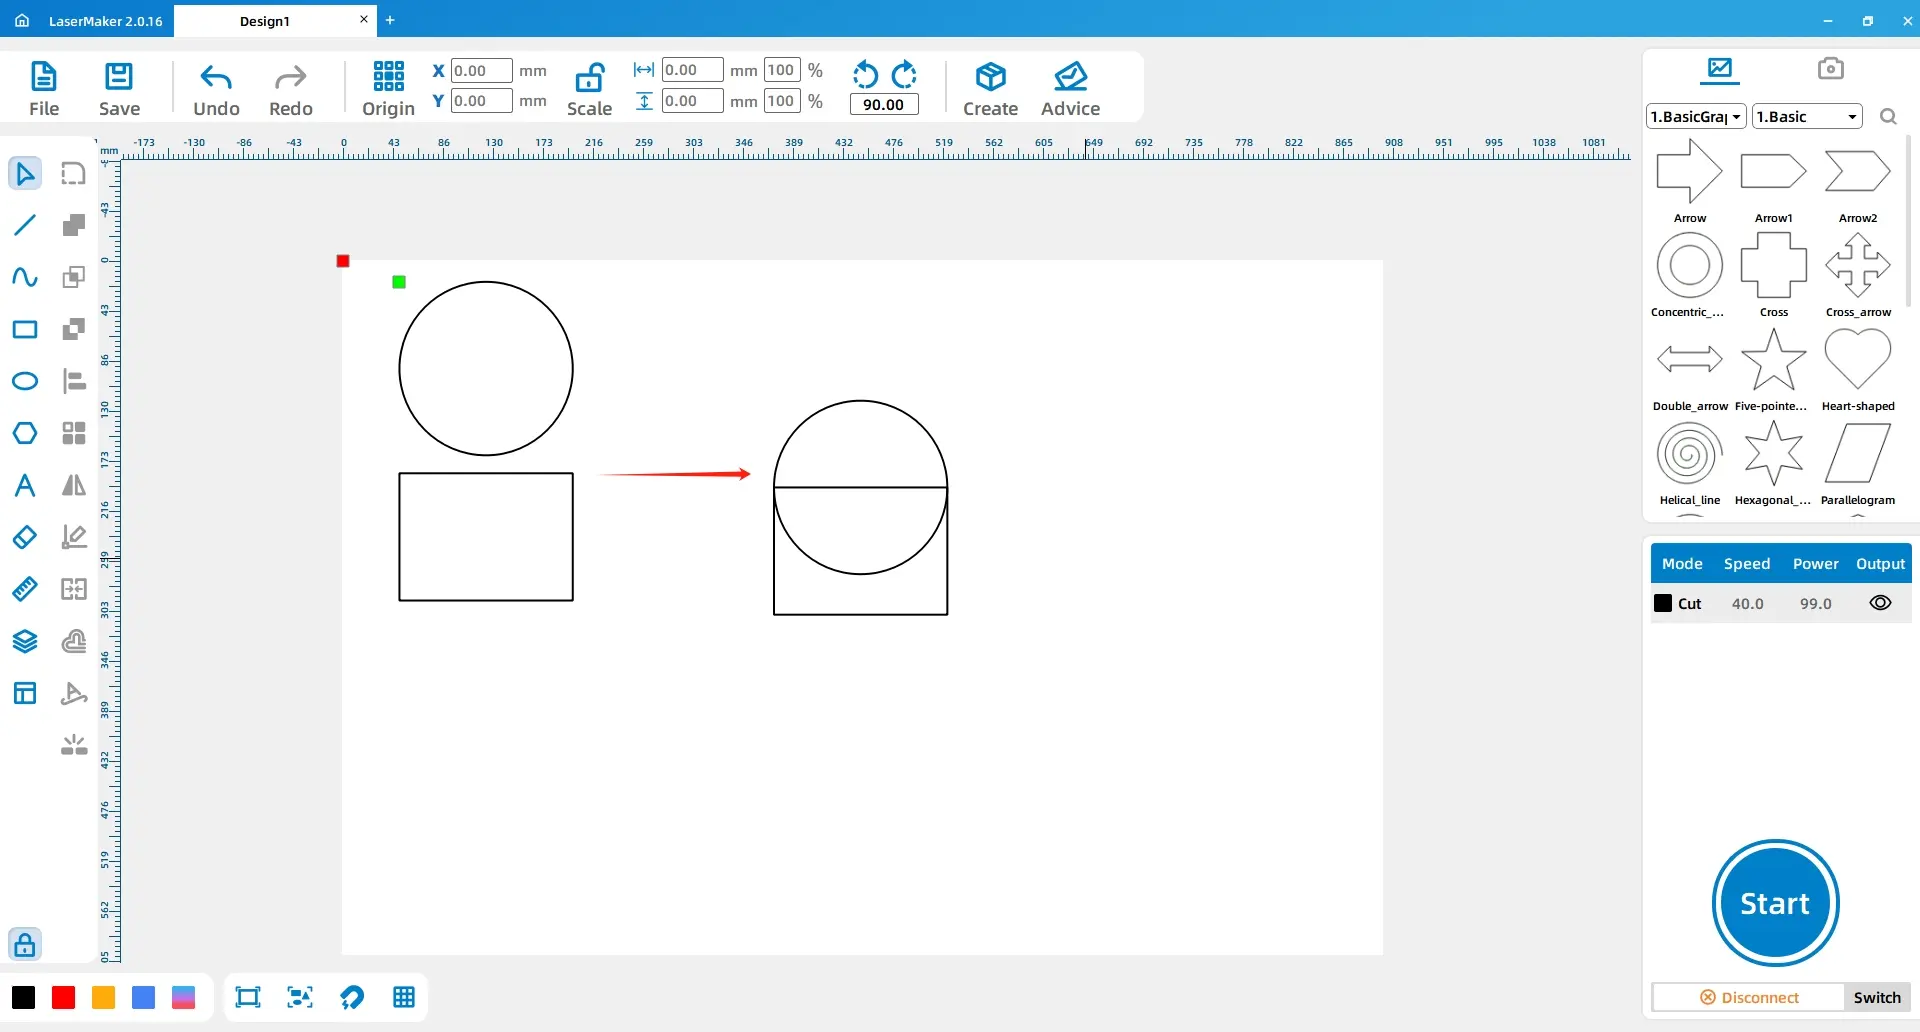
(2) Using the left mouse button, select the “Ellipse” tool from the left toolbar to draw a smaller perfect circle with dimensions of “5.71, 5.71”. Place it in the center of the larger circle.
Then, select the “Rectangle” tool again to draw Rectangle 1 with dimensions of “5.76, 50”. Move it vertically aligned above the smaller circle.
Lastly, use the “Rectangle” tool to draw Rectangle 2 with dimensions of “2, 10”. Move it horizontally aligned above Rectangle 1, as shown in the figure below:
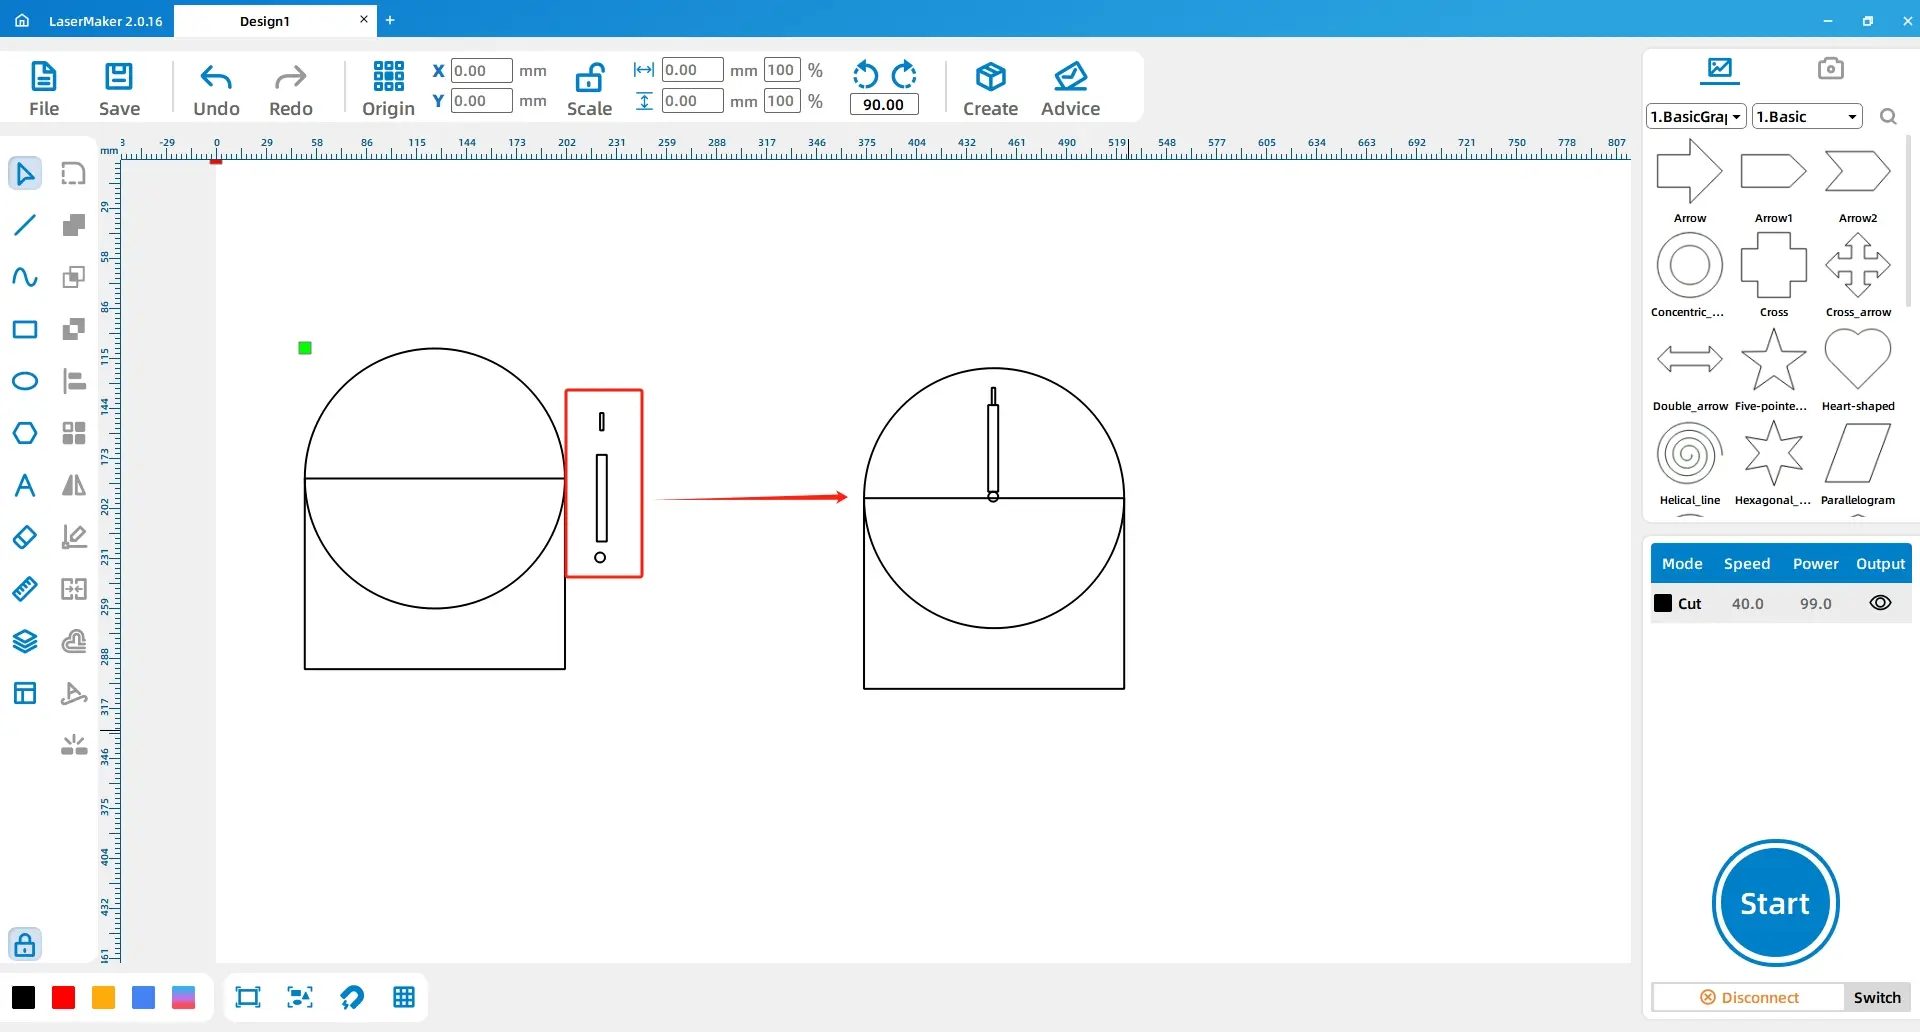
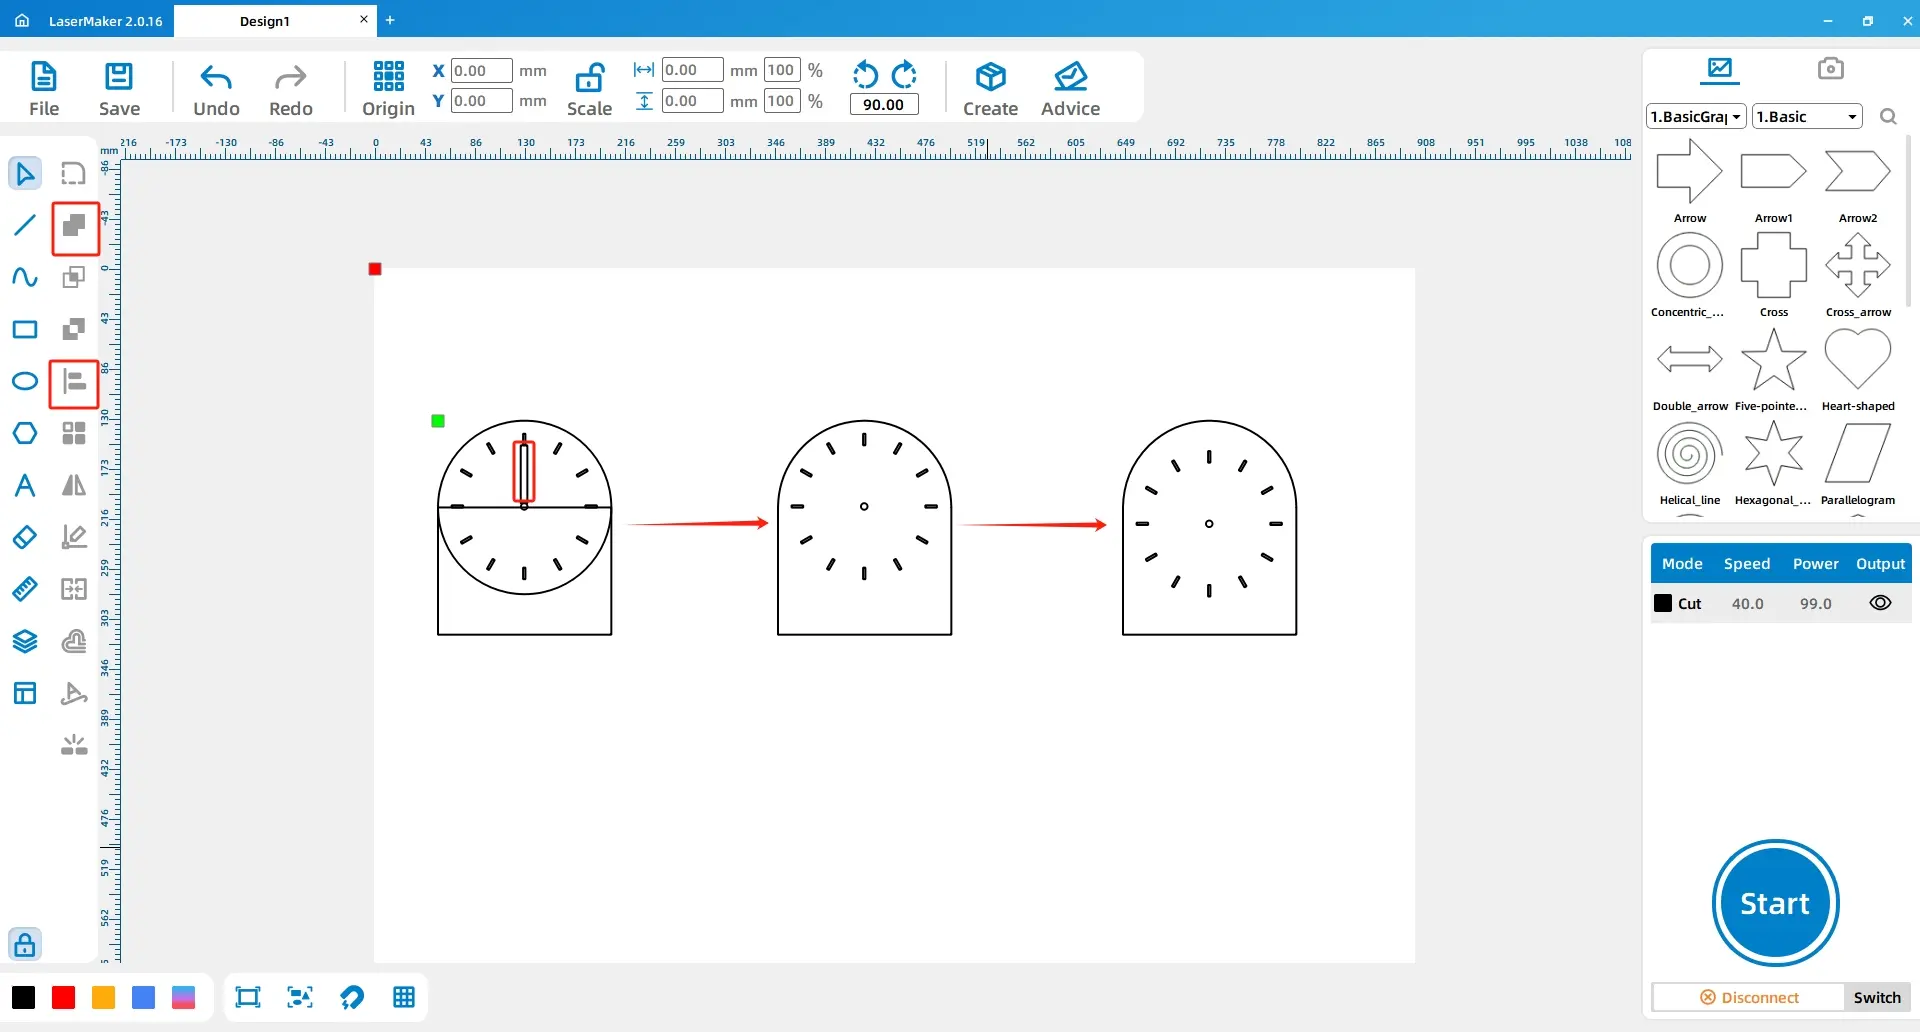
(4) Using the left mouse button, select the rectangles within the red area 1 in the figure and click “Delete”.
Then, select the large rectangle and the large circle using the left mouse button and click “Union”.
Next, select all the shapes except the outer frame, group them together, and then align them centrally with the outer frame, as shown in the figure below:
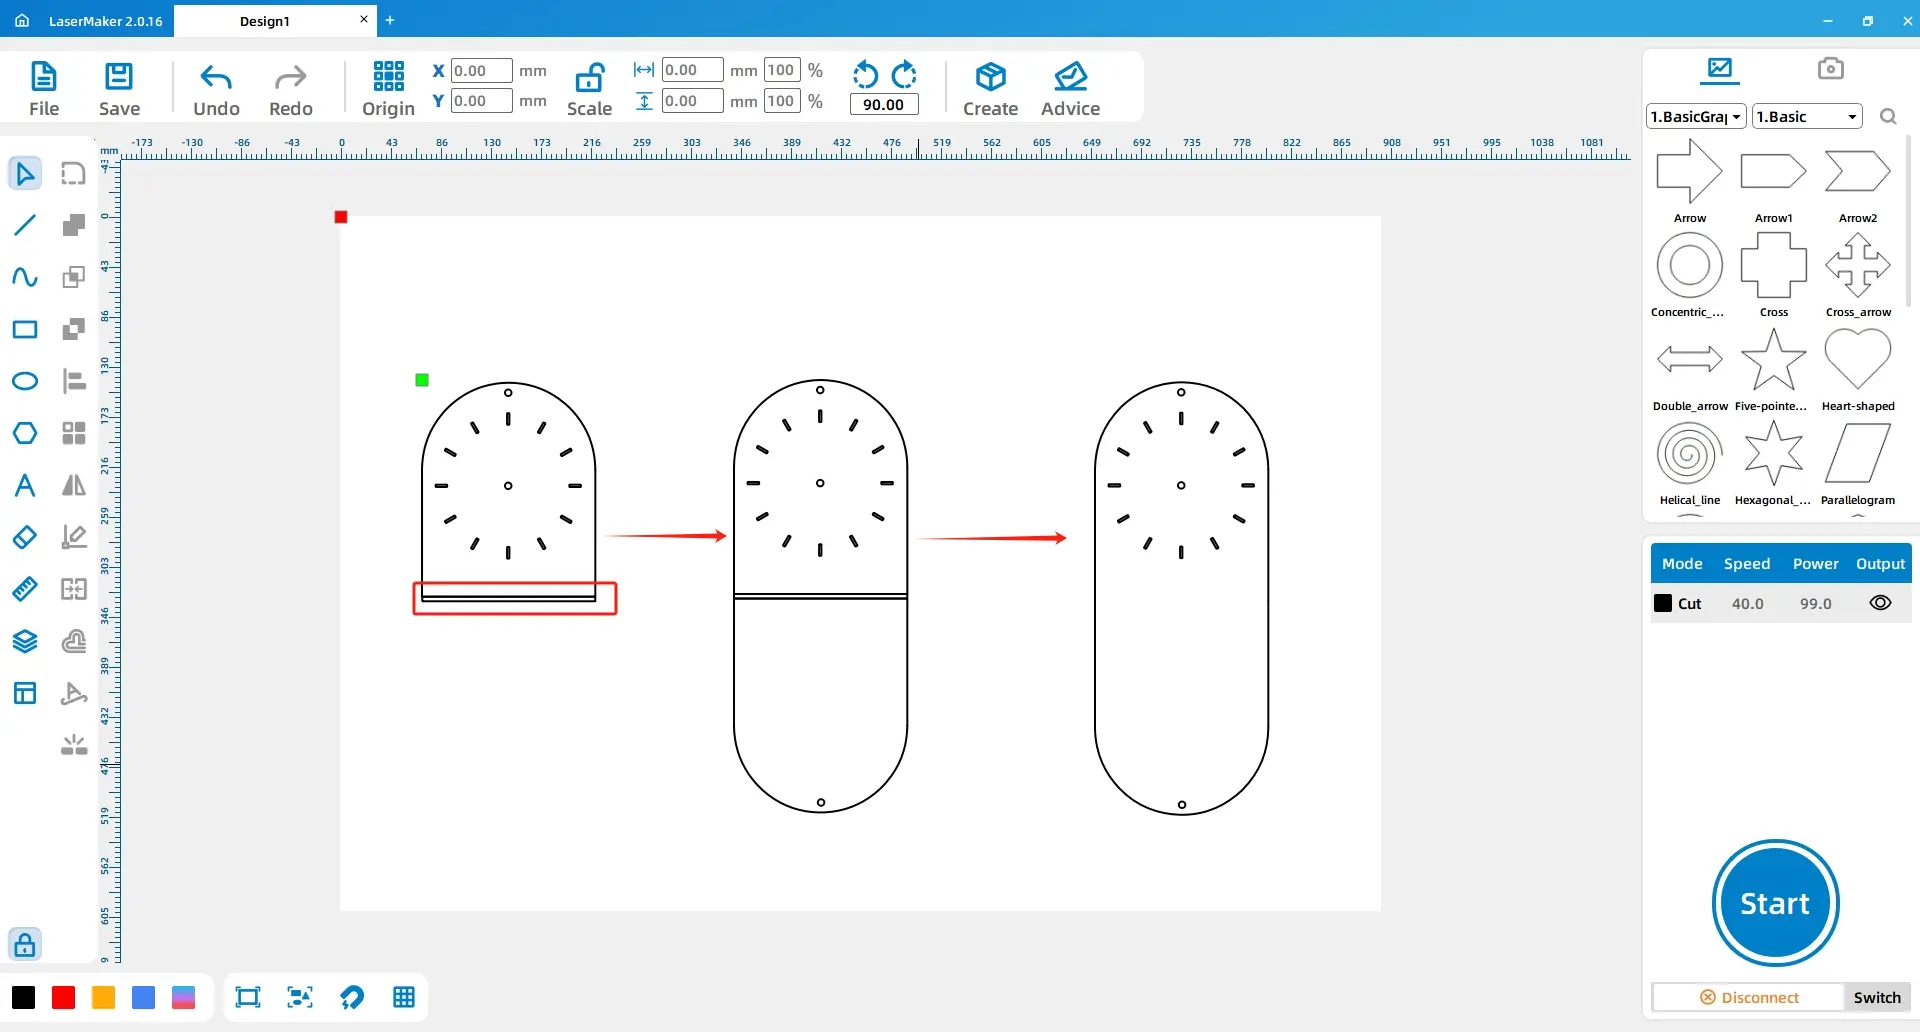
(5) Using the left mouse button, select the “Rectangle” tool from the left toolbar to draw a rectangle with dimensions of “150, 3”. Place it below the outer frame of the clock.
Then, use the “Ellipse” tool to draw a perfect circle 1 with dimensions of “8, 8”. Position it inside and above the outer frame of the clock.
Next, select the outer frame of the clock and circle 1 using the left mouse button, copy and paste them once to create a duplicate outer frame 2 and circle 2. Rotate them “180°” and place them below the rectangle.
Finally, select both outer frames of the clock and the rectangle, and click “Union” as shown in the figure below:
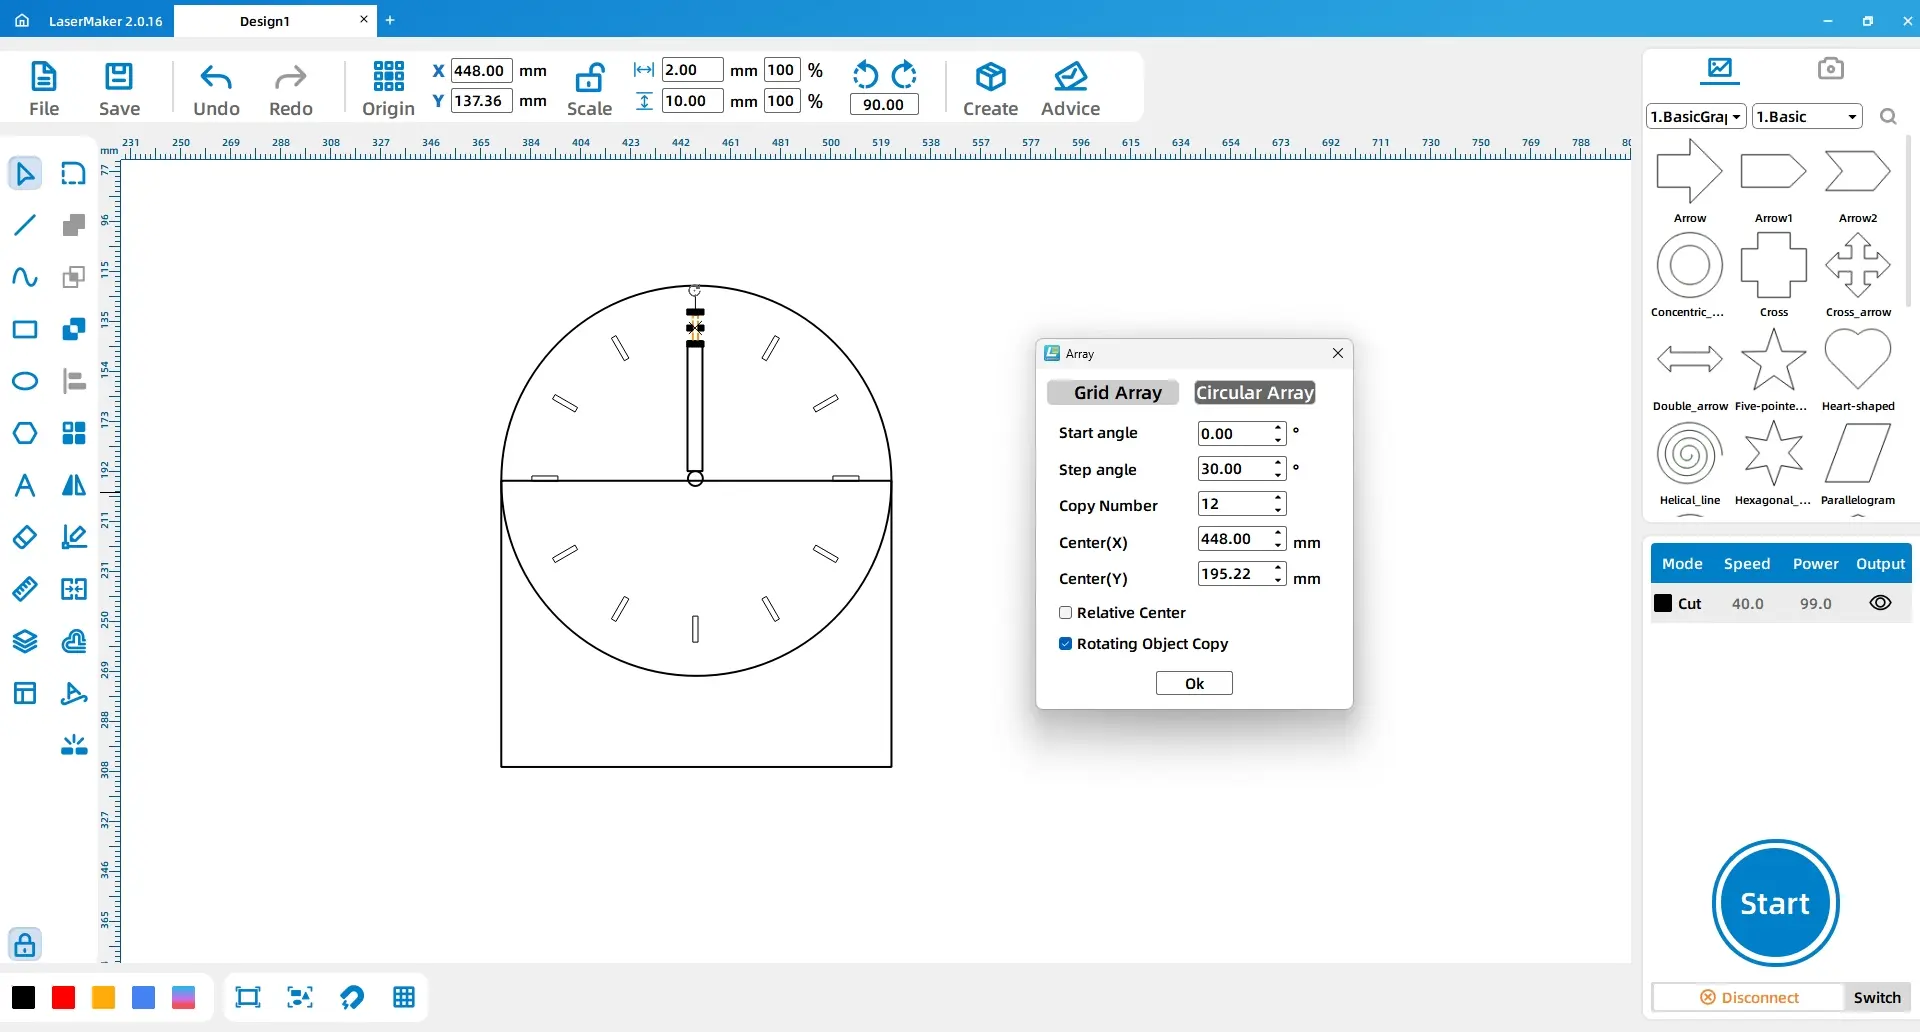
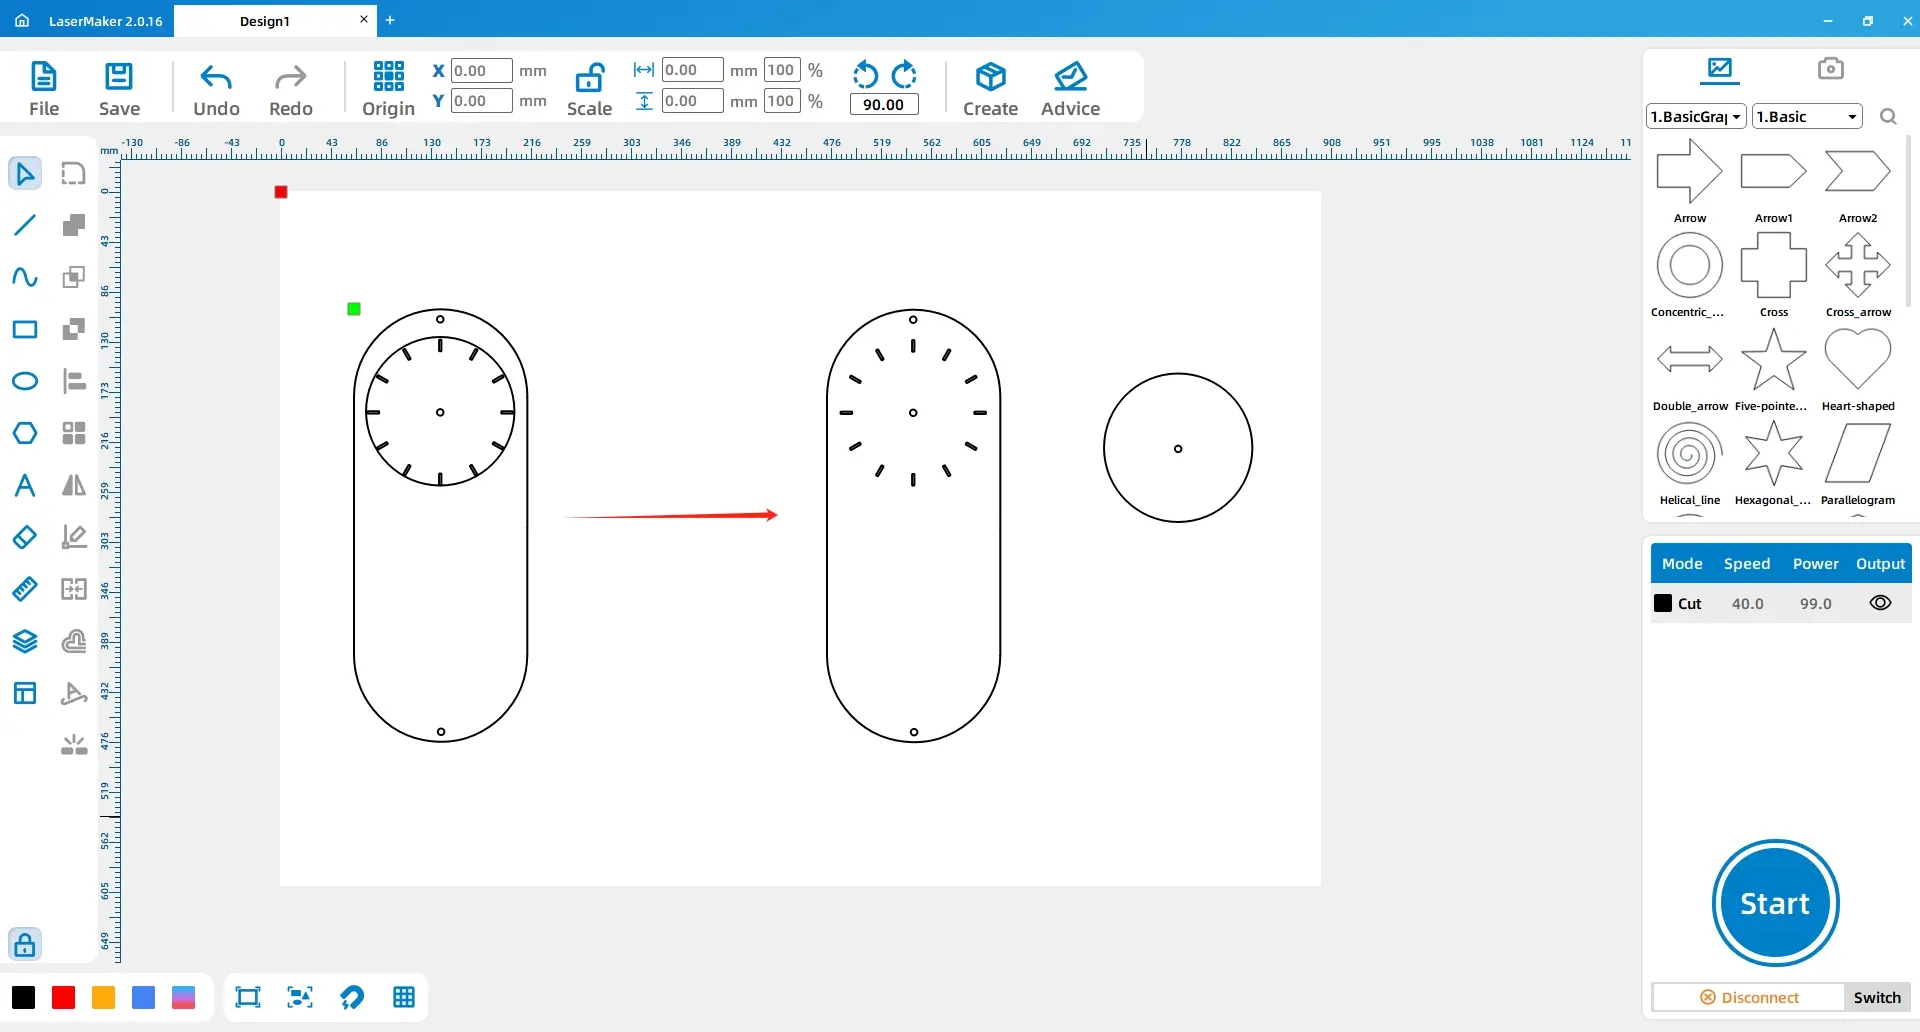
(6) Using the left mouse button, select the “Ellipse” tool from the left toolbar to draw a perfect circle 1 with dimensions of “130, 130”. Place it in the center of the clock and align it.
Then, select circle 1 and the circle within the red area using the left mouse button, and copy and paste them once as shown in the figure below:
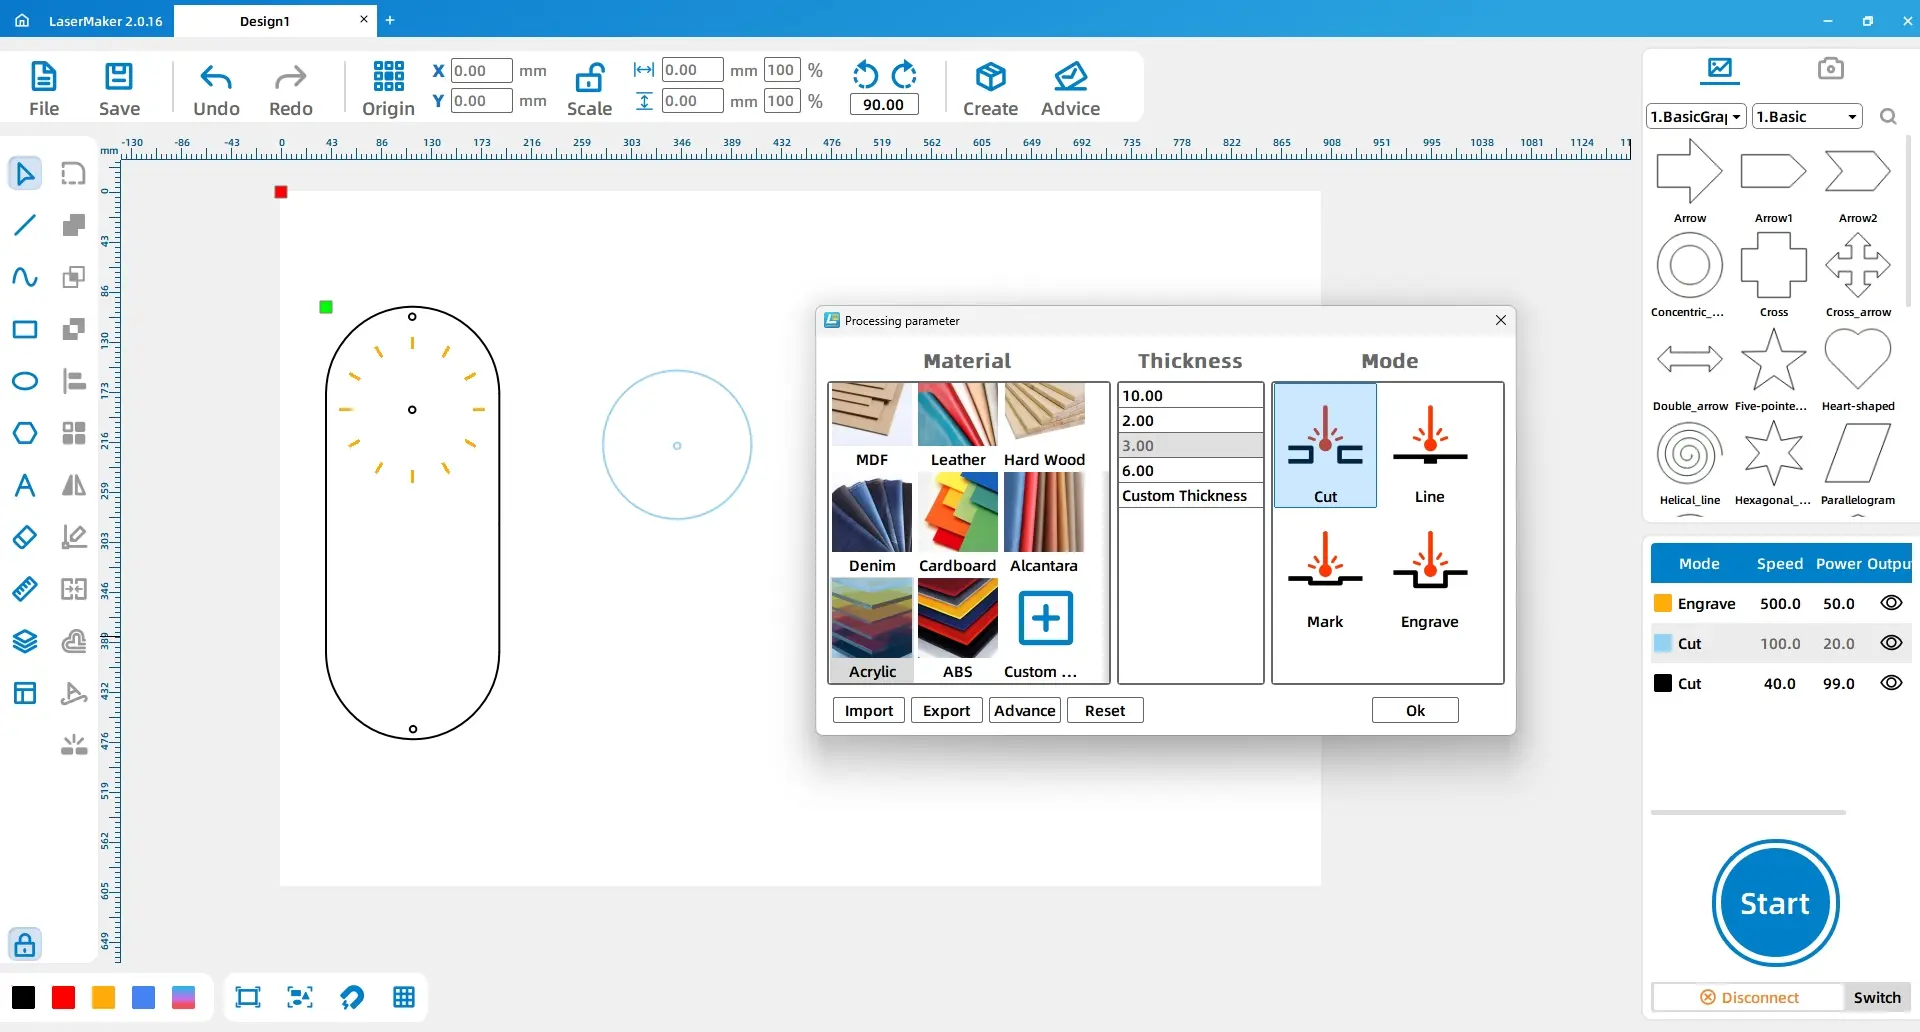
2. Process Settings
V. Assembly Tutorial
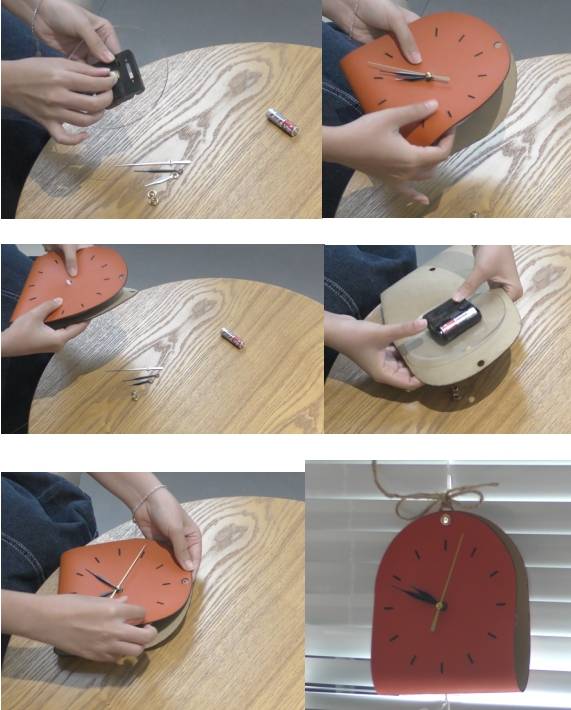
Step 1: Connect the clock movement to the acrylic plate using threaded connections.
Step 2: Combine the leather side with the clock marks to the clock movement.
Step 3: Install the hour, minute, and second hands into the clock movement.
Step 4: Insert the battery into the clock movement.
Step 5: Fold and combine the leather using the grommet.
Step 6: Use adhesive tape to secure the acrylic plate to the leather side with the clock marks. Pass a hemp rope through the grommet to enable hanging the clock.
VI. Work Display

VII. Summary
In this issue, we have brought you a tutorial on how to design and make a clock.
During the process, we discovered that the leather material, whether placed flat on a desktop or hung up, tends to curl up at the edges, which can obstruct the movement of the minute and second hands, causing them to stall. To address this issue, we used adhesive tape to stick the outer edge of the leather to the acrylic plate. This helped to minimize the curling effect and allowed the clock to function properly.
Encountering difficulties during the making process is not something to fear. We can use various methods to solve problems. Keep up the good work, little designers!
Browse Thunder Laser
Bolt >



.png) International
International
 United States
 Brasil
 Canada
 Costa Rica
 Česká
Česká
 Ελλάδα
 Polska
 Ireland
 Portugal
 Lietuva
 Россия
 Deutschland
 Britain
 Україна
 France
 Sverige
 Italia
 Norway
 Denmark
 Romania
 한국
한국
 中国
中国
 ประเทศไทย
 中国香港
中国香港
 Israel
 中國臺灣
中國臺灣
 India
India
 پاکستان
 پශ්රී ලංකා
 ジャパン
ジャパン
 Australia
 New Zealand
 South Africa