1. In the last two lessons, we made a heart-shaped music box and a music car. In his lesson, what kind of music box do you want to make?
2. If you were asked to make a music windmill, how would you make it?
(2)Do it by hand
1. Prepare before class
Drawing Windows
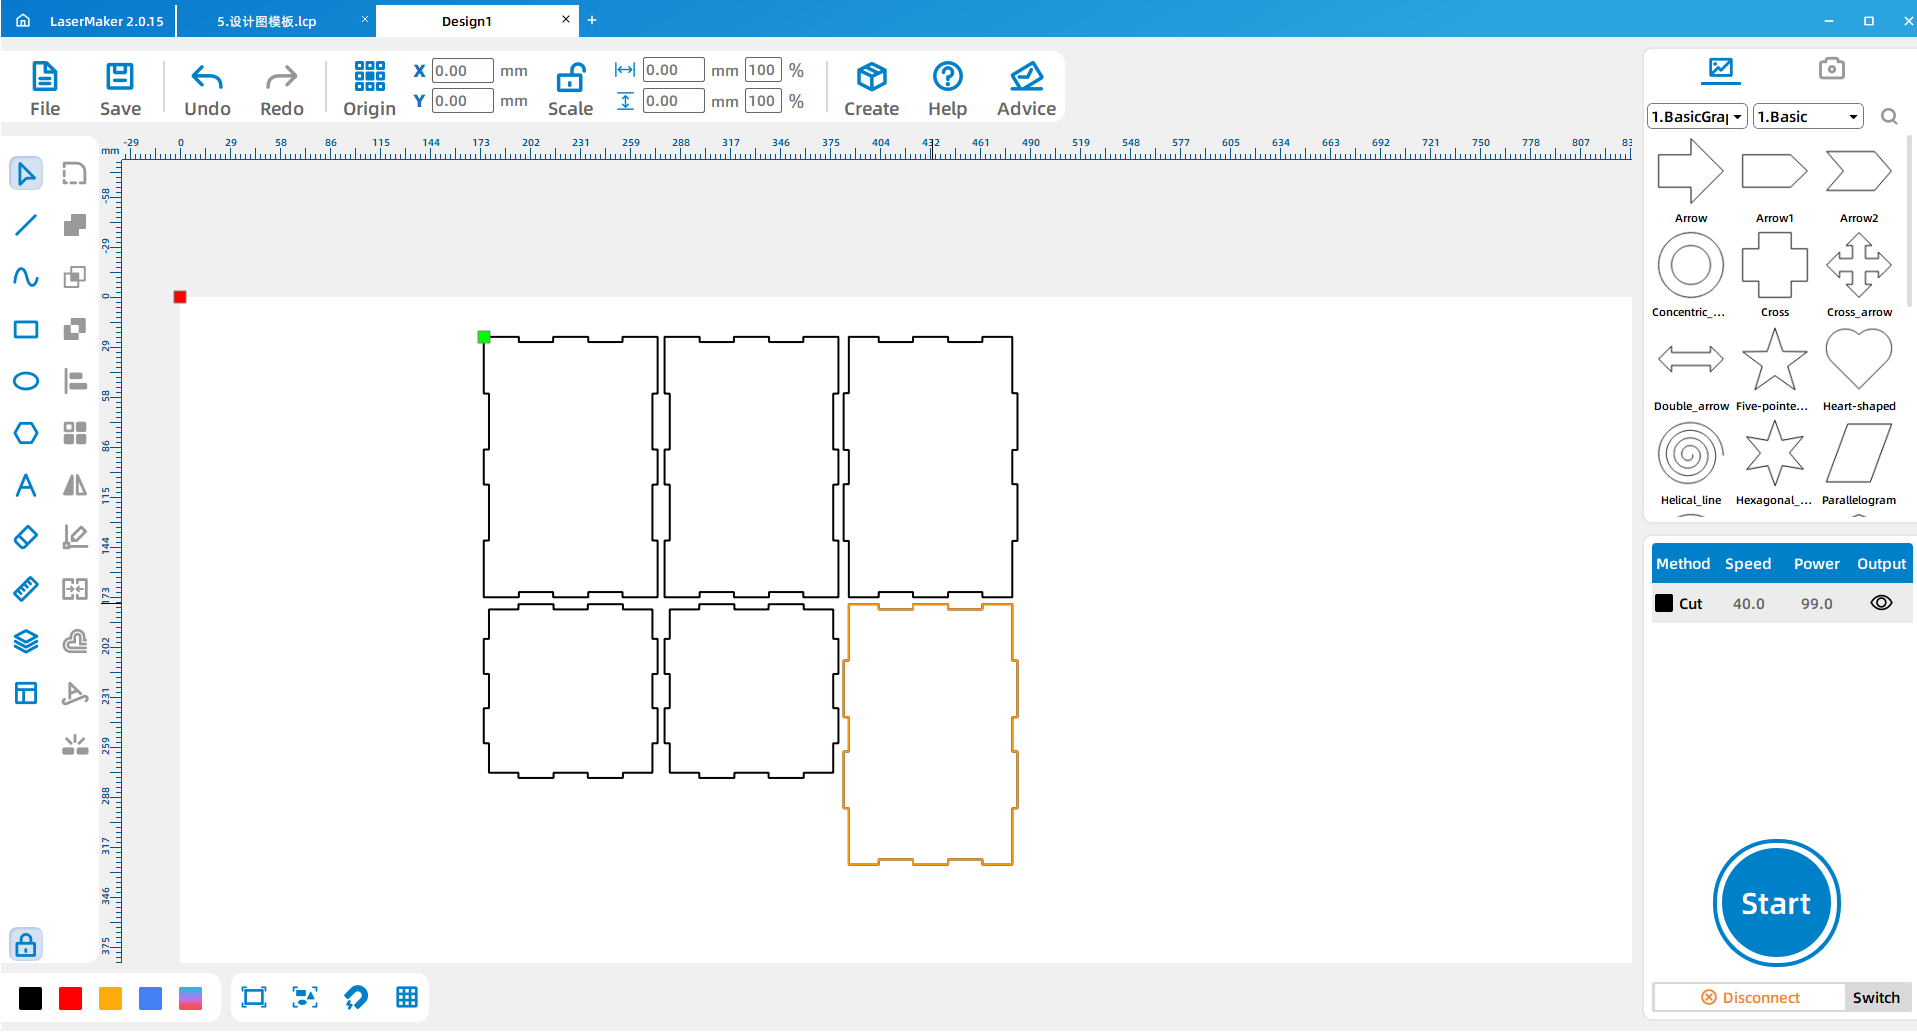
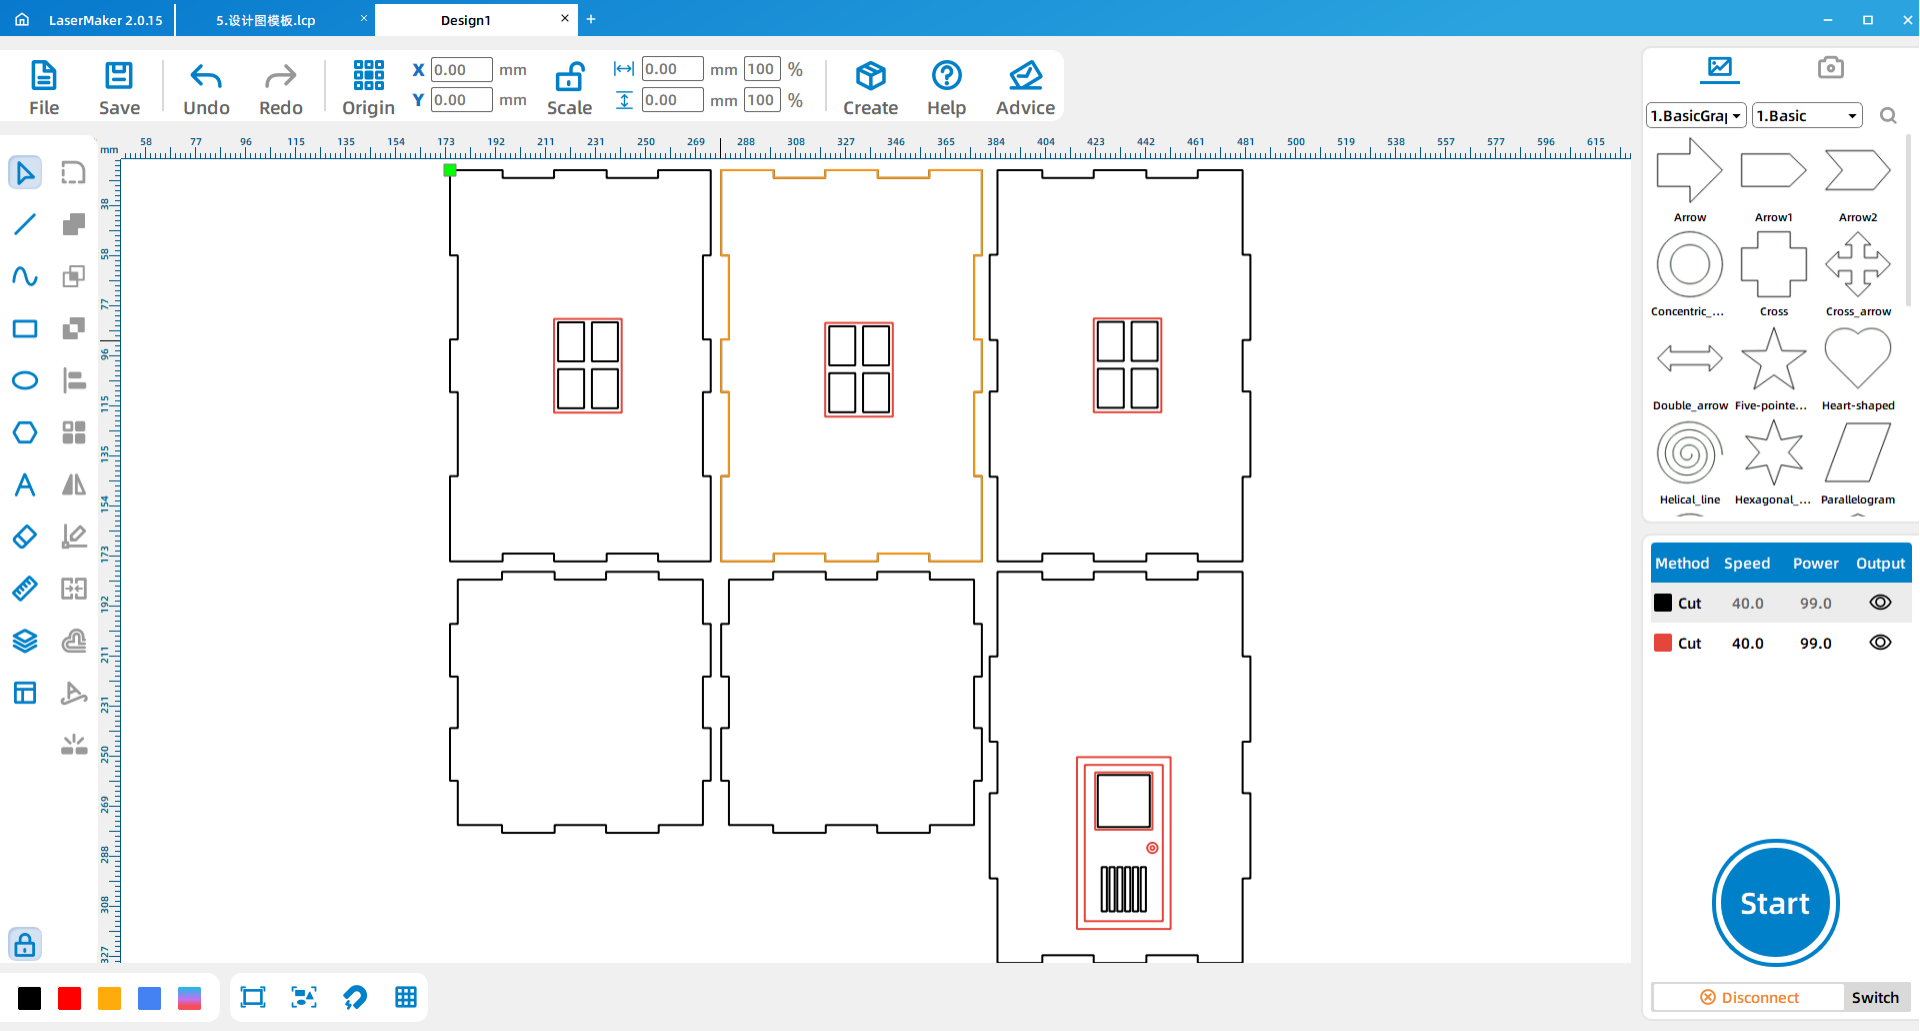
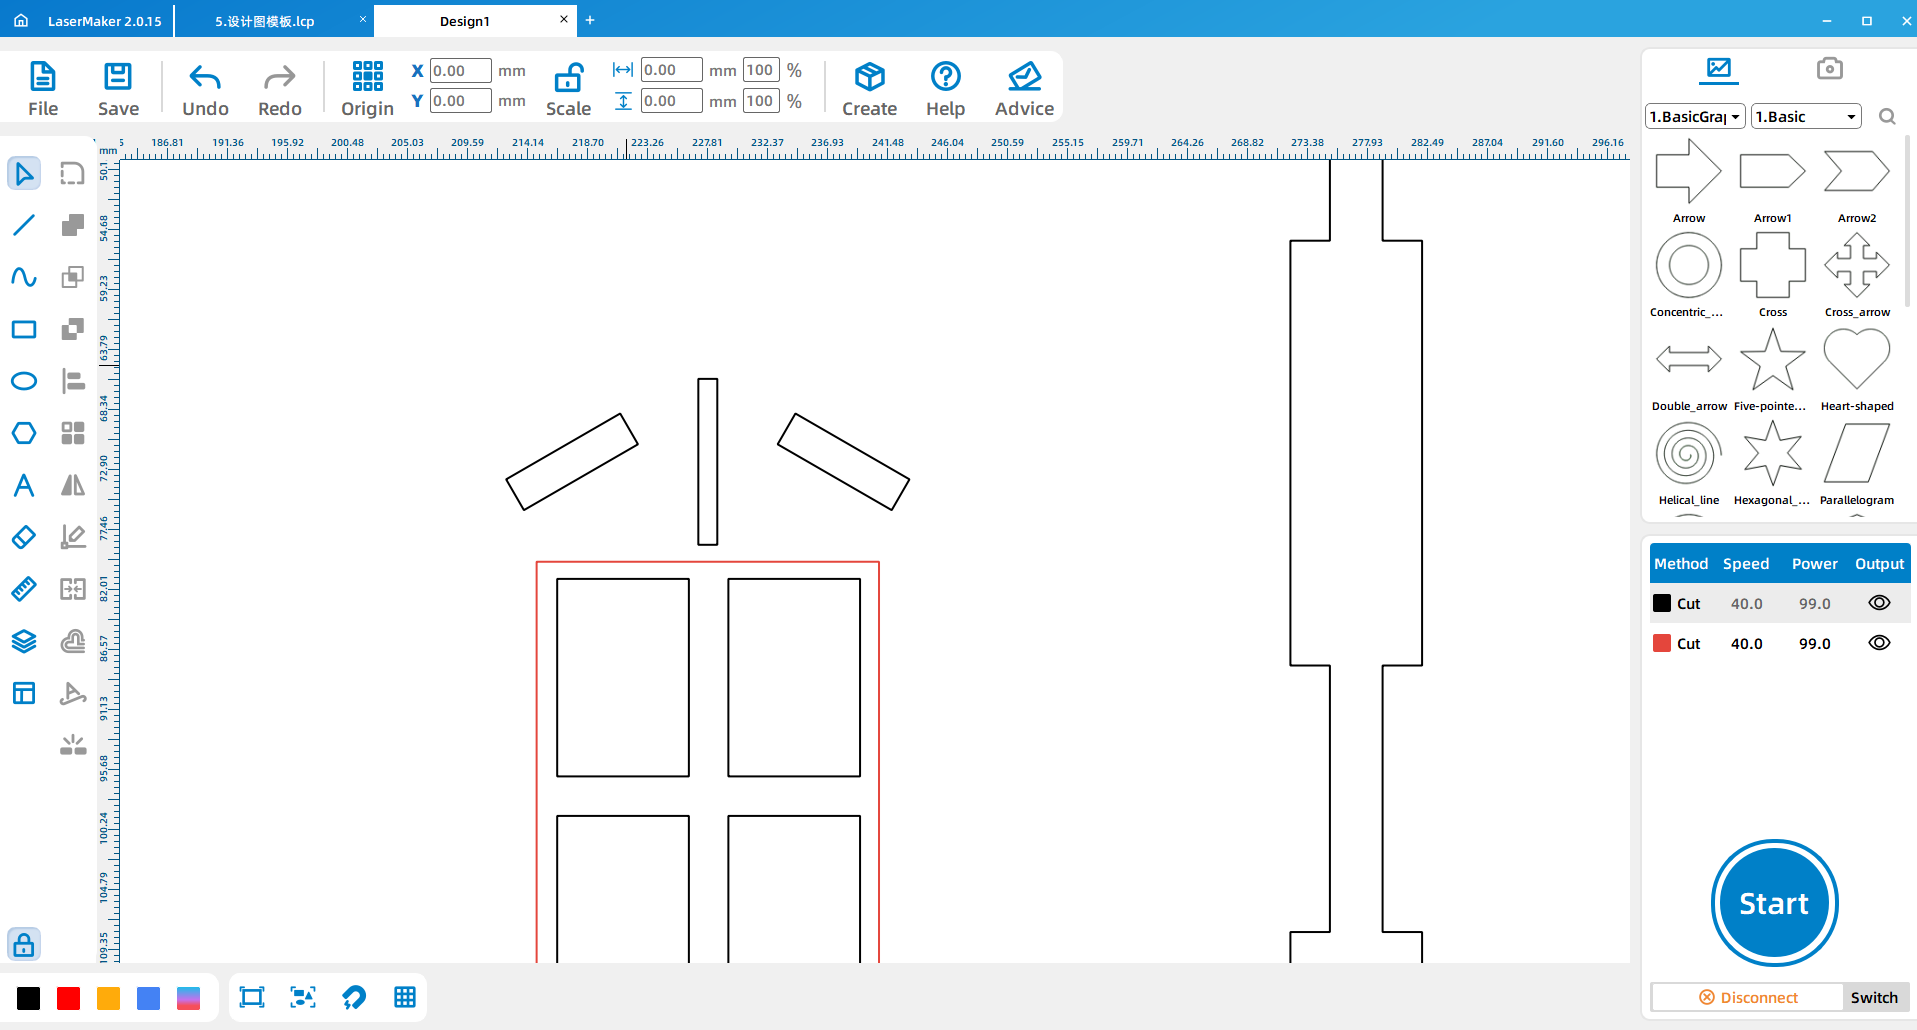
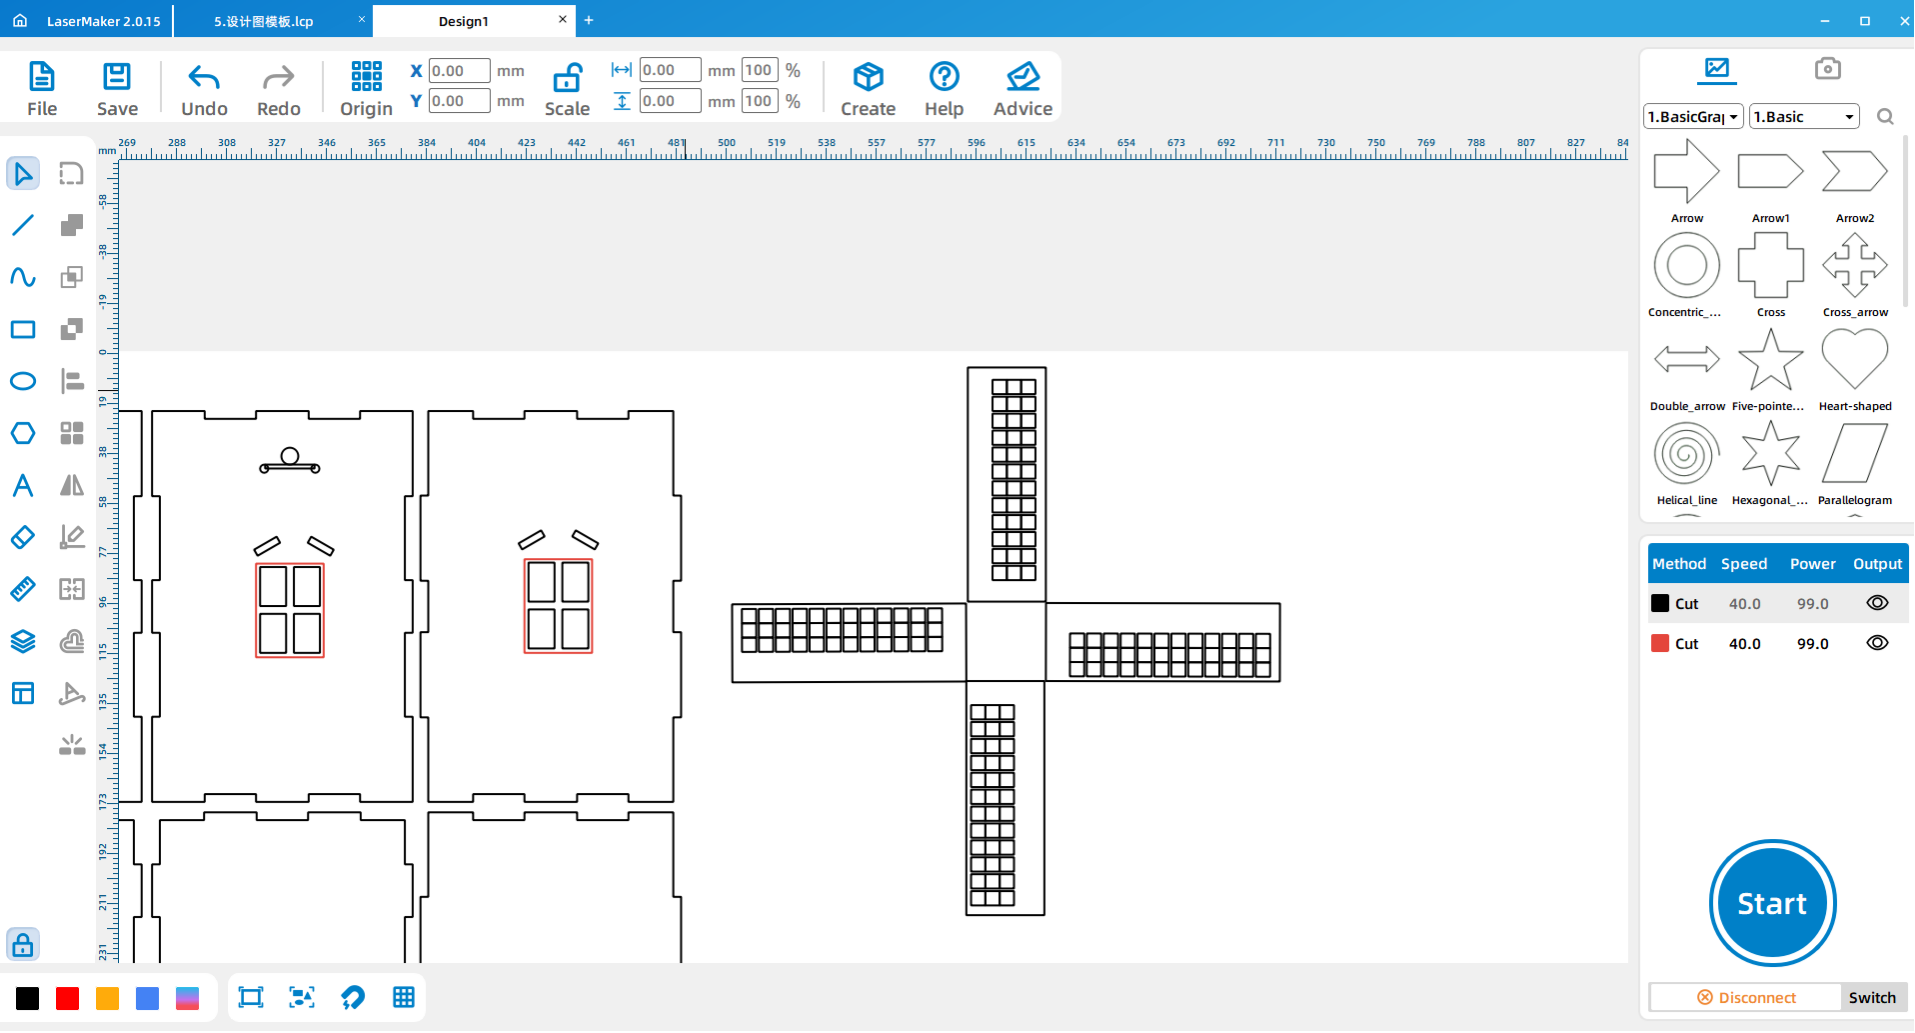
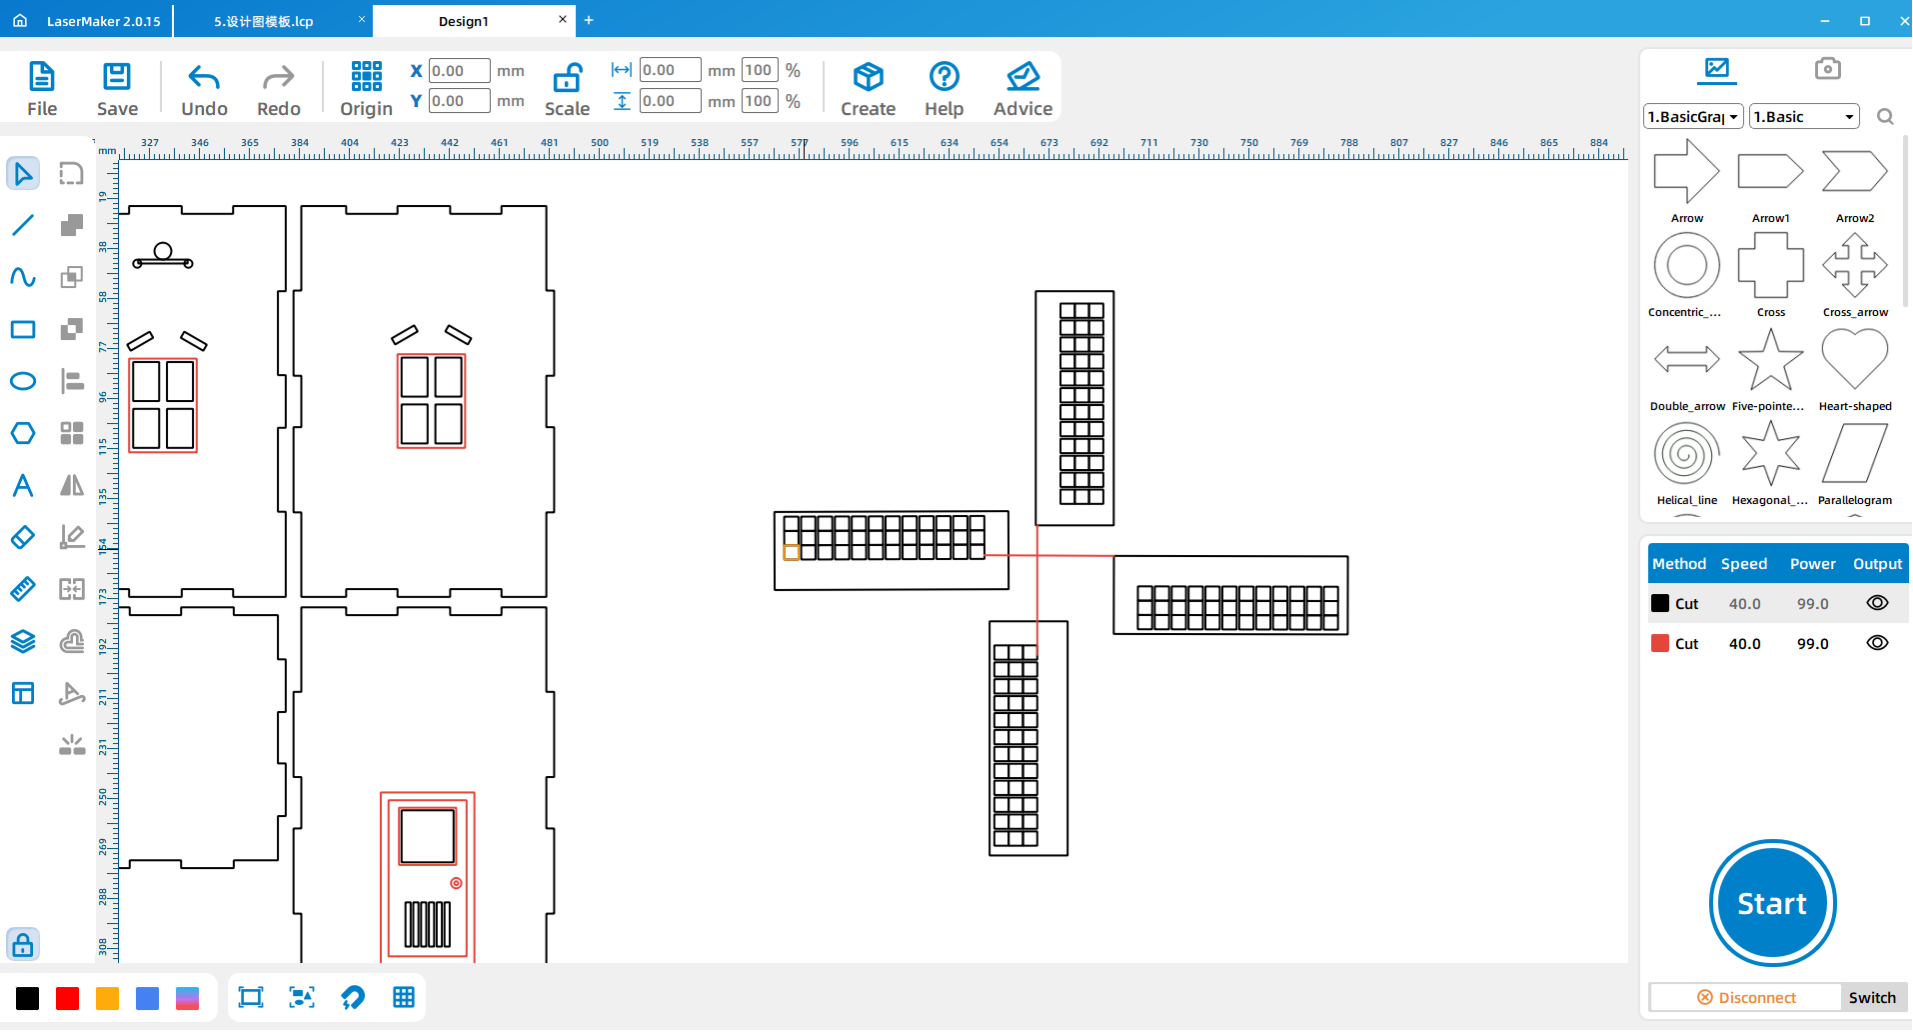
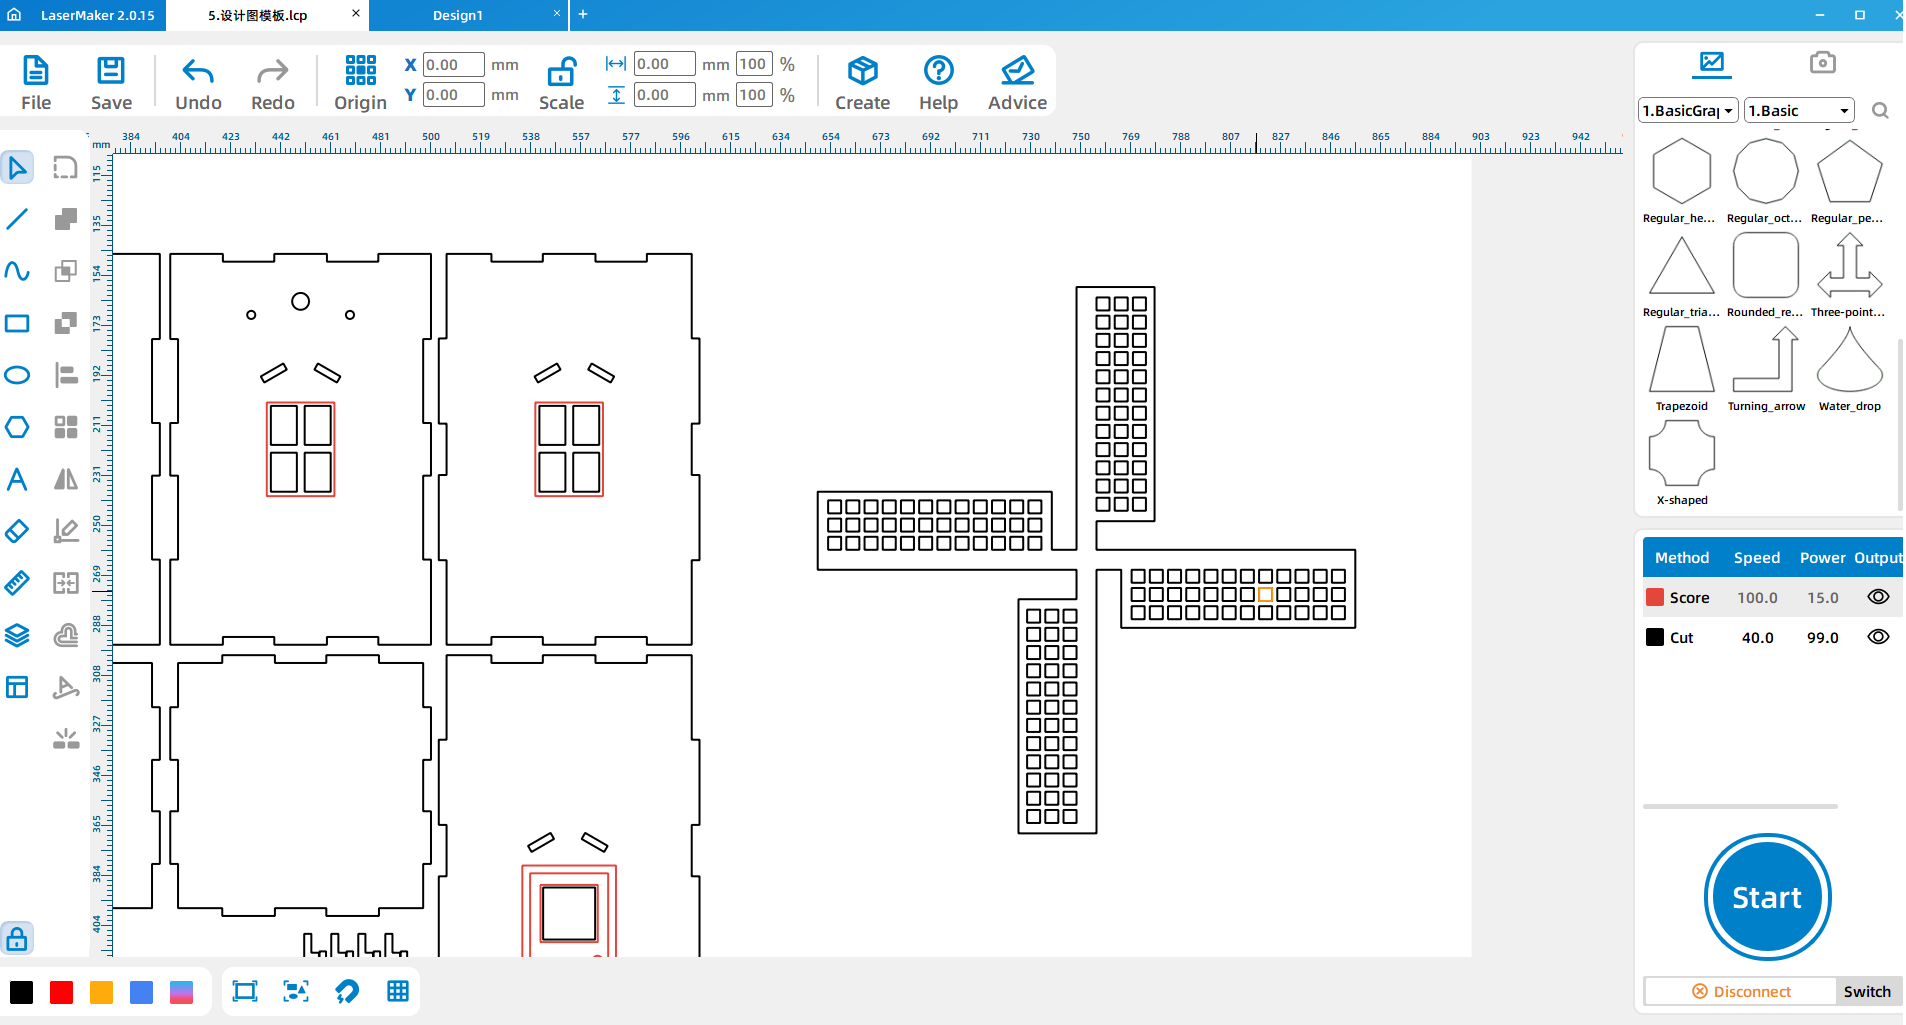
(1) Open the design drawing file for the “box” on LaserMaker and move each part into place. (Image below)
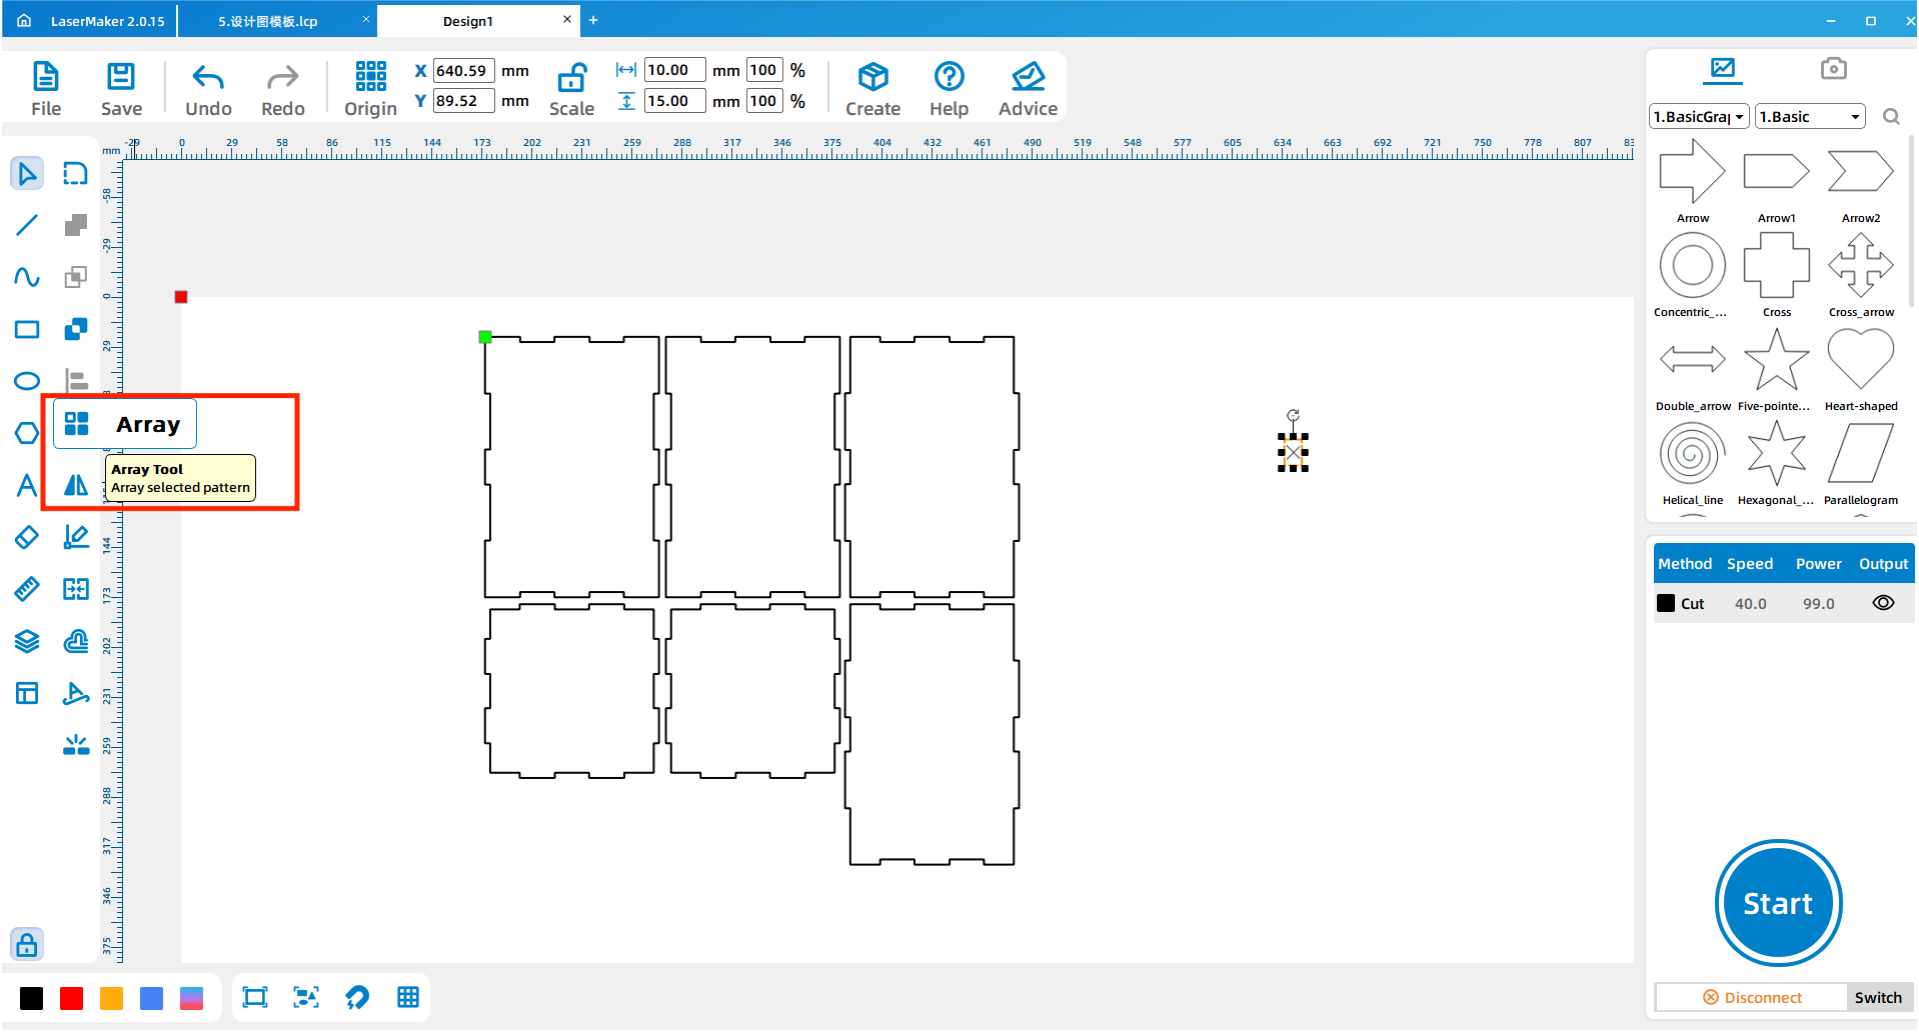
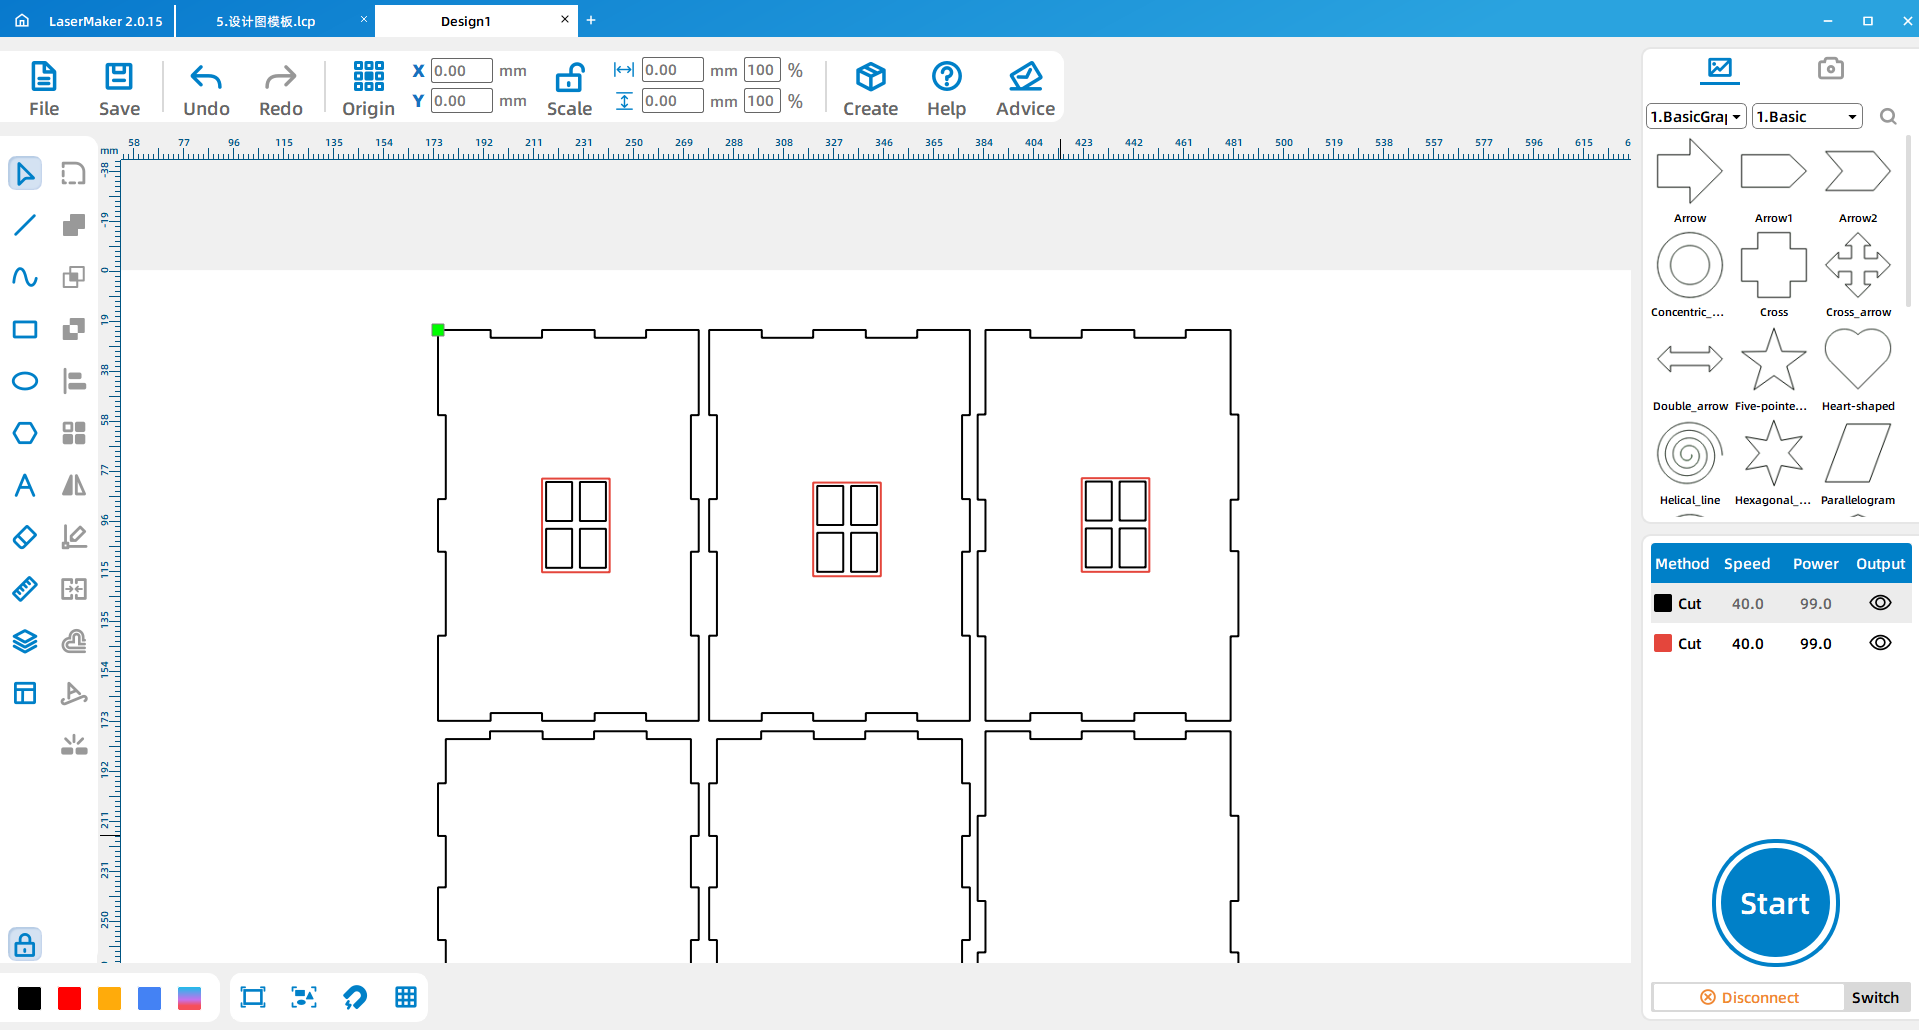
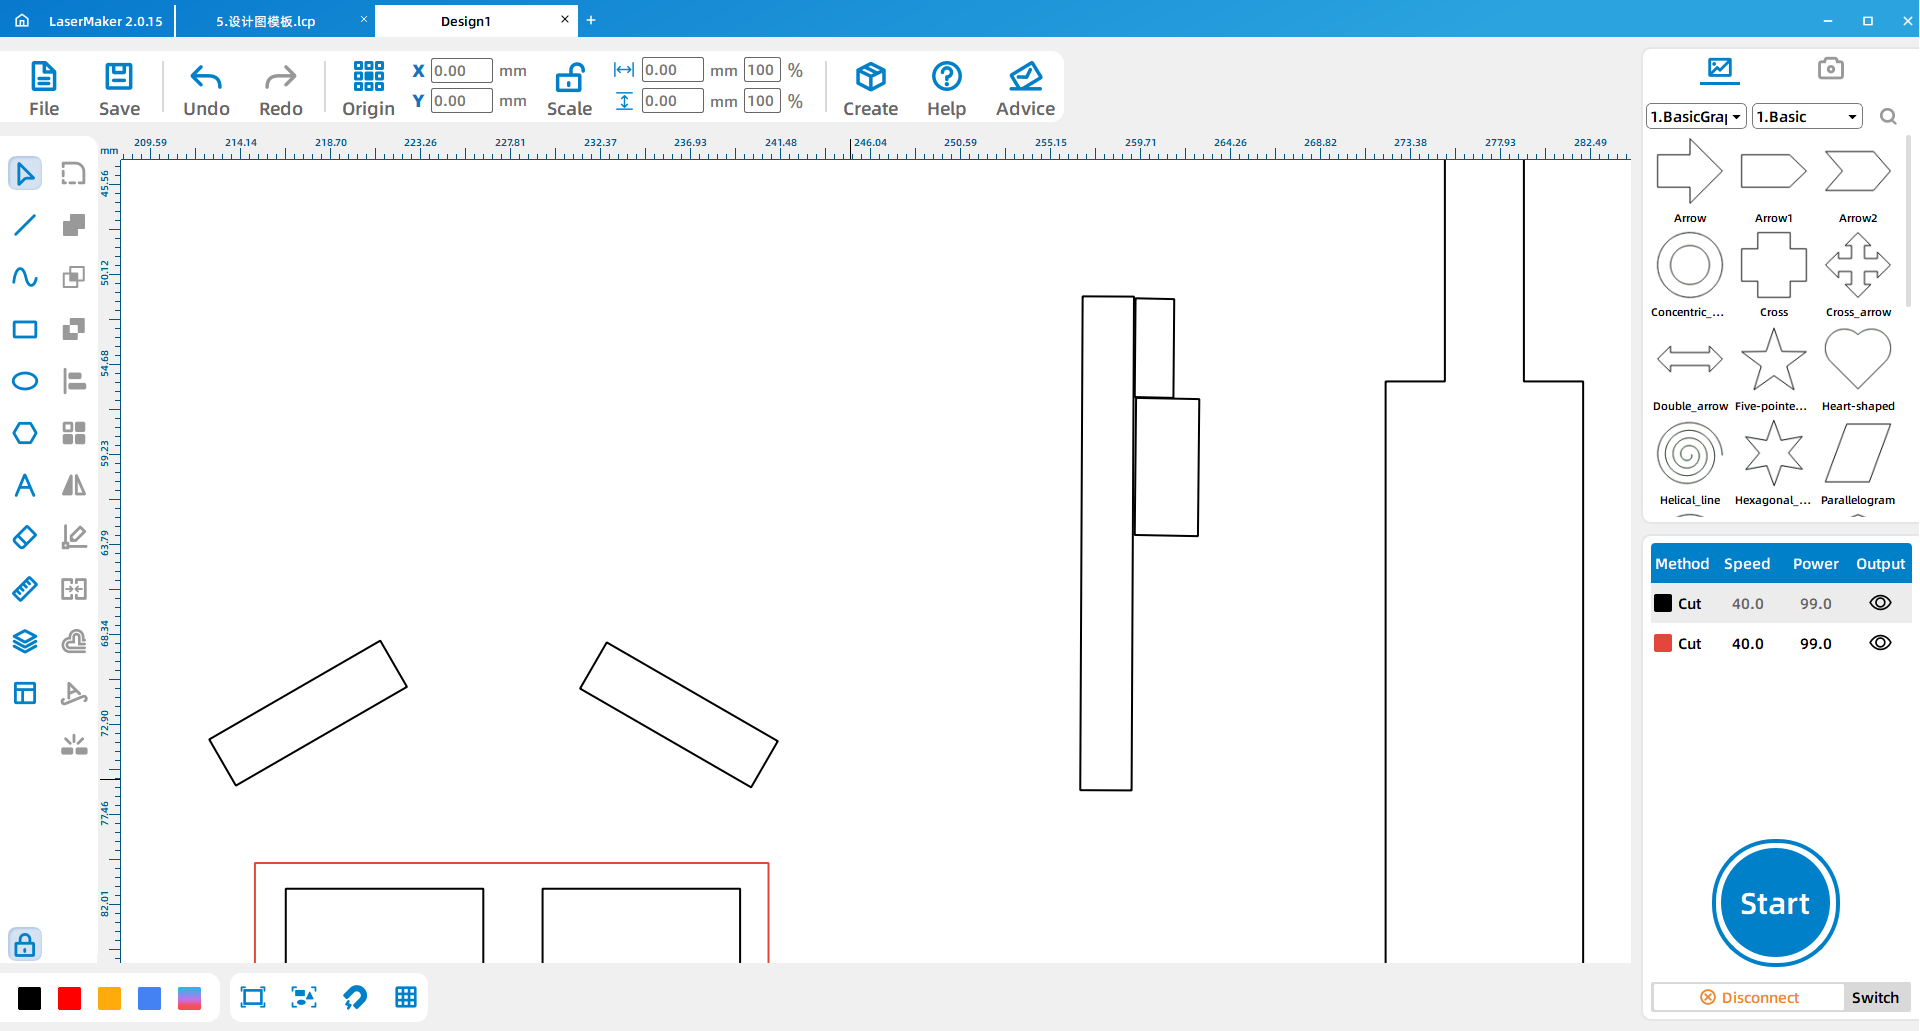
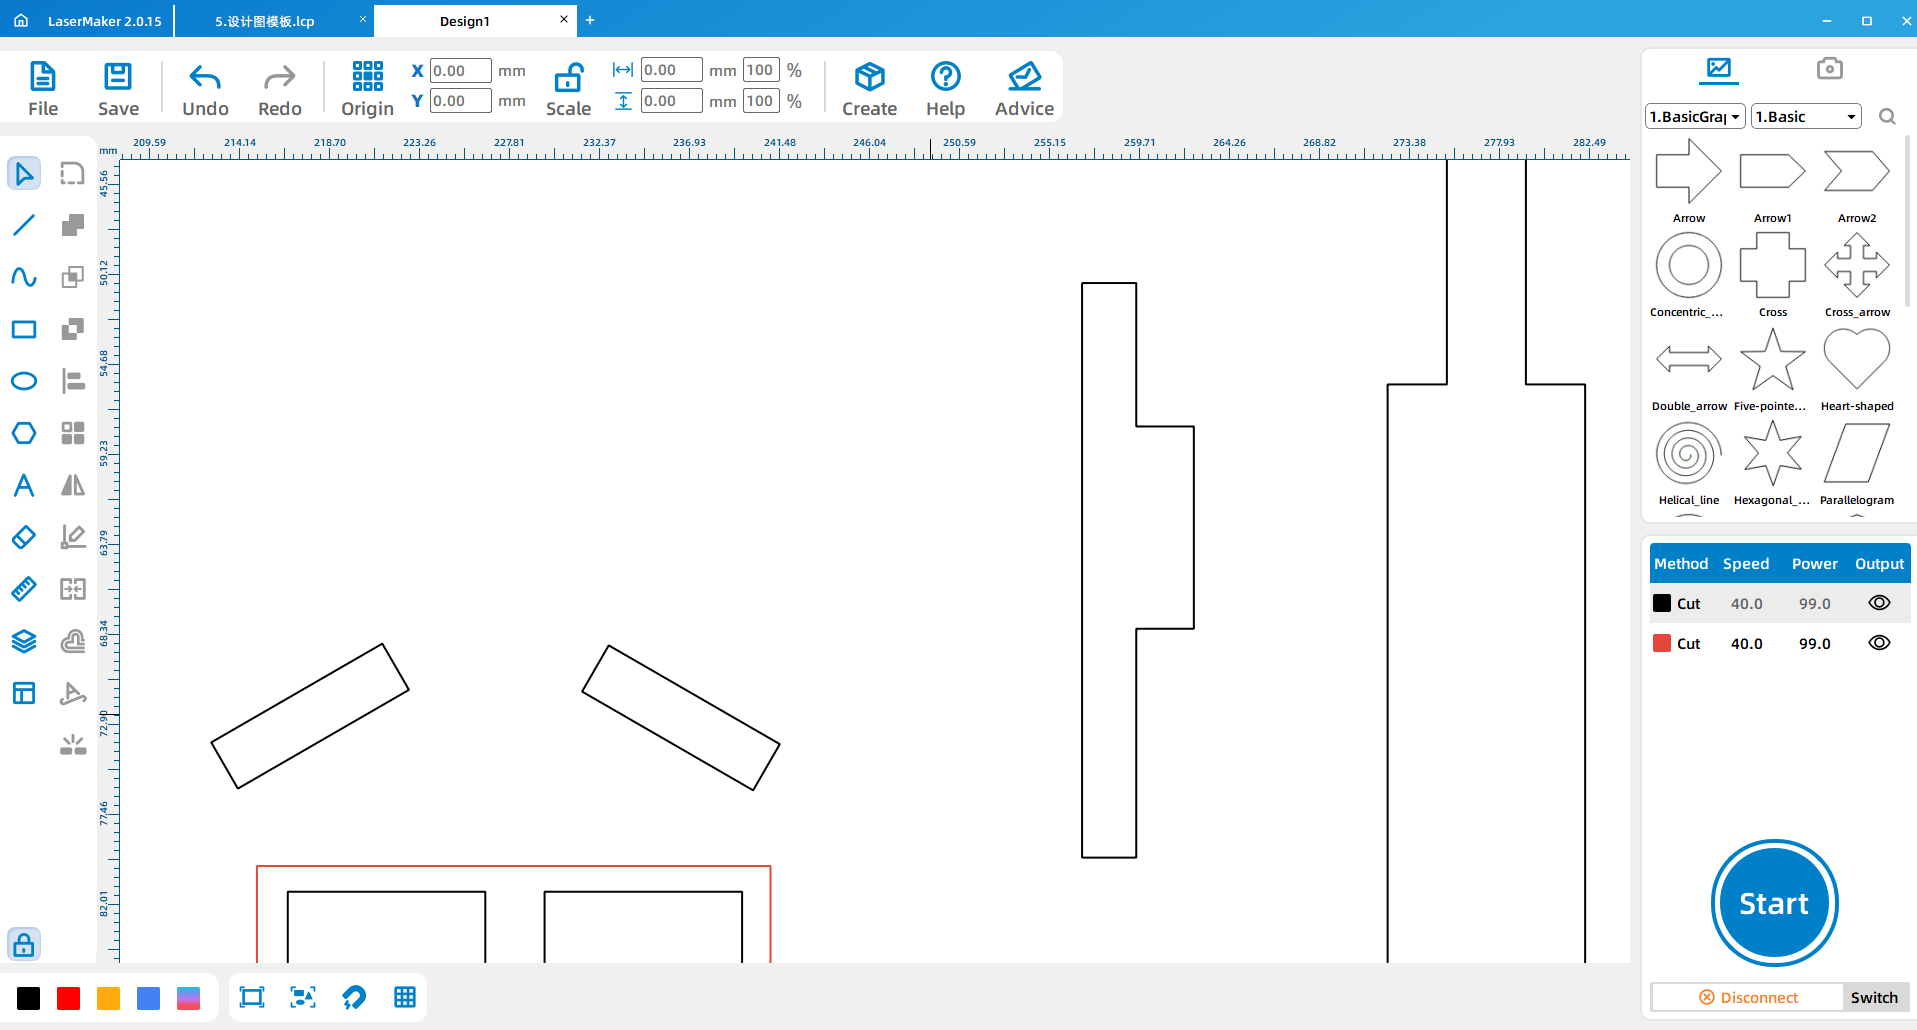
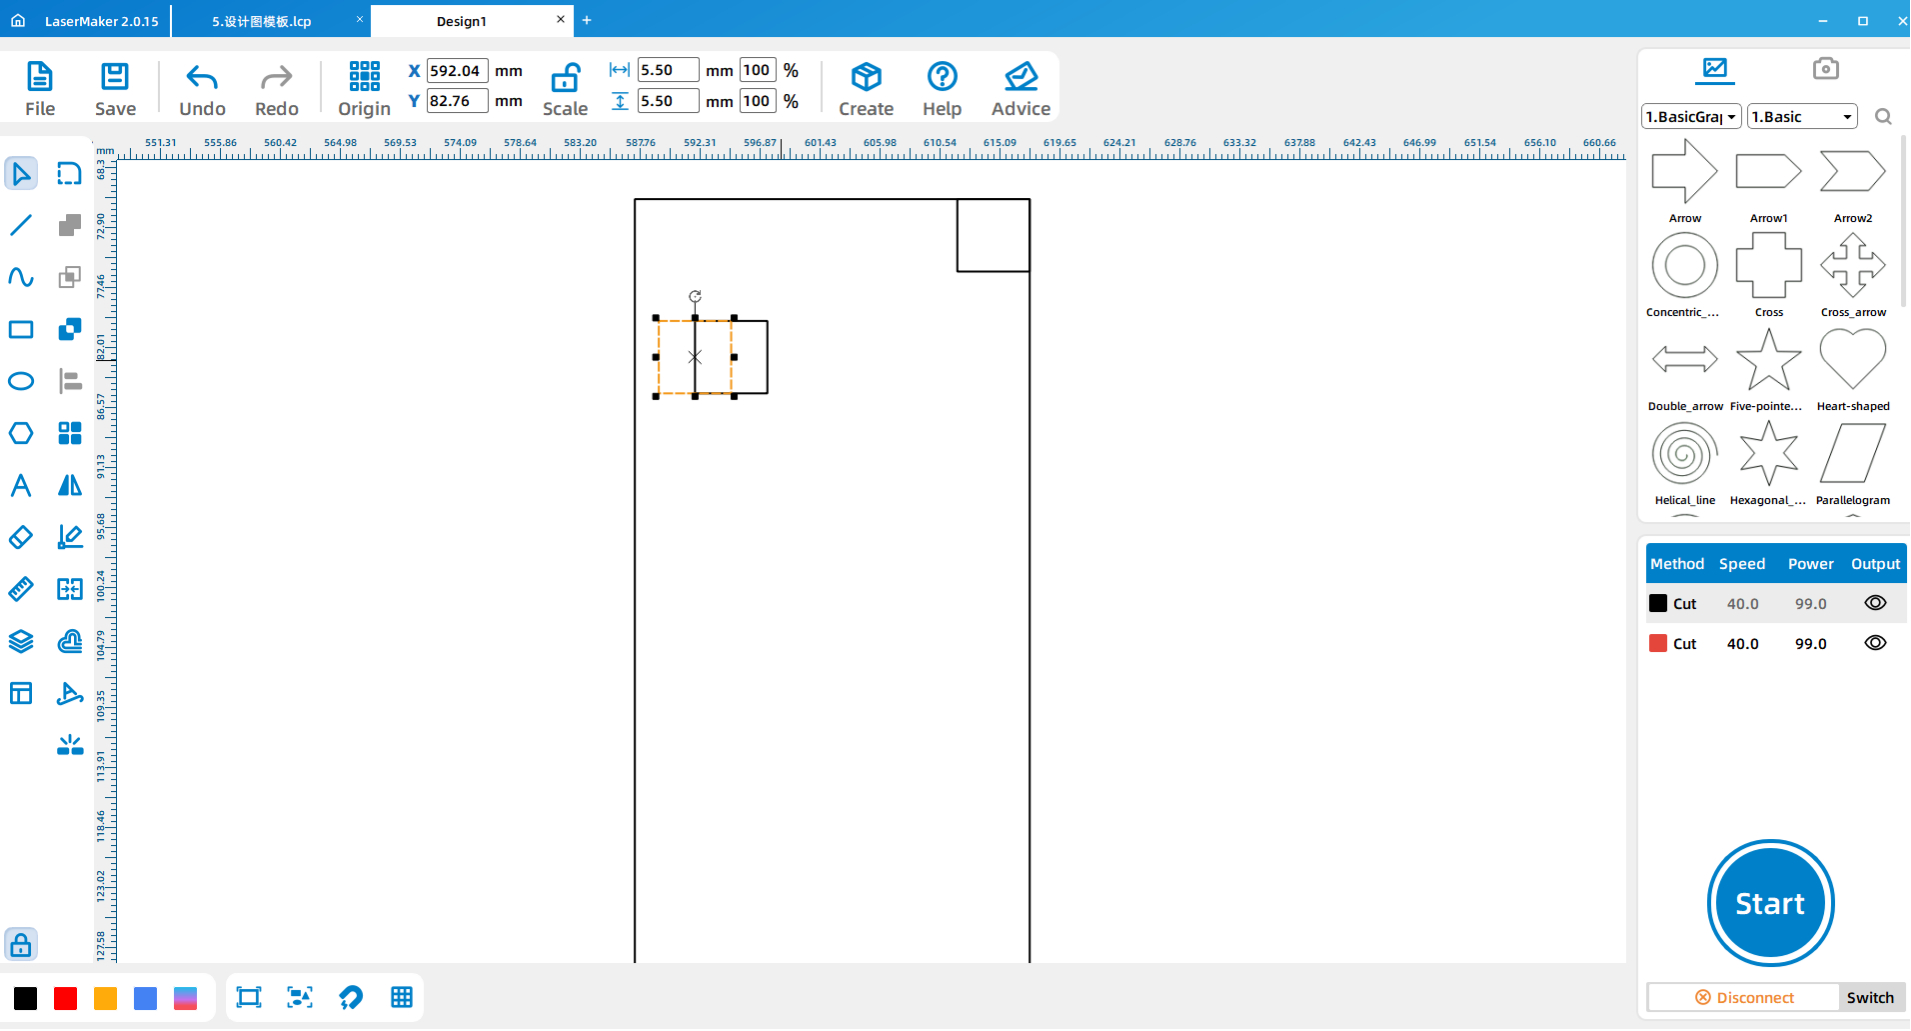
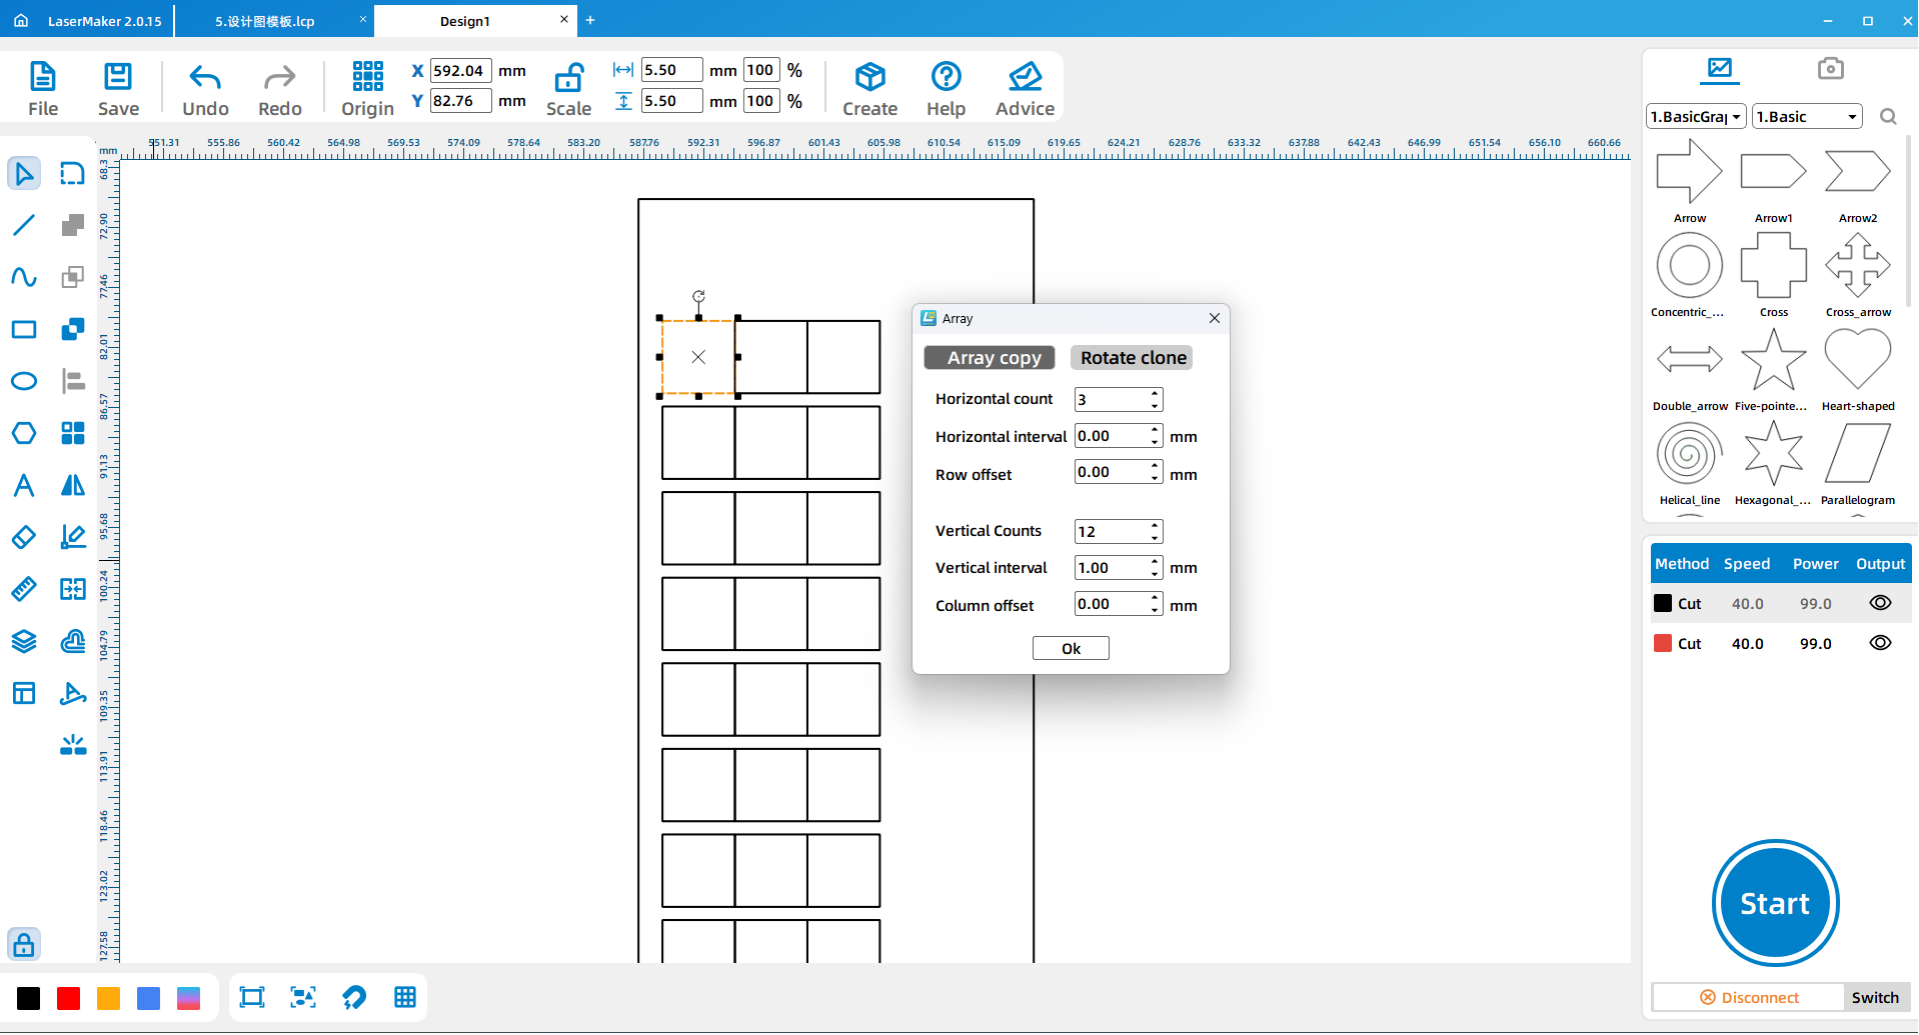
(2) Draw a 10*15 rectangle as the small square of the window (as shown below) and copy the array according to the requirements in the picture.
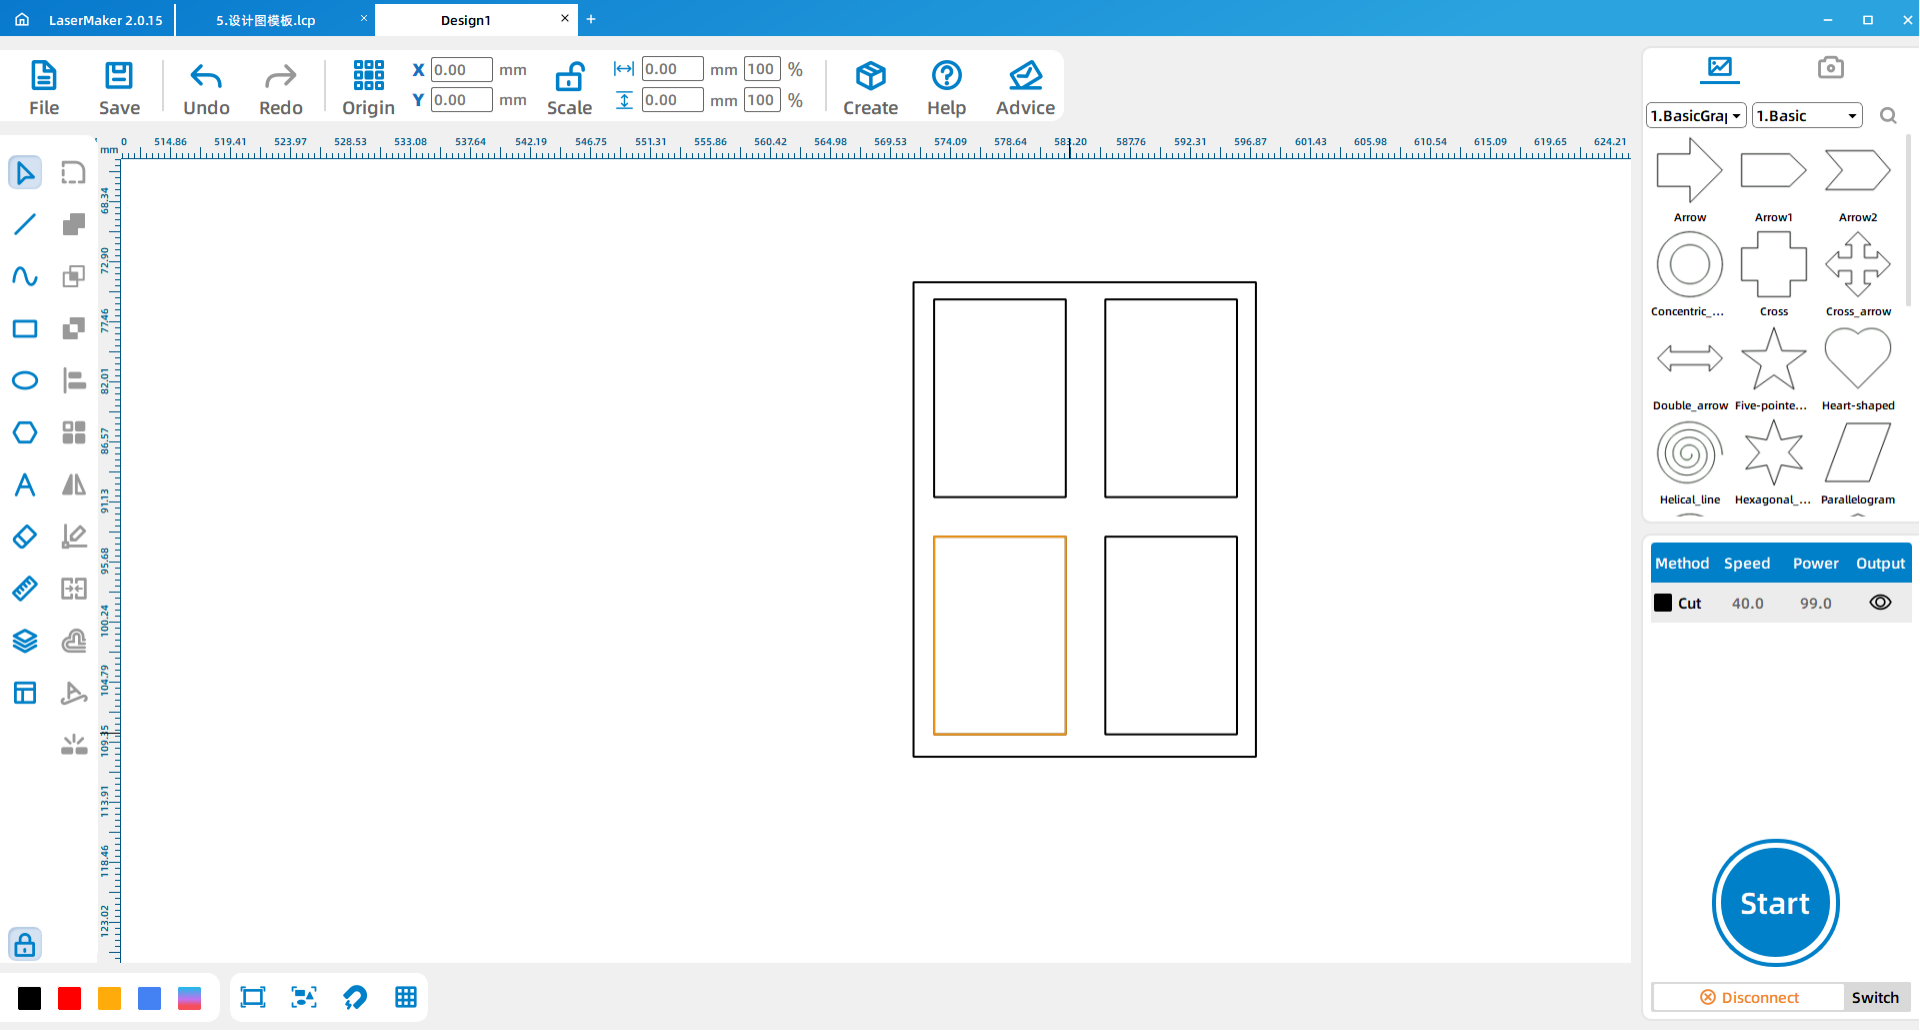
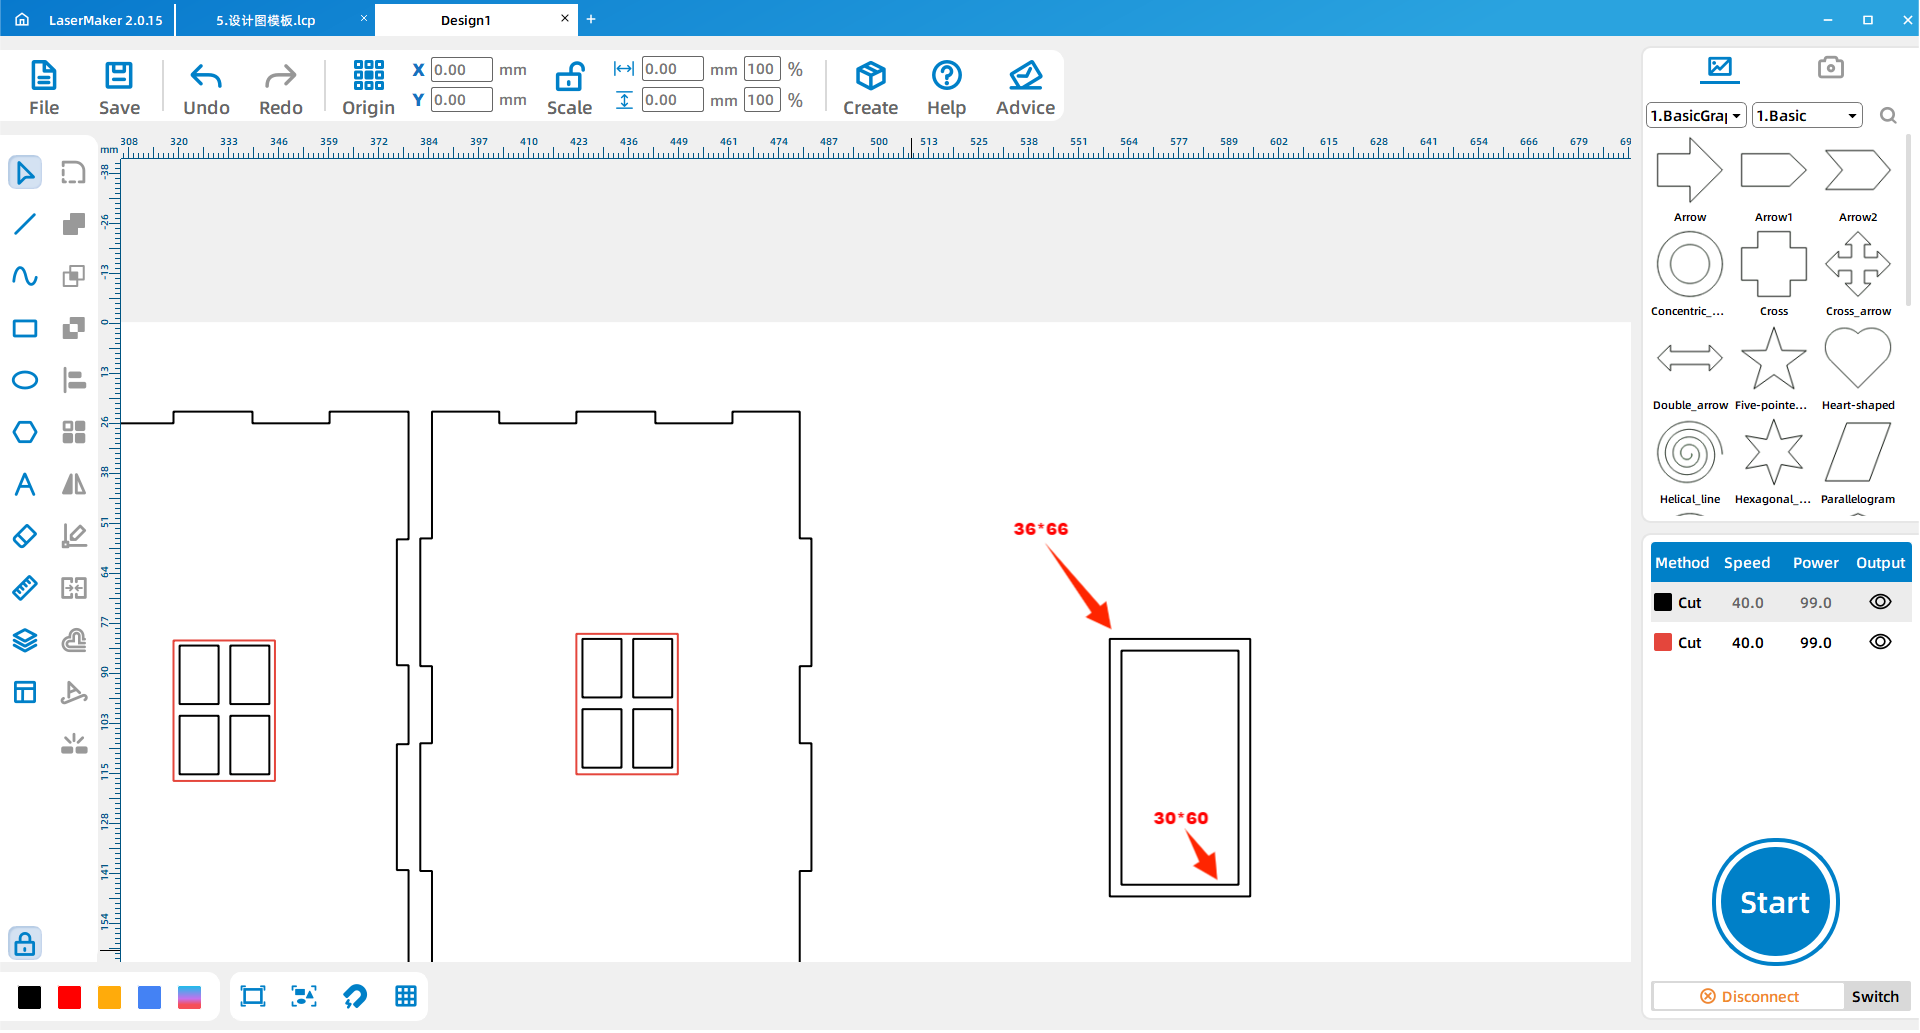
(3) Draw a 30*60mm rectangle as the window frame and design the layer color red.
(4) Make an array copy of this window and place it in the rectangular rectangle of the box (as shown below)
Draw the Windows and doors
(1) Draw a 30* 60mm rectangle for the inner frame of the door and a 36 by 66mm rectangle for the outer frame of the door.
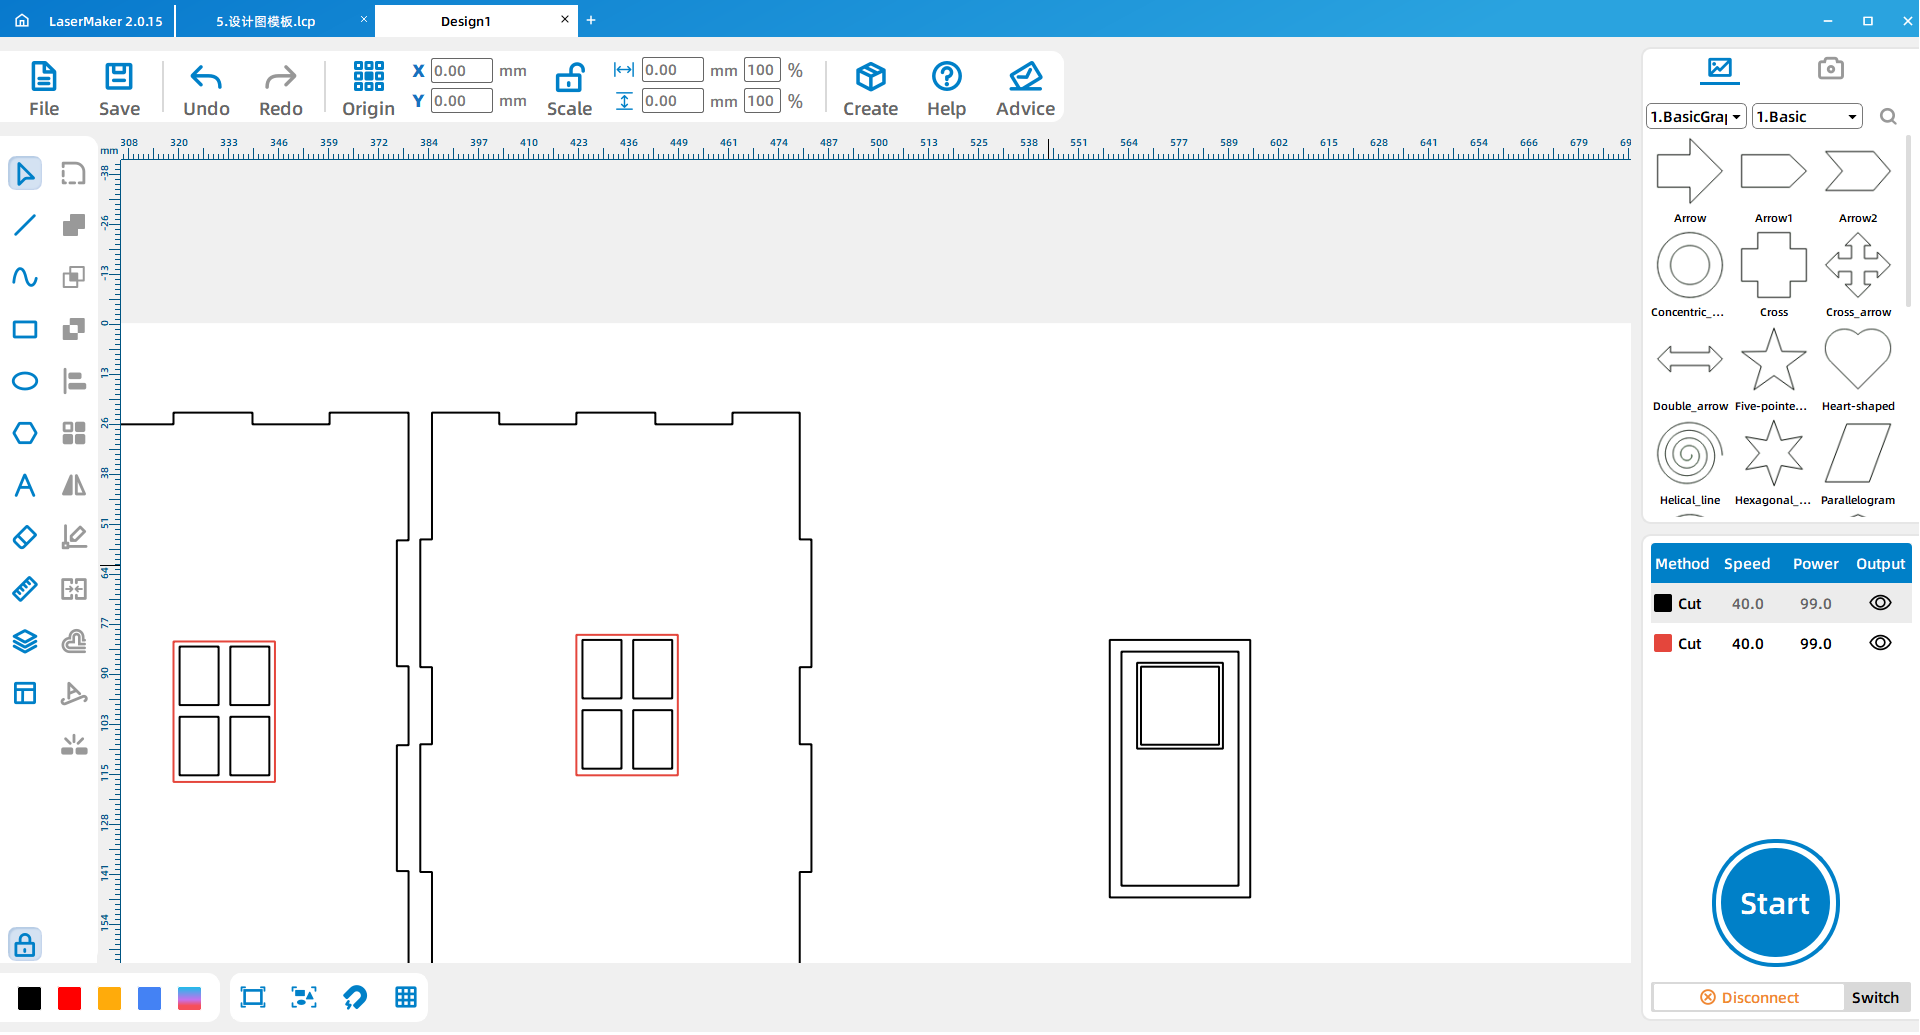
(2)Draw a square with an inner frame of 20*20mm and an outer frame of 22*22mm for the door and window and place it as shown below.
(3)Draw a 2*17mm rectangle and copy and place the array as required in the picture below.
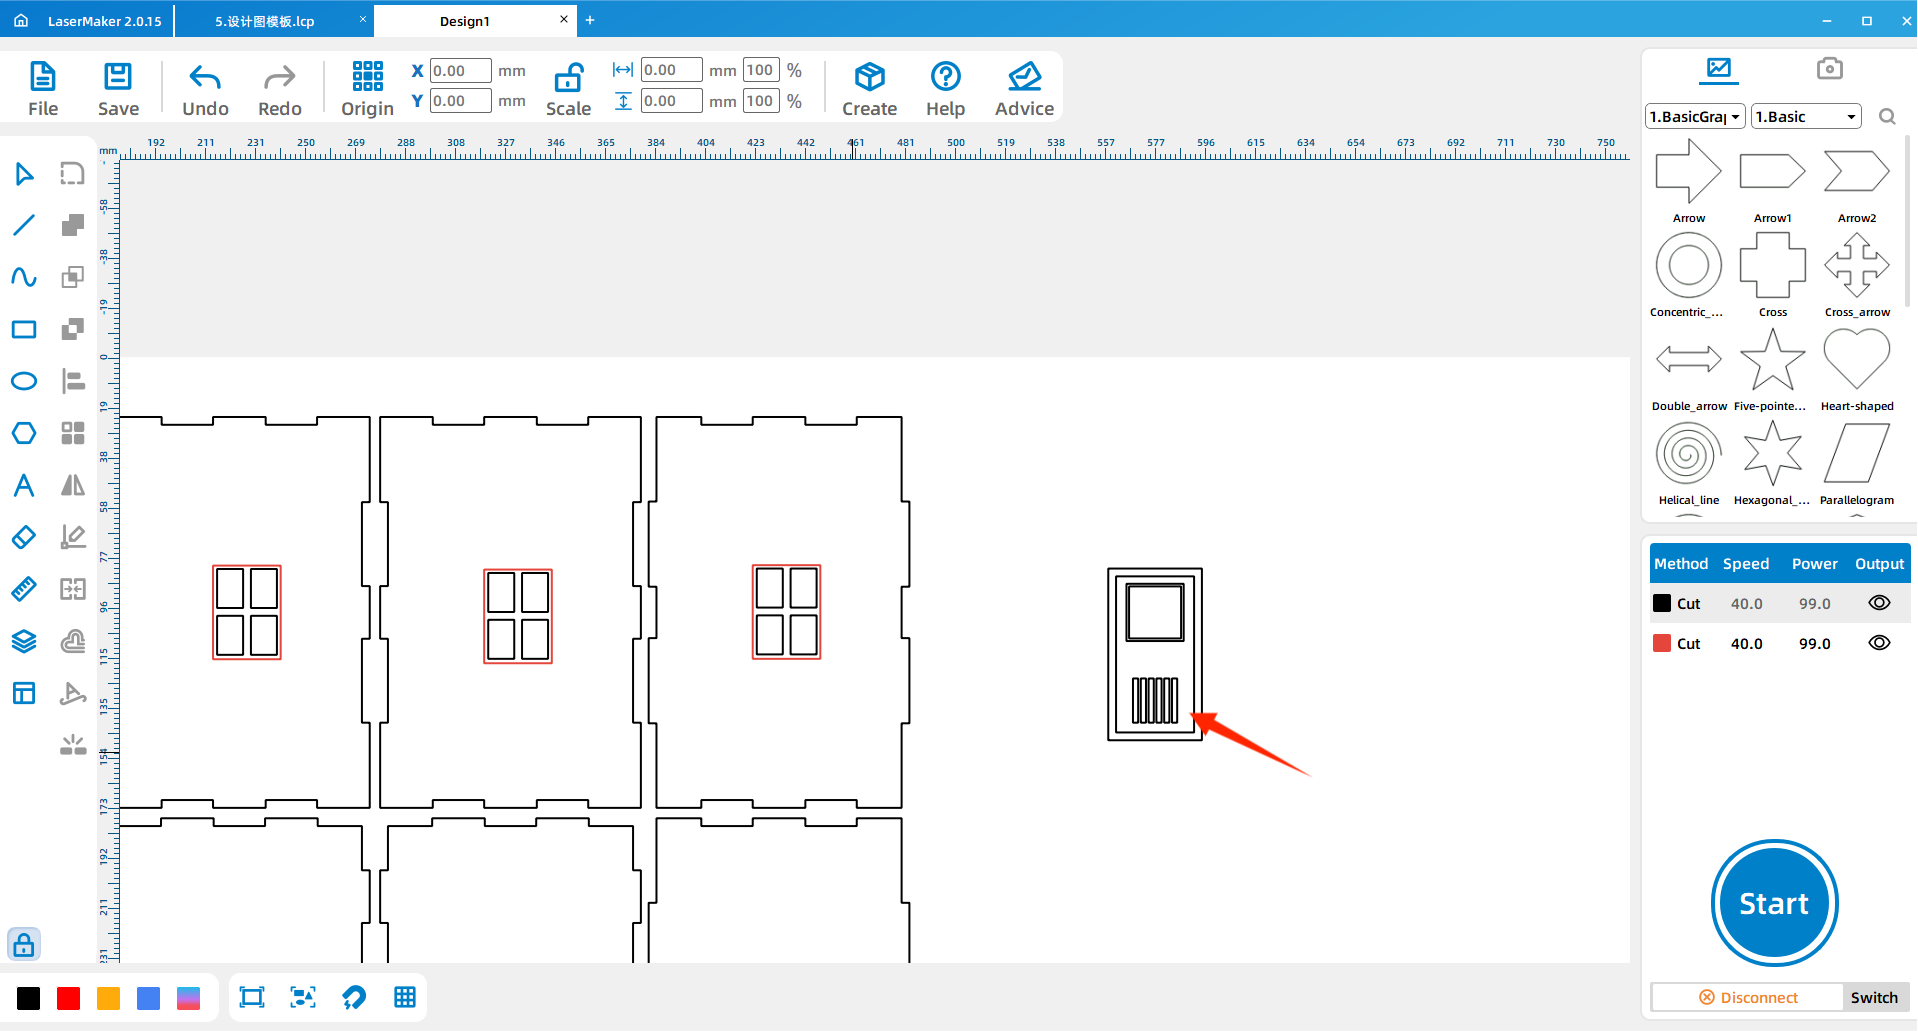
(4) Draw an inner circle with a diameter of 1.5mm and an outer circle of 4mm for the door handle and change the layer to red;
(5) Place the painted door in the position shown below.
Draw the window and door rims
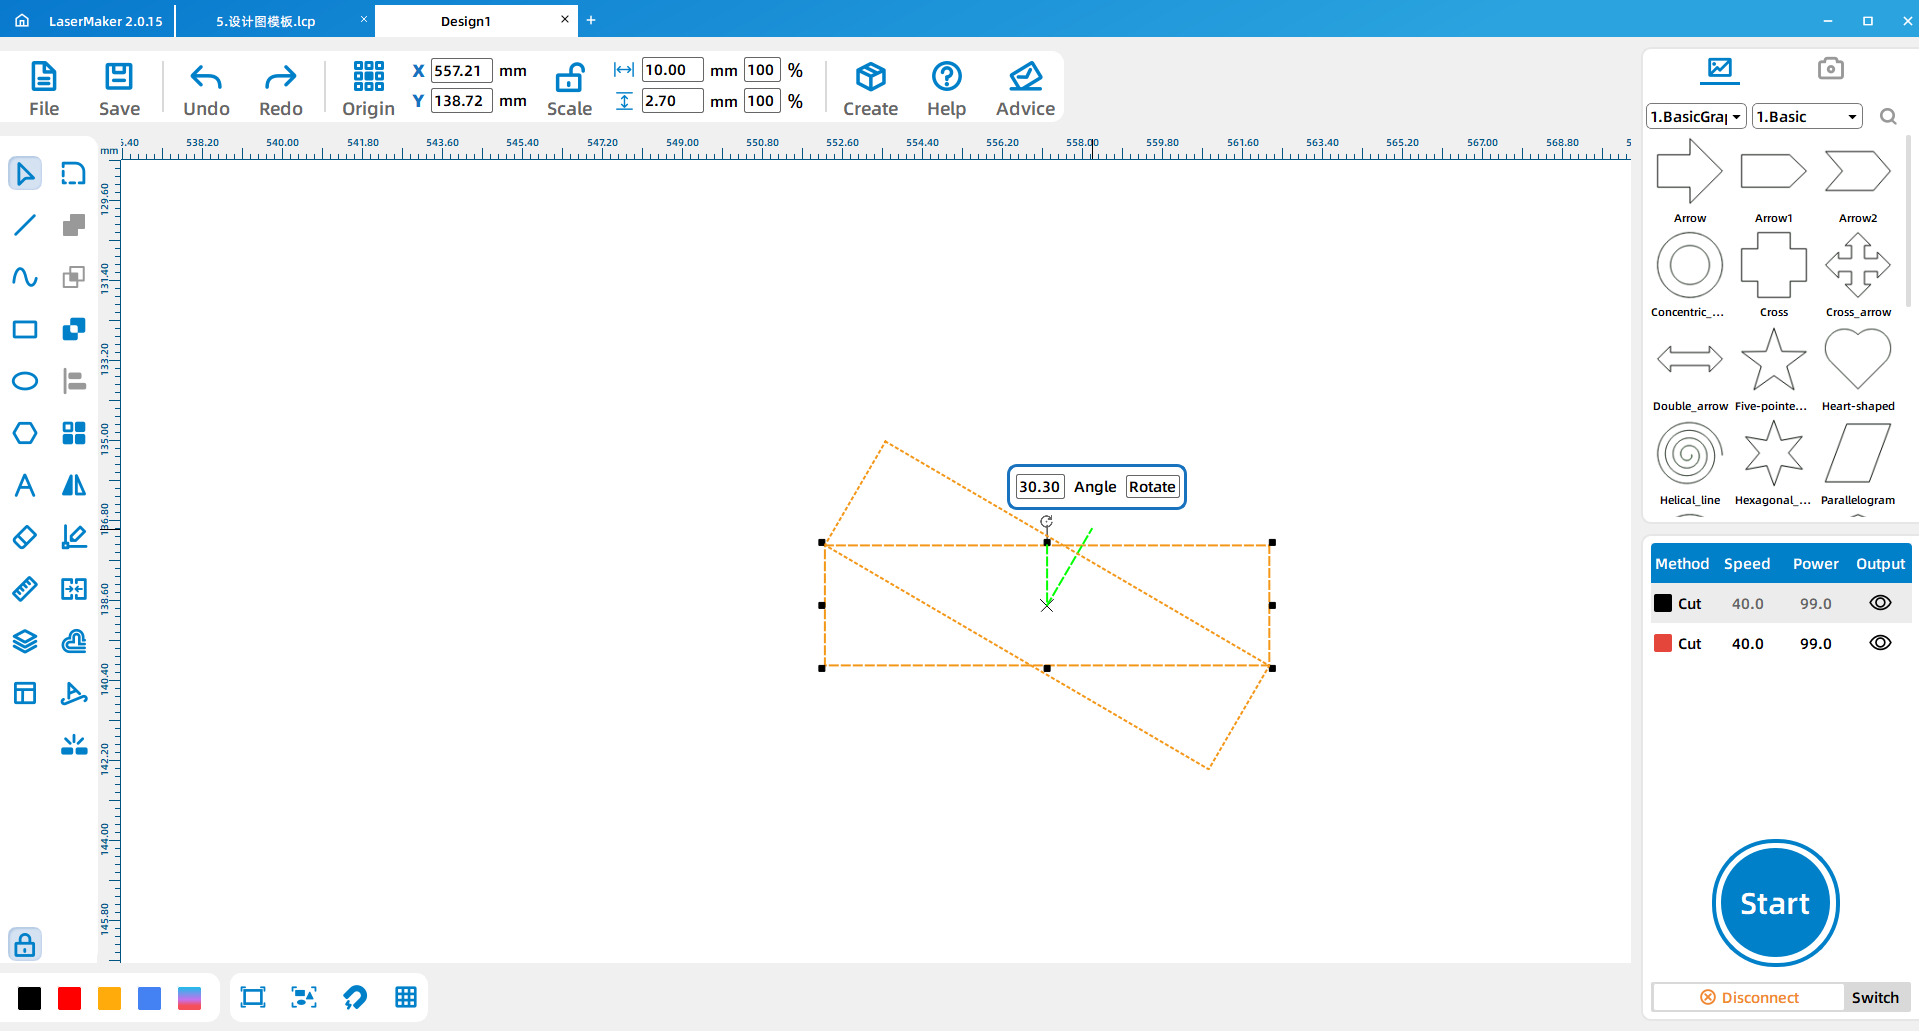
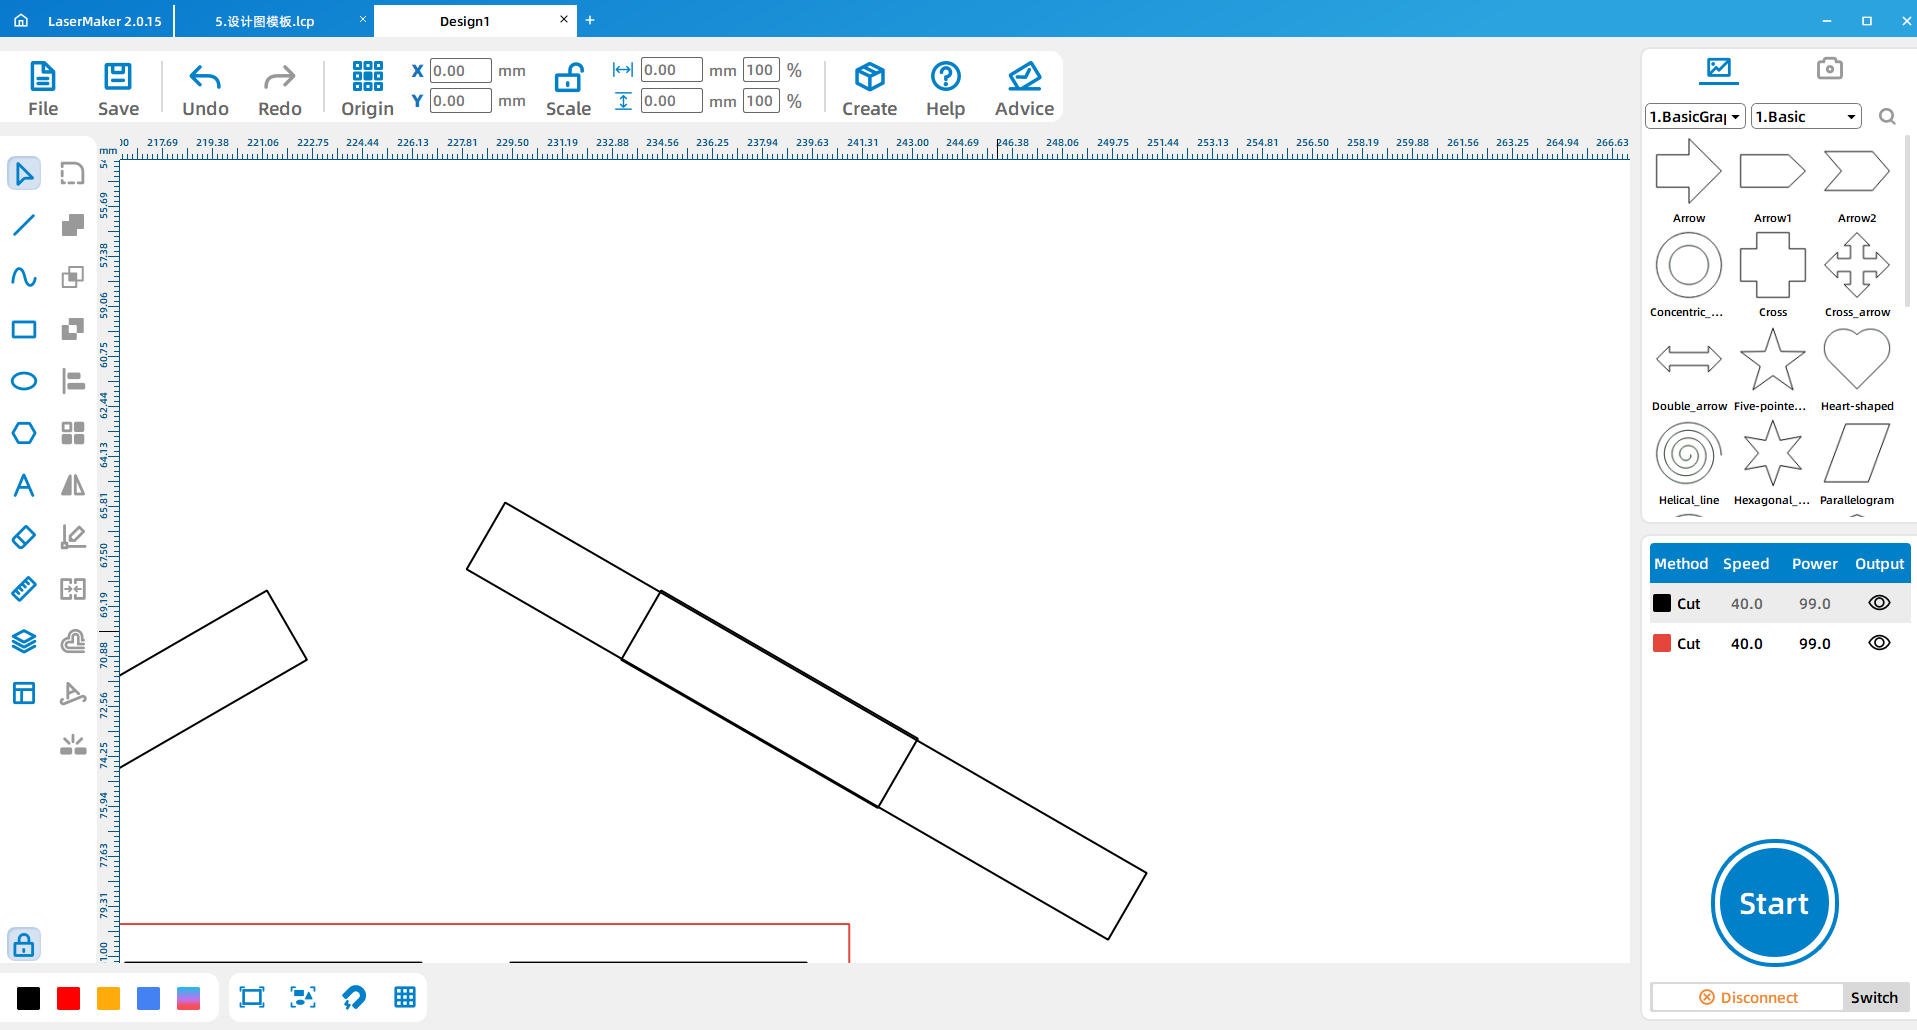
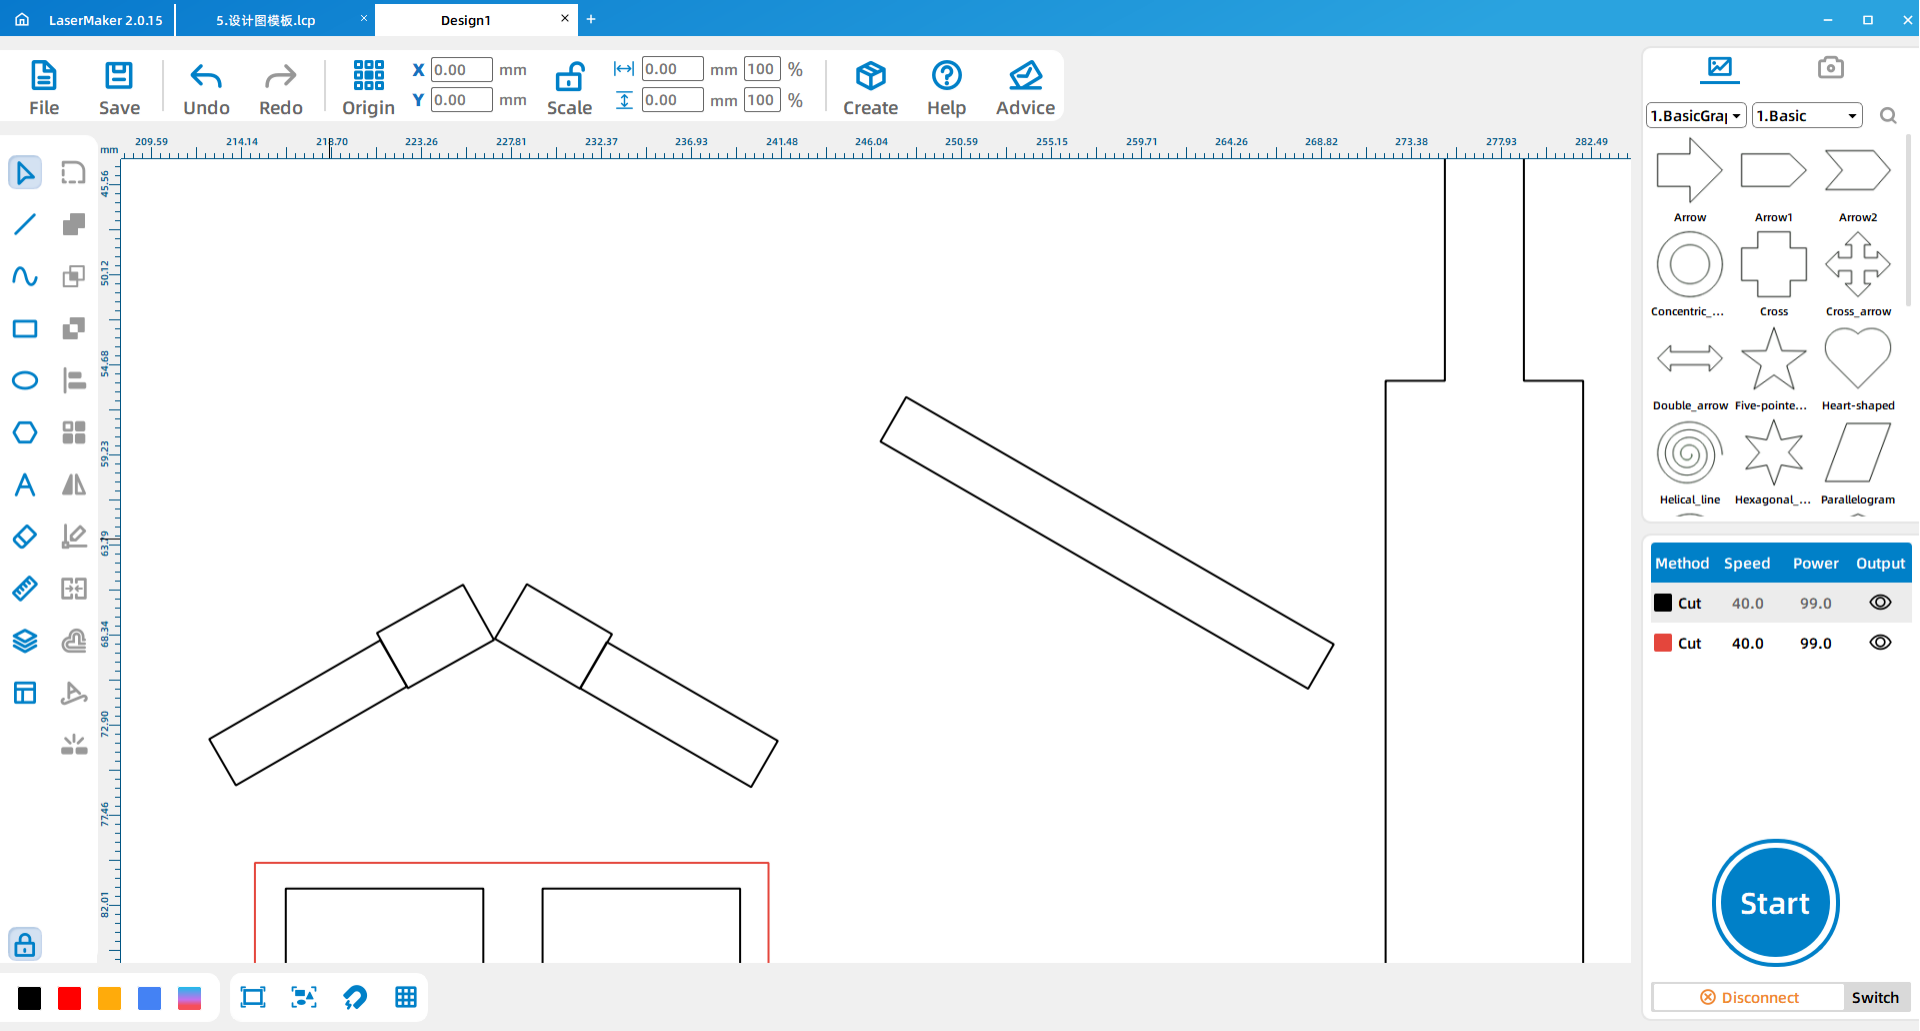
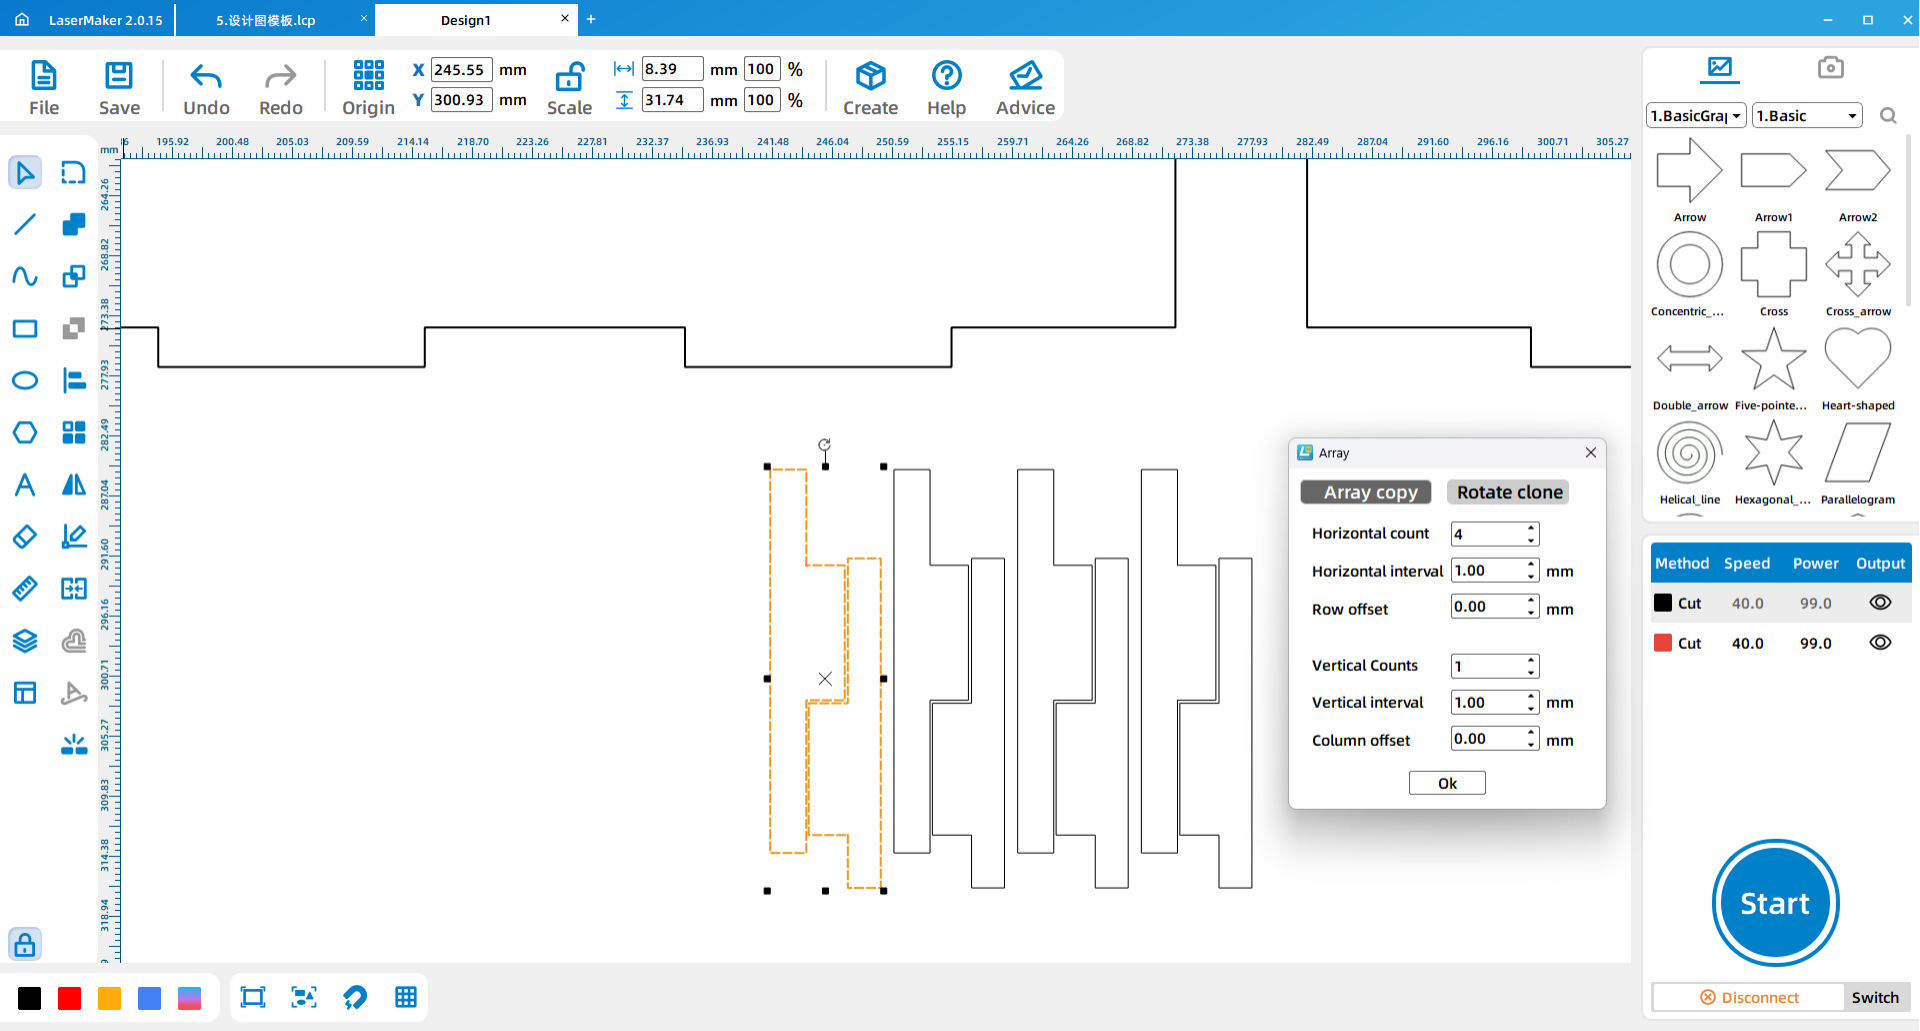
(1)Draw a 10*2.7mm rectangle as the bayonet of the window edge and click on “Shape – Rotate Graphics” on the left side of the software to rotate the rectangle 30 degrees.
(2)Draw a rectangle and place it in the middle of the window (as shown below). It is used to measure the position distance of the bayonet of the two window edges, taking the middle moment as the standard. Align the two window edges and place them respectively (as shown below) in the same way for the rest of the Windows and doors.
(3)Draw a rectangle of 2.6*25 as the window edge (Note: rotate it to the same Angle as the bayonet after drawing, and test whether it can overlap with the bayonet)
(4) Draw a 3.2*5 rectangle to measure the distance between the two window edges (as shown below)
(5)When the measurement is correct, turn it back to a 90 degree Angle and place it on the window edge (below)
(6)Draw a 3.2*10 card position and place it on the window edge (as shown below) Remove the small box and use the function of “welding” to splice it, the same operation on the other side.
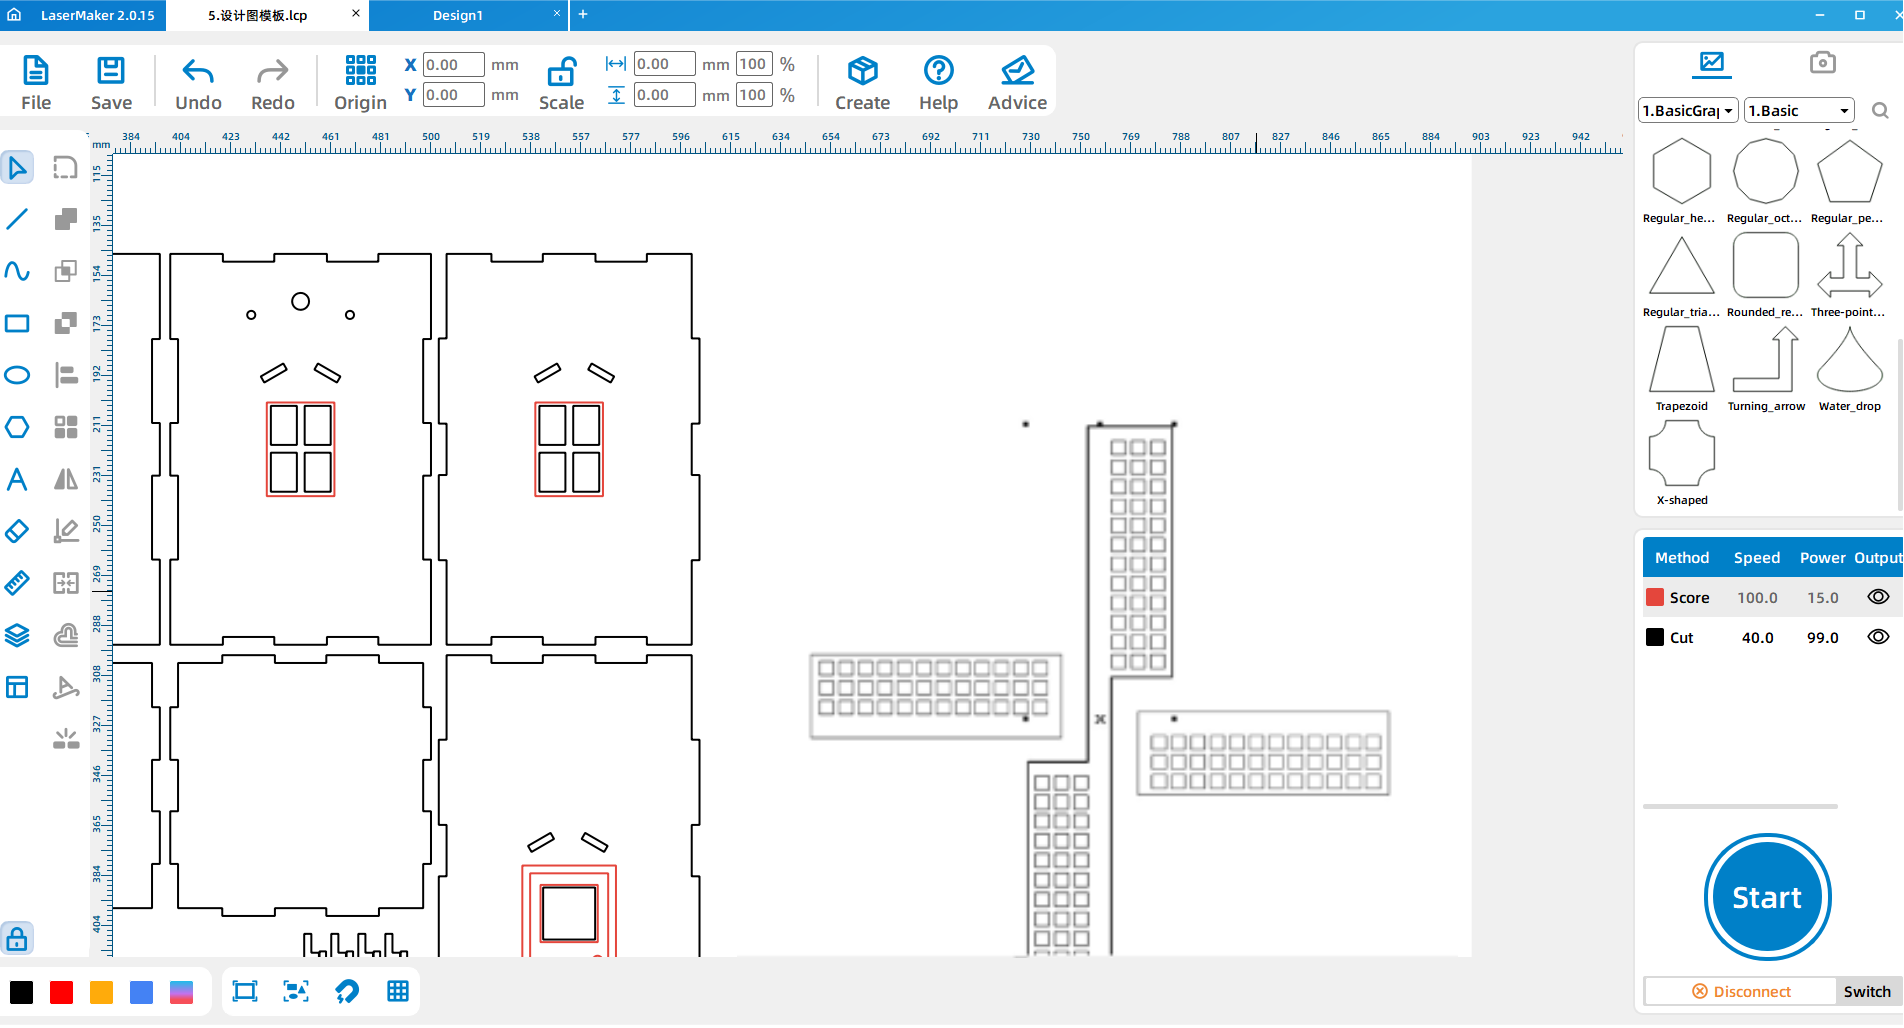
(7)After the window edge is drawn, copy the array according to the requirements under the picture.
Punching
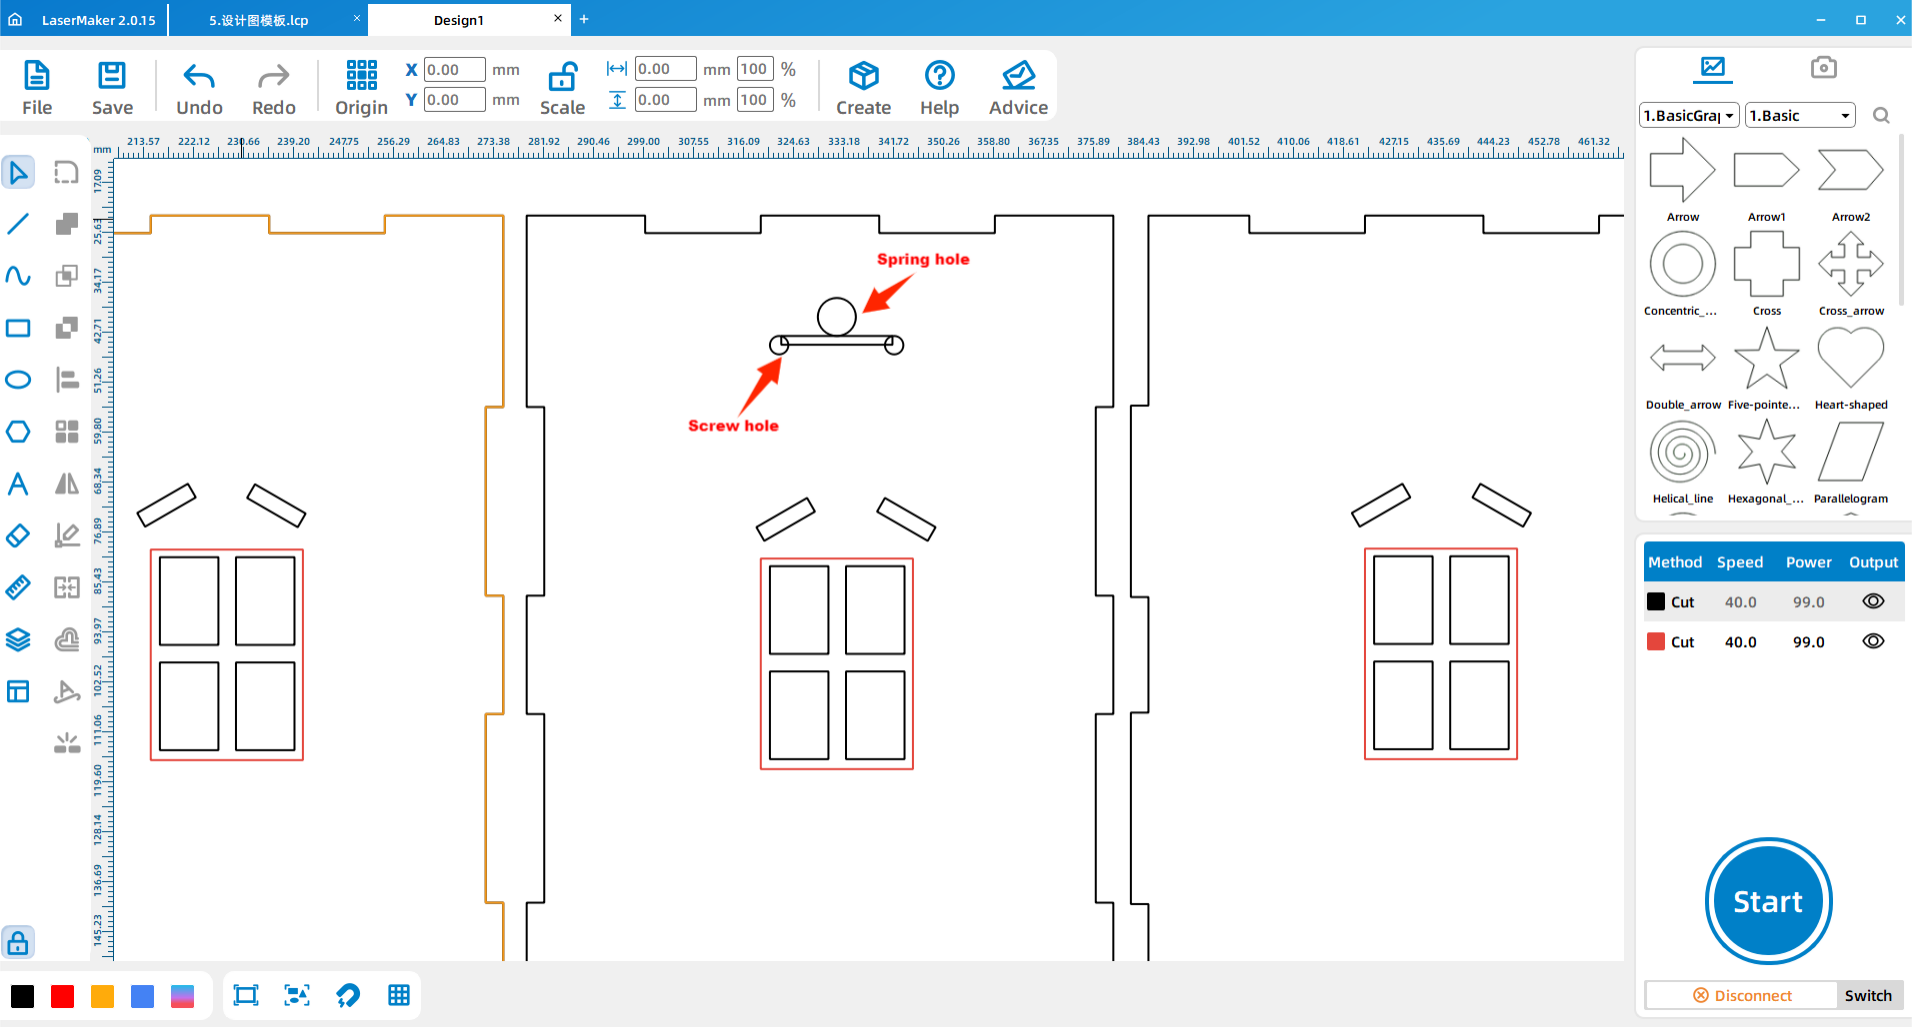
(1) Draw a circle with a diameter of 6.5mm for the wind-up hole;
(2) Draw two circles with a diameter of 3.15mm for the screw holes;
(3) During the design process, a 19*1.5 rectangle can be drawn to measure the distance between the two screw holes (as shown below)
Draw the windmill blade
(1) Draw a 30 by 90mm rectangle for the windmill blades and draw a 5 by 5mm square to roughly measure the position of the grid as shown in the image below.
(2)Remove the excess square and copy the array as required under the drawing.
(3)Copy the three windmill blades in the array and use the function of “rotation” to rotate according to the requirements under the diagram.
(Tip: The grid position of all four windmill blades is inconsistent)
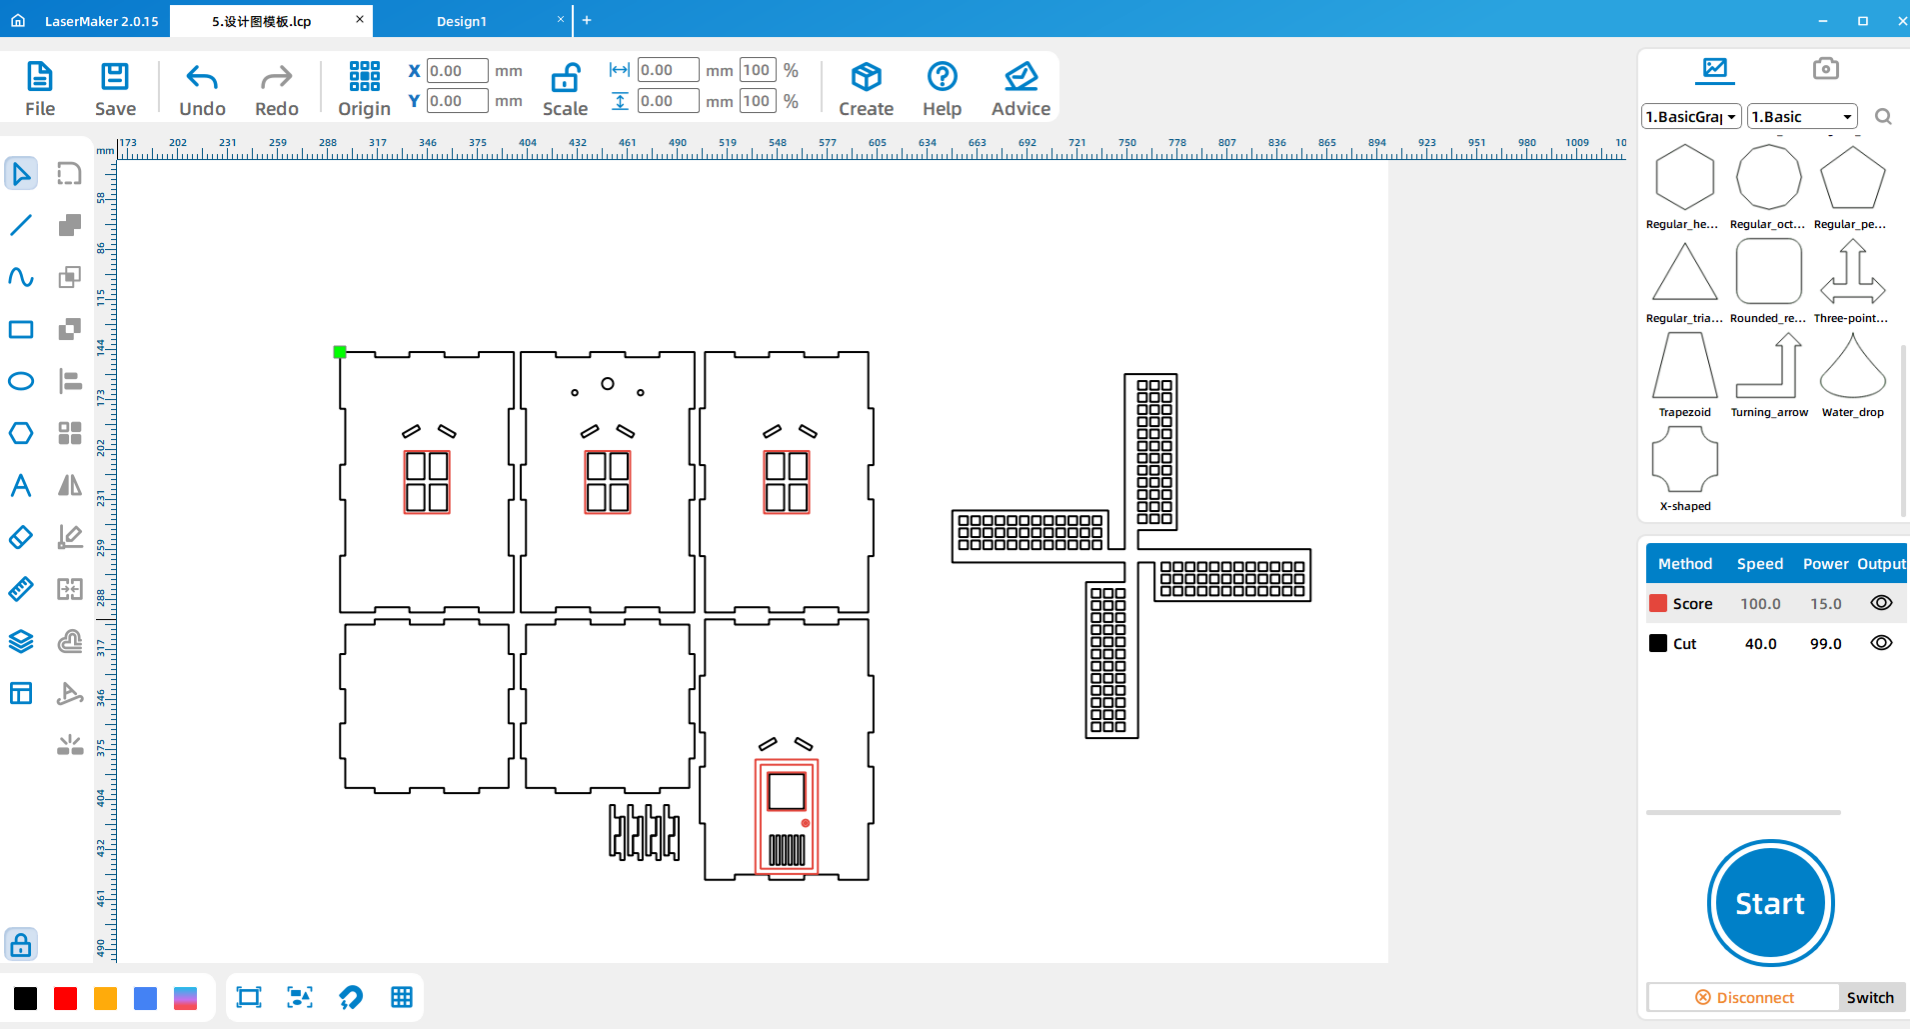
(4) Align and move the windmill blades according to the red line section in the image below.
(5) Draw rectangles between the windmill blades and connect them using the “Weld” function (as shown below)
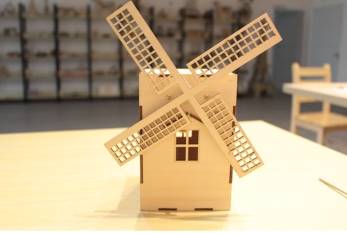
(6) Finally adjust the position of the parts properly, and the musical windmill design is complete!
Draw the windmill blade
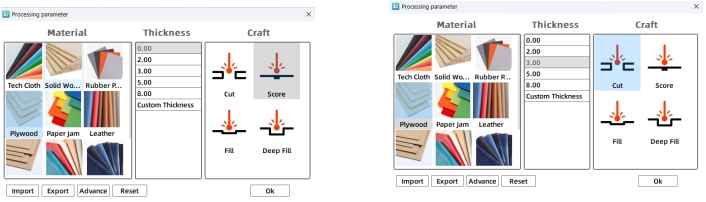
After the design is finished, set the layer parameters and adjust the parameter positions (wire first and cut later)
2.Machine demonstration
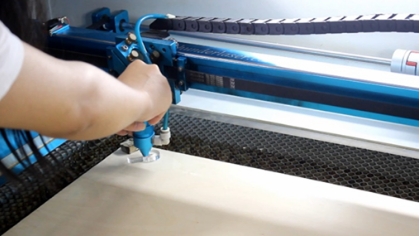
Import the design file demonstrated above into the laser cutting machine for processing.
(Tip: Remember to adjust the focal length before processing to avoid impenetrable cutting.)
3.Splicing assembly
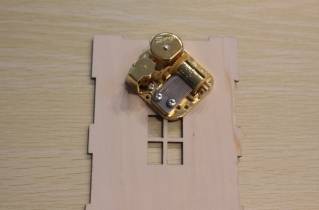
(1) Take out the spring handle of the music box movement and install the music box movement on the parts shown in the picture with screws.
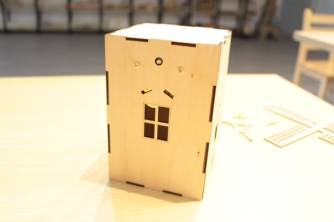
(2)Assemble the six pieces of wood according to the specifications and assemble them into a cuboid (as shown below)
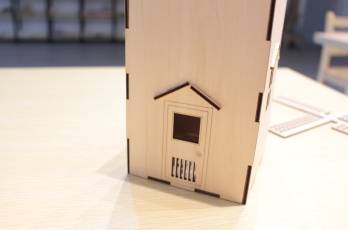
(3) Install the remaining small parts according to the requirements under the picture.
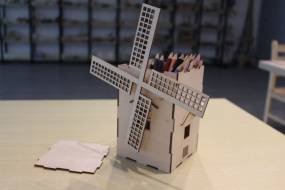
(4)Use white latex or hot melt glue to glue the windmill handle and windmill blade together and install it on the windmill music box.
(3)Think after class
1. In addition to the windmill model in teaching, what kind of windmill model do you have in mind? Share it with your classmates and teachers!
2. What would you do if you made other musical windmill models?
3. Will the musical windmill be the only musical windmill after it is built? Start your mind to think about it, and see what is the use of music windmill?
(4)Make a comment
Evaluate yourself and your partner
Evaluation item
Self-evaluation
Peer evaluation
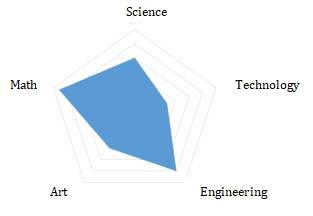
Creativity (30 points)
Technology (30 points)
Art (20 points)
Assist (20 points)
Total (100 points)
ThunderLaserSTEAMEducationCourse(Thematic)
3.3 Music World -- Music windmill
Practice
(1)Steam Index
(2)TeachingObjectives
* Exercise students’ ability of observation, thinking and operation;
* Learn and use LaserMaker editing software to design;
* Learn and cut parts with a laser cutting machine;
* Make a music windmill.
(3)Teachingkeypointsanddifficulties
* Exercise students’ ability of observation, thinking and operation;
* Learn and use LaserMaker editing software to design;
* Learn and cut parts with a laser cutting machine;
* Make a music windmill.
(4) Preparation for Teaching
* Please prepare relevant consumables, accessories and tools according to the attached table and the actual number of students.
* Ensure that students have the latest version of LaserMaker laser editing software installed on their computers.
* Please prepare the relevant presentation props in advance according to the PPT.
(5)Teaching process
1. Teaching introduction
Guide students to the class topic by asking questions:
1.In the first two lessons, we made heart-shaped music boxes and music carts. What kind of music boxes do you want to make this time?
Like a music windmill.
2. If you were asked to make a musical windmill, how would you make it?
Watch the video: After watching the video, are you already eager to make your own music windmill? Now let’s get into production!
2.Teaching demonstration
(1) Open the design file of the “box” in LaserMaker and move each part into place. (Image below)
(2) Draw a 10*15 rectangle as the small square of the window (as shown below) and copy the array according to the requirements in the picture.
(3) Draw a 30*60mm rectangle as the window frame and design the layer color red.
(4) Make an array copy of this window and place it in the rectangular rectangle of the box (as shown below)
Draw the Windows and doors
(1) Draw a 30* 60mm rectangle for the inner frame of the door and a 36 by 66mm rectangle for the outer frame of the door.
(2)Draw a square with an inner frame of 20*20mm and an outer frame of 22*22mm for the door and window and place it as shown below.
(3)Draw a 2*17mm rectangle and copy and place the array as required in the picture below.
(4) Draw an inner circle with a diameter of 1.5mm and an outer circle of 4mm for the door handle and change the layer to red;
(5) Place the painted door in the position shown below.
Draw the window and door rims
(1)Draw a 10*2.7mm rectangle as the bayonet of the window edge and click on “Shape – Rotate Graphics” on the left side of the software to rotate the rectangle 30 degrees.
(2)Draw a rectangle and place it in the middle of the window (as shown below). It is used to measure the position distance of the bayonet of the two window edges, taking the middle moment as the standard. Align the two window edges and place them respectively (as shown below) in the same way for the rest of the Windows and doors.
(3)Draw a rectangle of 2.6*25 as the window edge (Note: rotate it to the same Angle as the bayonet after drawing, and test whether it can overlap with the bayonet)
(4) Draw a 3.2*5 rectangle to measure the distance between the two window edges (as shown below)
(5)When the measurement is correct, turn it back to a 90 degree Angle and place it on the window edge (below)
(6)Draw a 3.2*10 card position and place it on the window edge (as shown below) Remove the small box and use the function of “welding” to splice it, the same operation on the other side.
(7)After the window edge is drawn, copy the array according to the requirements under the picture.
Punching
(1) Draw a circle with a diameter of 6.5mm for the wind-up hole;
(2) Draw two circles with a diameter of 3.15mm for the screw holes;
(3) During the design process, a 19*1.5 rectangle can be drawn to measure the distance between the two screw holes (as shown below)
Draw the windmill blade
(1) Draw a 30 by 90mm rectangle for the windmill blades and draw a 5 by 5mm square to roughly measure the position of the grid as shown in the image below.
(2)Remove the excess square and copy the array as required under the drawing.
(3)Copy the three windmill blades in the array and use the function of “rotation” to rotate according to the requirements under the diagram.
(Tip: The grid position of all four windmill blades is inconsistent)
(4) Align and move the windmill blades according to the red line section in the image below.
(5) Draw rectangles between the windmill blades and connect them using the “Weld” function (as shown below)
(6) Finally adjust the position of the parts properly, and the musical windmill design is complete!
Draw the windmill blade
After the design is finished, set the layer parameters and adjust the parameter positions (wire first and cut later)
2.Machine demonstration
Import the design file demonstrated above into the laser cutting machine for processing.
(Tip: Remember to adjust the focal length before processing to avoid impenetrable cutting.)
3.Splicing assembly
(1) Take out the spring handle of the music box movement and install the music box movement on the parts shown in the picture with screws.
(2)Assemble the six pieces of wood according to the specifications and assemble them into a cuboid (as shown below)
(3) Install the remaining small parts according to the requirements under the picture.
(4)Use white latex or hot melt glue to glue the windmill handle and windmill blade together and install it on the windmill music box.
4.Student operation
(1)Preparation before class: Hand out paper and pens for hand-drawing.
(2)Machine processing: Guide students to complete the machine processing steps in the order of completing the design.
(3)Splicing and Assembly:Distribute tools in groups and guide students to complete the assembly of works independently.
(6) Feedback with the class
1. Besides the windmill model in teaching, what kind of windmill model do you have in mind? Share it with your classmates and teachers!
2. What would you do if you made other musical windmill models?
3. Will the musical windmill be the only musical windmill after it is built? Start your mind to think about it, and see what is the use of music windmill?


.png "laser cutter Globle")


