Badge is a sign worn on the chest to show the identity of the work, is a hanging or wearing type of sign, it plays the role of introduction and marking.
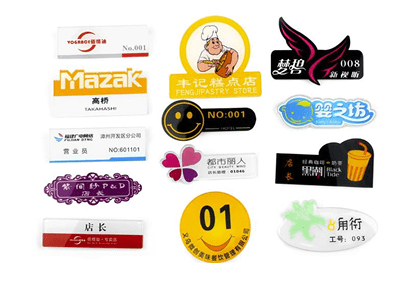
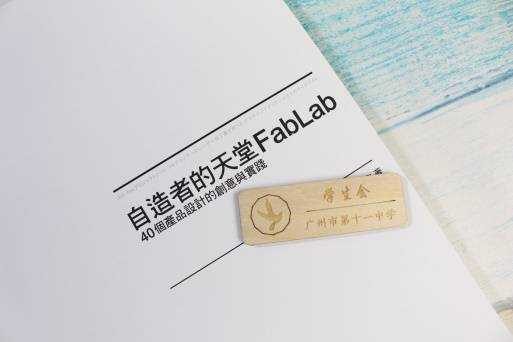
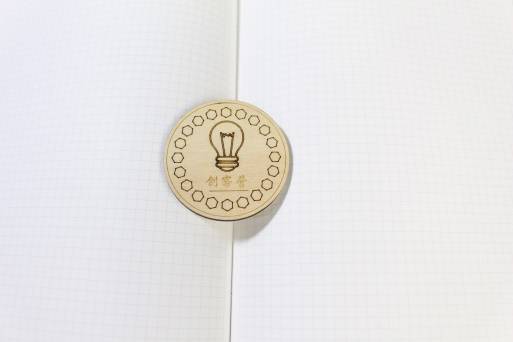
The name plate is mostly rectangular in shape, and there are also round ones, as shown in the following figure.
3. Project analysis
(1) Shape of the parts: the name plate is a flat work, the outline can be drawn by the producer, through cutting.
(2) The content of the piece: the text or graphics on the name plate, which forms an etching effect on the material by tracing or engraving. Text can be entered and edited using text tools. Graphics can be drawn or imported for processing.
(3) Component size: Find a reference sample of the corresponding hanging or wearing name badge in the stationery store or activity, and measure its length, width, and material thickness.
(4) Mode of use: hanging products need to punch holes and thread on the plane; Wearable products need to consider the size of the pin, and consider and debug whether it is feasible to bond with the material and support strength.
(5) Material selection: basswood plywood board, acrylic board.
(6) Process effect: shallow carving effect.
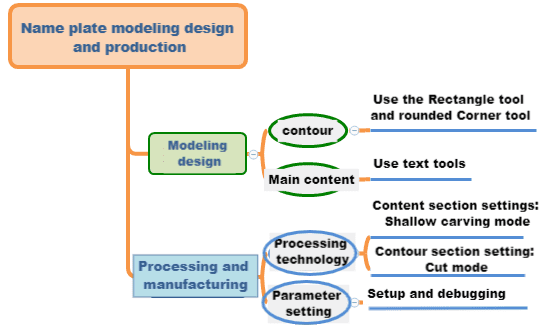
4. Modeling process
1. Research and hand-drawn design
Measure
By observing the styles of common event badges and conference badges, fill in the size of your badge in the table below, and explain why.
According to the use scenario of the name badge and the effect you want to achieve, considering the shape and content of the name badge, hand draw the design sketch of the name badge in the following box
2.Software drawing
After the project analysis of the name badge, we can complete the graphic drawing of the name badge through 3 steps.
(1) Draw the outline of the name plate
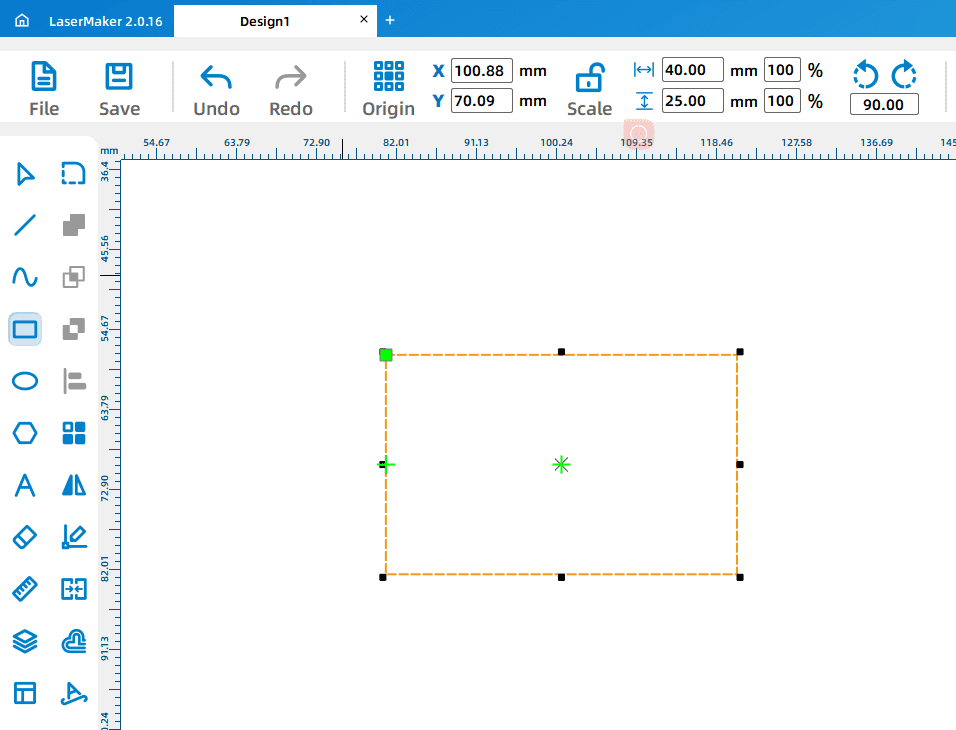
Use the Rectangle Tool to draw a rectangle
Move the mouse pointer to the drawing box, click Rectangle Tool, move the mouse pointer to the blank area of the drawing area, hold down the left mouse button, and drag the mouse to draw a rectangle. At this time, you can either drag to modify the size of the rectangle, or directly enter the measured name plate size in the width and height input boxes, as shown in the following figure.
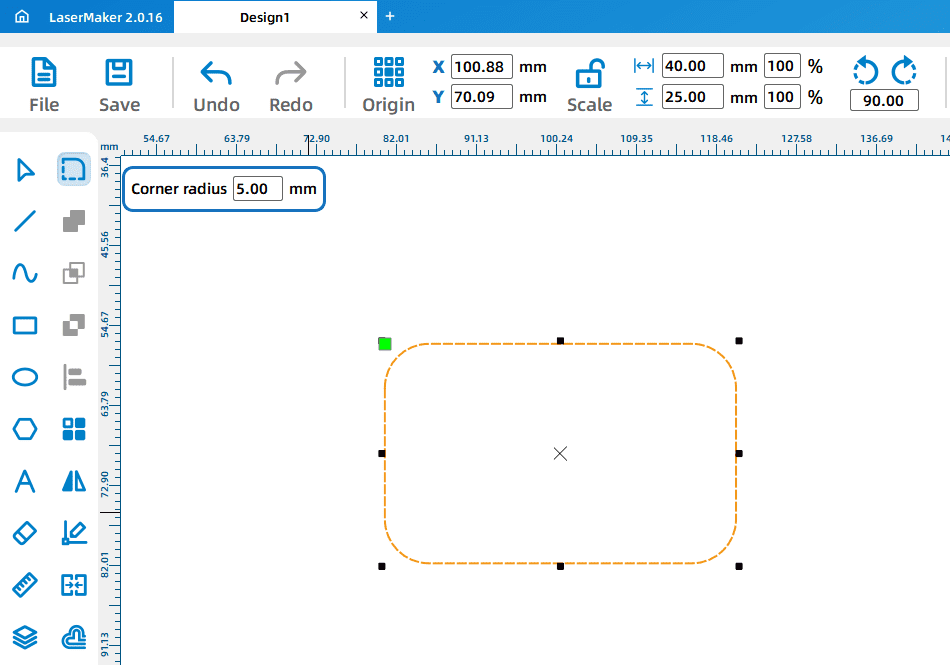
Use the “Round Corner Tool” to optimize the graphics
Move the mouse pointer to the drawing box and click “Rounded Corner Tool”. The “Rounded Corner Tool” dialog box appears. Enter “Radius” to determine the rounded effect of the rectangle. As shown in the following figure, enter “5” in the radius box, then move the mouse pointer to the sharp Angle of the rectangle, and round the four corners in turn. When the “+” symbol appears, click to round the corners.
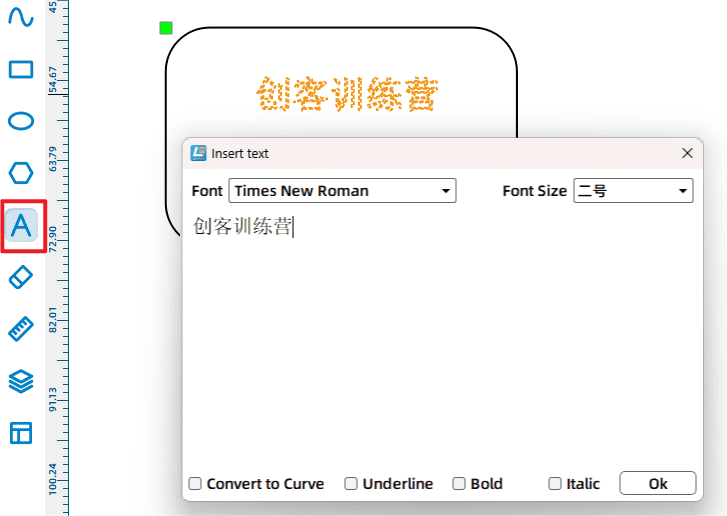
(2) Use the “Text Tool” to add name tag text
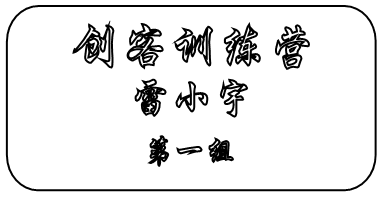
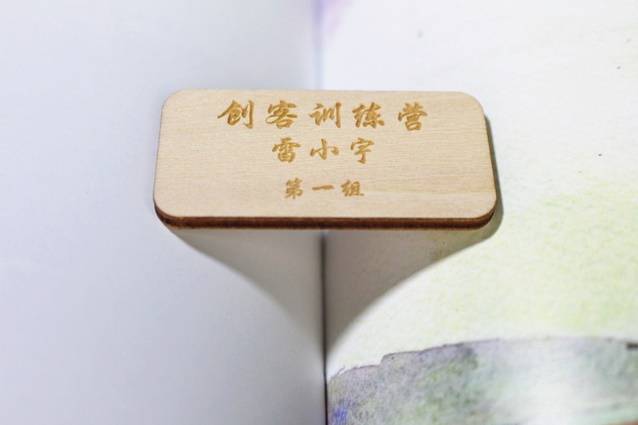
Move the mouse pointer to the drawing box, click “Text Tool”, move the mouse pointer to the drawn rounded rectangle, double-click the left mouse button, and the “Draw Text” dialog box will pop up, as shown in Figure 5.5. Select your favorite font and appropriate size, enter “Maker Training Camp”, click “OK”, you can finish the text drawing. Similarly, enter the text “Lei Xiaoyu” and “Group 1” respectively in the oval. After the text is drawn, the font can be moved and the font size can be set so that it can be rationally arranged on the badge, as shown in the following figure.
3. Process pattern design
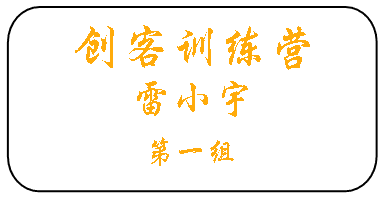
Select the badge text content object and click the “Yellow” color block in the “Layer Palette” to add the “Yellow Light Carving” process layer, as shown in the following figure.
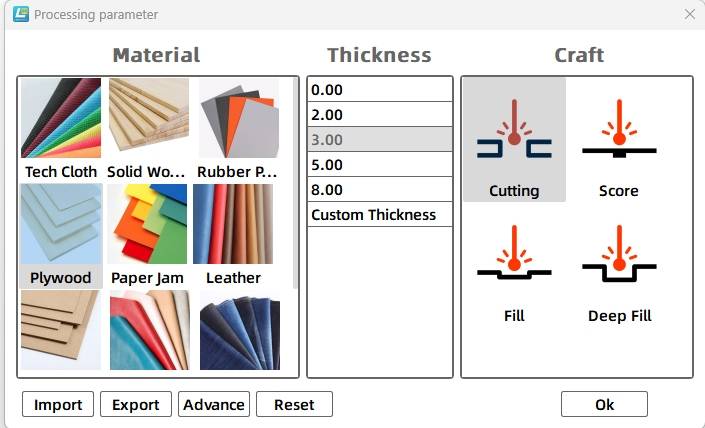
Double-click the process layer to pop up the “Processing parameters” dialog box, set the processing material to basswood plywood, the process to shallow carving, and the processing thickness to 0.1mm, then click “OK” to exit the dialog box.
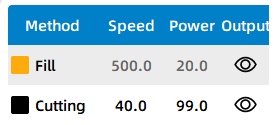
Select the name plate contour object, double-click its corresponding “Black cut” process layer, pop up the “Processing parameters” dialog box, set the processing material to basswood plywood, process to cut, processing thickness to 3mm, and click “OK” to exit the dialog box.
If you need to adjust the processing speed and power, you can double-click the corresponding machining thickness value in the “Machining Parameters” dialog box, and adjust the relevant parameters in the pop-up “Engraving parameters” or “Cutting parameters” dialog box.
Finally, the process layer displays the selected material name, process and machining thickness corresponding to the speed and power parameters. According to the production needs, drag the process layer and adjust the process sequence as follows: shallow carving → tracing → cutting, as shown in the following figure.
Thinking and debugging
(1) Enter the “Laser parameters” dialog box, modify the empirical value parameters of power or speed, for example, change the speed parameter to 400, change the power parameter to 20, conduct experiments, observe the results, and debug the appropriate parameters.
(2) Replace different fonts for engraving experiments, so that it presents the ideal effect, to meet the practical and artistic needs of the design of the work.
5. Display of finished products
The finished product is shown in following figure.
6. Extension exercise
The class board shown in following figure can be designed and made by LaserMaker, or you can design it to have a more cultural personality according to your ideas. Please note that the design needs to consider the way it can be firmly fixed to the wall.
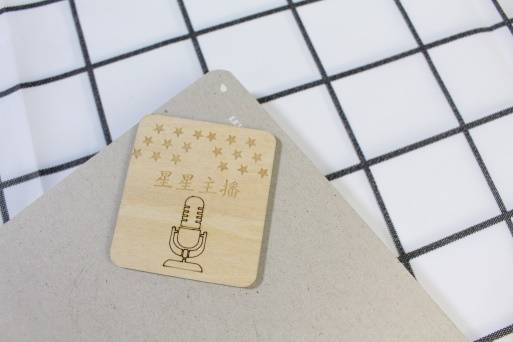
7. Work appreciation
shows the various badges and similar works of the LaserBlock open source community for your reference and appreciation.


.png "laser cutter Globle")


