Recommended settings
| Processing | Speed (mm/s) | Max power(%) | Min power(%) | DPI | Hatch type | Blow type |
|---|---|---|---|---|---|---|
| Engraving | 1500 | 30 | 20 | 300 | one-way fill | weak |
| Cutting | 20 | 80 | 10 | 300 | one-way fill | strong |
Processing steps
1、File Setup
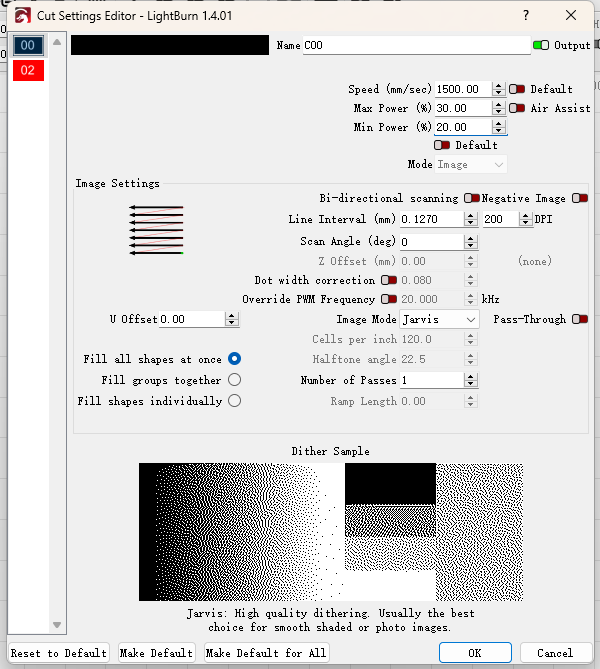
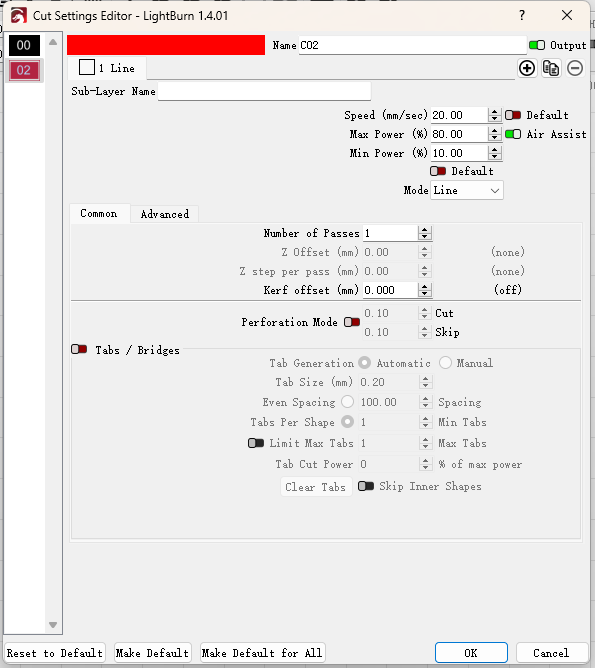
Step 1: Choose the Appropriate Parameters
Confirm the correct speed and power settings based on the specific material and thickness.
Decide between unidirectional or bidirectional fill; unidirectional often yields better results but takes longer. Here, unidirectional fill is selected.
Generally, set the DPI to 300. The higher the DPI, the more lines and the deeper the engraving.
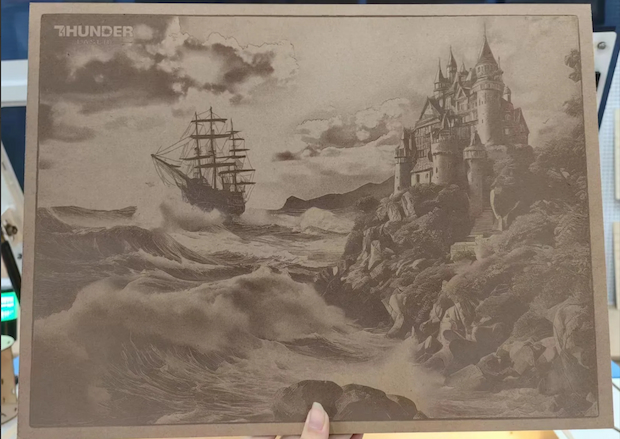
Since this is an image engraving, select the appropriate image mode. Here, Jarvis mode is chosen.
In the advanced options, ensure the slope value is set to “0.”
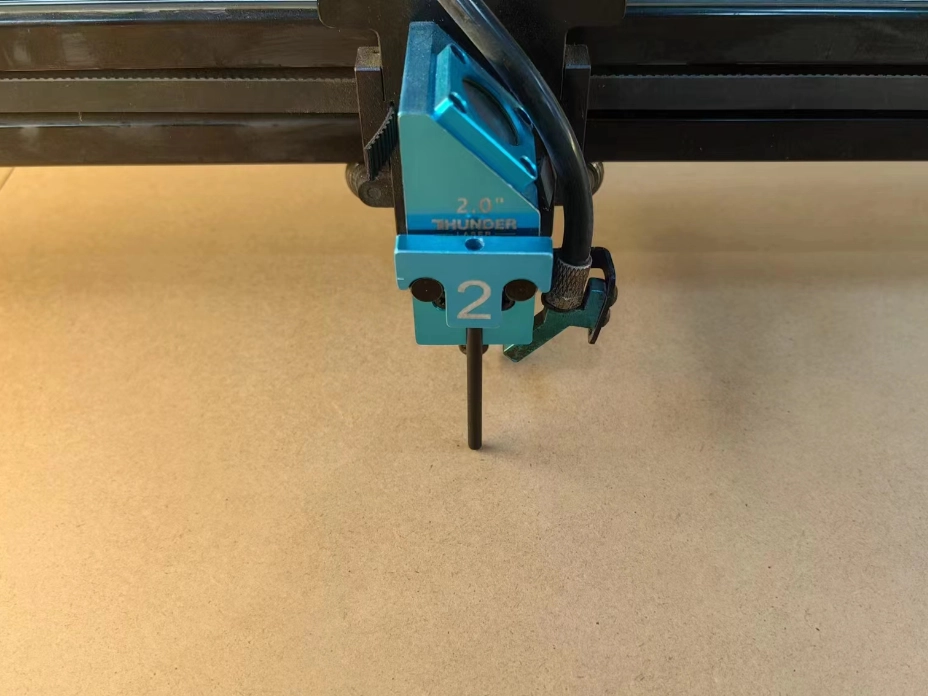
Step 2: Focus
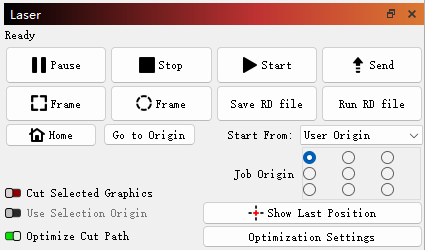
Step 3: Send the file
2、Machine Operation
Step 1: Focus the laser head
Step 2: Select the file and confirm
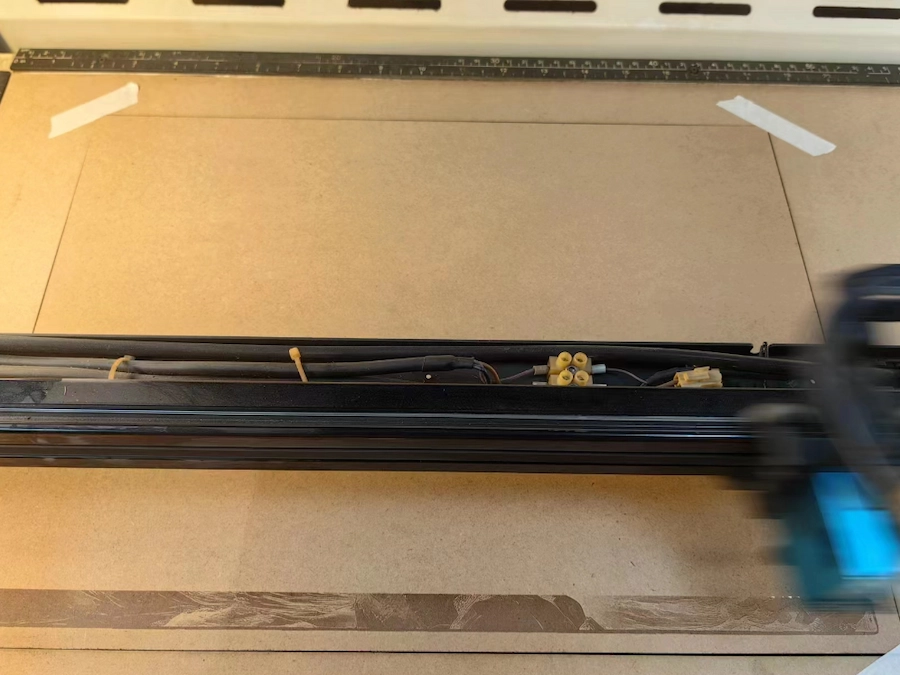
Step 3: Sample positioning confirmation
Move the laser head to the center position and check the distance from the top, bottom, left, and right of the pattern, ensuring it is centered as much as possible.
After determining the correct position, click the positioning button to confirm the starting point.
Run the frame to see if the engraving range fits entirely on the sample surface.
Once the position is set and all settings like focus are correct, click the start button.
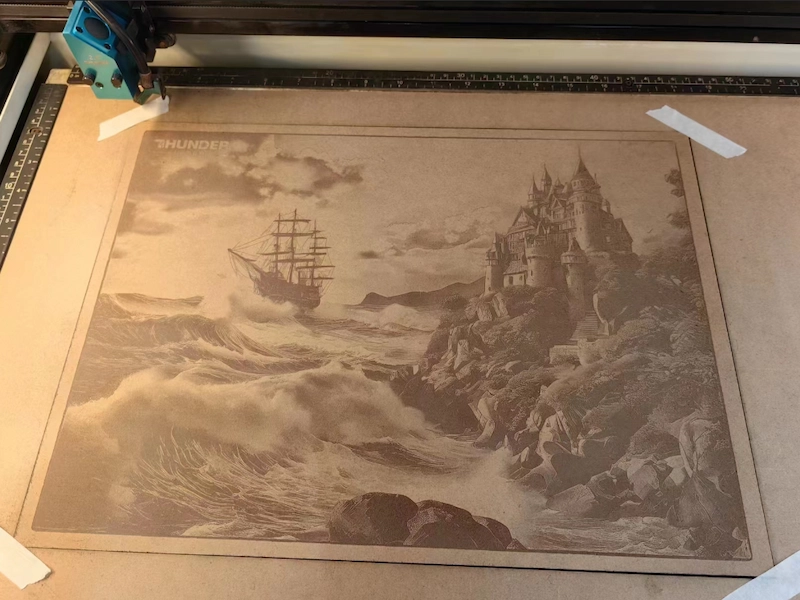
Step 4: Monitor the process
You can cut the board beforehand and tape around it to prevent the wood from warping.
Monitor the engraving process to prevent any unexpected incidents. Do not leave the machine unattended while it is running.
Step 5: Engraving finished

.png "laser cutter Globle")


