The demand for personalized gifts and keepsakes has surged in recent years, and photo laser engraving has become a cornerstone of this growing trend. Unlike traditional printing methods, laser engraving machines offer unmatched precision, permanence, and aesthetic appeal.
Whether for memorial plaques, custom home decor, or promotional items, this technique allows users to etch high-detail images onto various materials with remarkable clarity. By leveraging advanced laser technology, photo engraving has found applications in industries ranging from fine art to industrial manufacturing, creating long-lasting impressions that stand the test of time.

1. What Is Photo Laser Engraving?
Photo laser engraving transforms digital images into detailed engravings by etching surfaces with a controlled laser beam. Grayscale values dictate engraving depth, with darker areas absorbing more energy for deeper marks. Achieving the right contrast and tonal range ensures clarity and texture.
The process starts with converting a high-resolution image into a laser-compatible format. DPI settings impact detail sharpness, while engraving depth depends on material, laser power, and speed. Fine-tuning these parameters ensures precise, high-quality results.
2. Choosing the Right Material for Photo Engraving
Selecting the right substrate is essential for producing high-quality engravings. Each material offers distinct characteristics that impact the final appearance of the image.
2.1. Wood
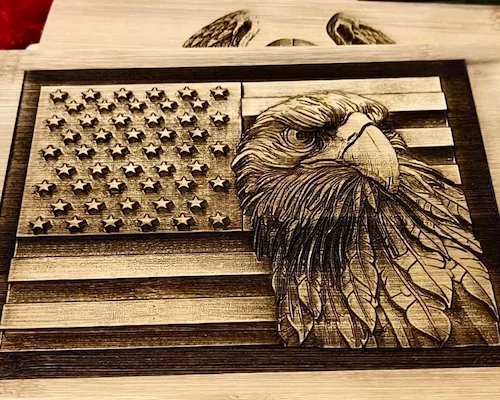
Wood provides a natural, rustic look that enhances engraved photos with warm, organic textures. Lighter woods like birch and maple yield higher contrast results, while darker woods may require increased laser power for visibility.
2.2. Acrylic
Acrylic delivers crisp, sharp engravings with a contemporary appeal. Clear and frosted acrylics are particularly effective, creating a striking contrast that enhances the depth of the image. It is a popular choice for illuminated signs and decorative pieces.
2.3. Metal
Metal engraving produces highly durable and professional results, often used for awards, plaques, and industrial applications. Materials like anodized aluminum and stainless steel offer excellent contrast without the need for additional treatments.
2.4. Glass
Glass engraving produces an elegant frosted effect, making it ideal for commemorative plaques, drinkware, and decorative panels. Specialized techniques such as rotary attachments can help engrave curved surfaces with precision.
2.5. Stone and Slate
Stone and slate offer a timeless, weather-resistant engraving option, perfect for memorial plaques and outdoor applications. The contrast in stone engraving is subtle but deeply etched, ensuring long-lasting legibility.
For different materials and their applications, here we have a chart to get a quick comparison:
| Material | Best For | Engraving Effect |
|---|---|---|
| Wood | Rustic decor, keepsakes | Warm, high-contrast |
| Acrylic | Modern signage, displays | Sharp, illuminated |
| Metal | Plaques, awards, ID tags | High durability, precision |
| Glass | Drinkware, memorials | Elegant frosted effect |
| Stone/Slate | Memorials, outdoor signage | Deep, weather-resistant |
3. Best Laser Engraving Machines for Photo Engraving
When selecting a laser engraver for photo etching, understanding the differences between CO2 and fiber laser technology is crucial. CO2 lasers excel at engraving non-metal materials like wood, acrylic, and glass, while fiber lasers are optimized for metals. For high-resolution photo engraving, machines with adjustable power settings, high DPI capabilities, and precise motion control are essential.
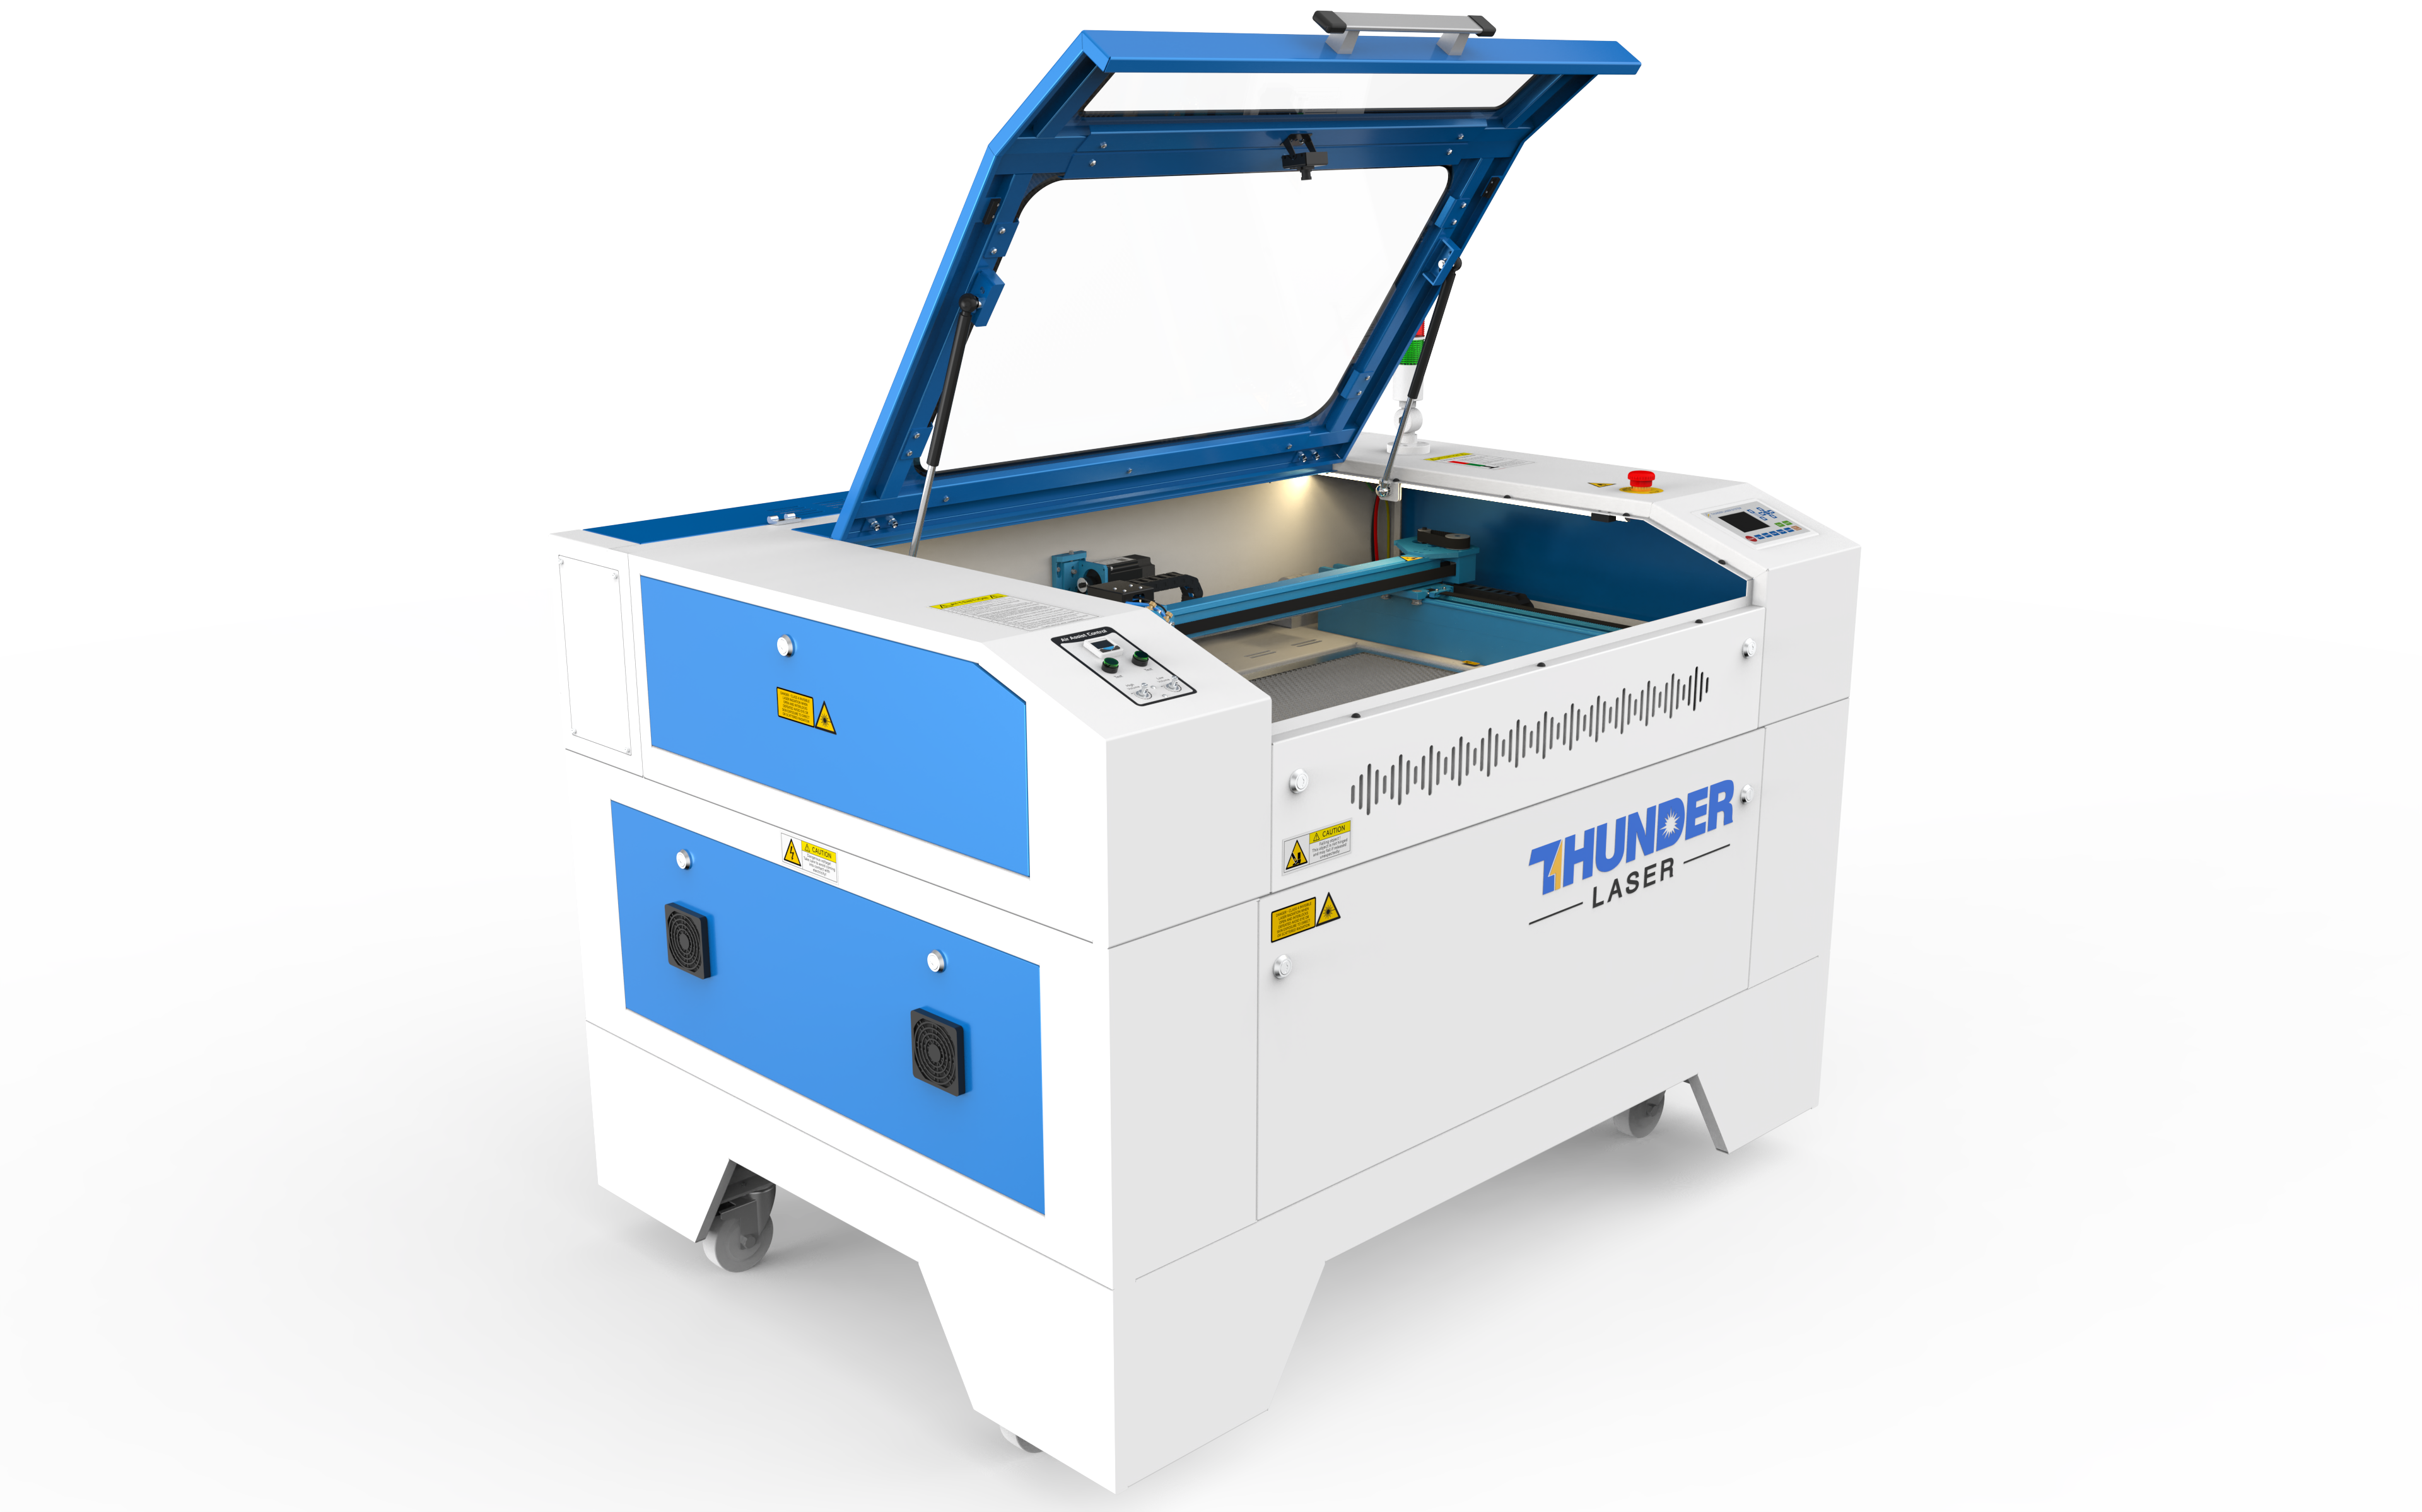
The Thunder Nova Plus is an industry-leading CO2 laser engraver engineered for exceptional photo engraving results. Equipped with a 60W RF metal tube, this machine excels at reproducing intricate details with remarkable clarity. With a 2.5″ high-resolution lens and advanced air-assist features, it produces intricate engravings with impeccable detail up to 2000 DPI. Its spacious work area of 600*400*155mm (23.6″ x 15.7″ x 6.1″) accommodates various material sizes, making it an excellent choice for both hobbyists and professionals seeking unparalleled precision.
4. How to Prepare a Photo for Laser Engraving
Achieving a high-quality laser-engraved photo requires careful image preparation. The process involves selecting a suitable image, optimizing it through editing software, and converting it into a laser-friendly format. One of the most critical steps is converting the image to grayscale, ensuring the laser accurately translates shades of light and dark into engraved details.4.1. Choosing the Right Image
The quality of the final engraving heavily depends on the image you start with. High-resolution images (at least 300 DPI) produce clearer engravings with more refined details. Images with strong contrast—where highlights, midtones, and shadows are well-defined—tend to work best. Busy backgrounds or low-contrast images may result in a lack of clarity when engraved. Cropping and adjusting the composition to focus on the subject ensures a more striking and readable engraving.4.2. Image Editing Software: Optimizing Photos for Engraving
To achieve the best results, using image editing software like Adobe Photoshop or LightBurn is essential. These programs allow you to adjust contrast, sharpen details, and convert the image into an engraving-ready format. A well-prepared photo ensures that the laser captures even the smallest details without losing depth or definition.4.3. Converting Images to Grayscale: Step-by-Step Guide
Grayscale conversion is a crucial step in preparing a photo for laser engraving. The laser interprets shades of gray as varying levels of intensity, with lighter areas receiving minimal burns and darker areas absorbing more laser energy, creating depth and contrast. Here’s a guide of how to properly convert an image to grayscale in Photoshop:Step 1. Open the Image in Editing Software
- Use Adobe Photoshop to load the image. Ensure it is high resolution for better detailing.
Step 2. Remove Unnecessary Background Elements
- If the background is cluttered, use selection tools or a layer mask to isolate the main subject.
- Adjust brightness and contrast to enhance separation between light and dark areas.
Step 3. Convert to Grayscale
- In Photoshop:Go to Image > Mode > Grayscale.
- This removes all color information, leaving only brightness variations.
Step 4. Enhance Contrast and Midtones
- Grayscale conversion alone may not create enough contrast for a sharp engraving.
- Adjust Levels or Curves to fine-tune brightness and contrast.
- The goal is to define highlights and shadows without losing midtone details.
Step 5. Apply a Sharpening Filter
- Engraving machines respond best to crisp details. Apply Unsharp Mask or High-Pass Filter to make edges more defined.
- Over-sharpening can create harsh lines, so adjust gradually.
Step 6. Use Dithering for Photorealistic Engraving
- Dithering simulates depth by creating patterns of dots in different densities.
- In Photoshop, go to Mode > Bitmap > Halftone Screen or Diffusion Dither for a stylized effect.
- This technique works particularly well for wood, acrylic, and stone engravings.
Step 7. Save in the Correct Format
- Save the optimized image in BMP, PNG, or JPEG format, depending on the software used by your laser engraver.
- Ensure the resolution remains high to maintain quality.
5. Step-by-Step Guide to Laser Engraving Photos
Step 1. Select the Perfect Image: Choose a high-resolution photo with well-defined details. Step 2. Convert the Image to Grayscale: Adjust contrast and sharpness to enhance clarity. Step 3. Set Up the Laser Engraver Parameters: Configure speed, power, and resolution settings based on the material. Step 4. Test Engravings: Experiment with sample pieces to refine the settings. Step 5. Execute the Final Engraving: Once satisfied with the test results, engrave the final piece and perform any necessary post-processing.
6. Tricks to Engrave Lifelike Photos with Laser Machines
Getting a crisp, detailed laser-engraved photo requires more than just a good image—it’s about fine-tuning the engraving process. Here are some key tips to enhance the quality of your results:
6.1. Choose the Right Engraving Speed and Power
- Soft materials (wood, acrylic): Use high speed, low power to prevent burning.
- Hard materials (metal, stone, glass): Use low speed, moderate power for deeper marks.
- Always run test engravings to refine your settings.
For better outcomes, the recommended parameters for different materials might help.
6.2. Set the Correct DPI for Engraving
- 300–500 DPI: Best for wood and acrylic.
- 600–1000 DPI: Ideal for metal and glass for sharper details.
One thing should be noticed– higher DPI isn’t always better—it may cause excessive burns on organic materials.
6.3. Use the Right Focus and Lens
- A 5″ or 2″ lens provides better detail than a standard 2.5″ lens.
- Ensure the laser is properly focused; even slight misalignment reduces clarity.
- Raise Z-axis by 1-2mm with soft-focus slightly can achieve a smoother shading.
7. Applications of Laser Engraving Photos
Photo laser engraving has revolutionized personalization, allowing intricate images to be etched onto various materials with remarkable detail. From heartfelt gifts to sophisticated branding, its applications span across multiple industries.
7.1. Personalized Gifts & Keepsakes
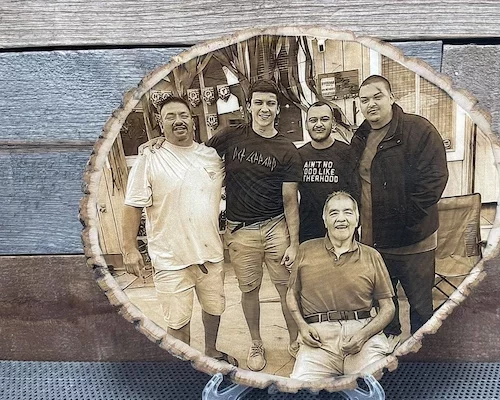
- Engraved Wooden Portraits – Transform family photos into rustic, timeless wooden plaques.
- Custom Photo Keychains – Miniature engraved images on metal or acrylic keychains.
- Photo-Engraved Jewelry – Pendants, bracelets, and lockets with detailed photo etchings.
7.2. Business & Branding
- Custom Promotional Items – Laser-engraved metal or acrylic plaques for corporate gifts.
- Branded Merchandise – Unique marketing tools like engraved wooden notebooks and leather wallets.
- Award & Recognition Plaques – Employee of the month or achievement awards with photo engravings.
7.3. Home Décor & Art
- Photo-Engraved Glass Art – Elegant frosted images on glass panels and frames.
- Acrylic 3D Photo Blocks – Depth-etched laser portraits for a modern aesthetic.
- Custom Metal Wall Art – Intricate designs and family portraits engraved on brushed aluminum.
7.4. Special Occasions & Celebrations
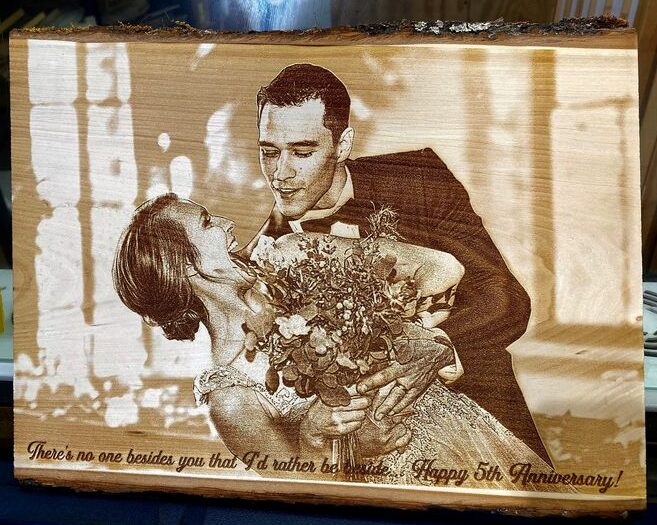
- Engraved Wedding Gifts – Personalized wooden or acrylic wedding photos as keepsakes.
- Anniversary & Love Tokens – Couples’ pictures engraved on keychains, lockets, or wooden frames.
- Baby Birth Announcements – Photo-engraved plaques celebrating newborns with date and details.
7.5. Fine Art & Photography
- Photo-to-Wood Engraving – Unique laser-engraved artistic pieces for exhibitions.
- Engraved Stone Portraits – High-detail laser carvings on granite or slate for luxury artwork.
- Layered Acrylic Engraving – Multi-depth engravings for a 3D effect in acrylic displays.
Conclusion
Photo laser engraving is an innovative method that transforms ordinary images into permanent works of art. By selecting the right material, optimizing image preparation, and utilizing advanced laser technology, users can achieve stunning results that stand the test of time. Whether for personal keepsakes or commercial applications, laser-engraved photos offer a timeless way to preserve cherished memories with unparalleled detail and precision.
FAQs About Acrylic Laser Engraving
Q1. What is the best material for photo engraving?
Wood, acrylic, coated metal, and slate are excellent choices. Light-colored woods like birch or maple offer high contrast, acrylic provides sharp details, and anodized metal ensures durability. Slate creates a classic, etched appearance.
Q2. What resolution should a photo be for laser engraving?
A minimum of 300 DPI is recommended for clear details, but 600–1000 DPI produces sharper results. Higher resolutions capture fine textures and tonal variations, improving engraving quality, especially on materials like acrylic or metal.
Q3. How do I prepare an image for laser engraving?
Convert the image to grayscale, enhance contrast, sharpen edges, and apply dithering if necessary. Avoid low-contrast or blurry photos. Save the file in BMP, PNG, or another lossless format to maintain quality.
Q4. What software can I use for photo laser engraving?
LightBurn, Photoshop, CorelDRAW, and GIMP are commonly used. These programs allow you to adjust contrast, apply dithering, and optimize images for laser engraving, ensuring maximum detail and clarity in the final result.
Q5. What type of laser is best for photo engraving?
CO2 lasers work best for organic materials like wood, acrylic, and glass, while fiber lasers excel at engraving metals. Choose a machine with high DPI capability for superior image reproduction.

.png "laser cutter Globle")


