Introduction
Let’s create a laser etching unique 3D brass coin! It is a precious and unique craft, you can customize it to give to your friends or clients as a precious gift or sell it at the bazaar!
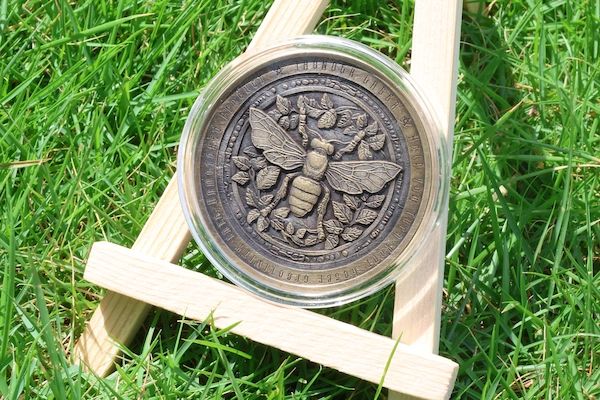
With personalized wraparound characters and a fine 3D image, this coin is indeed worth being collected. In our design, a bee rests on intertwined branches and leaves, bringing you a vibrant and delightful natural feeling.
Read this post for a great laser etching journey!
Machine Used
Aurora Lite 50W
Material Needed
A Brass Coin
Settings
- 3D Etching
- Speed:2000mm/s
- Max Etching Power:100%
- Min Etching Power:2.5%
- Frequency: 20kHz
- DPI:1270
- Character Etching
- Speed:100mm/s
- Etching Power:40%
- Frequency: 50kHz
- DPI: 2540
Before your work begins
- Verify that the exhaust fan is functioning properly.
- Make sure the lens isn't stained and the laser is running well.
- Remember take the the lens' cover off!
Step 1: Place the coin
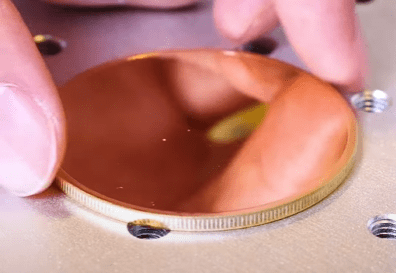
The coin is a flat circle, put it on the plate and keeping it near the center of plate is better, that’s all.
Step 2: Import your 3D coin file
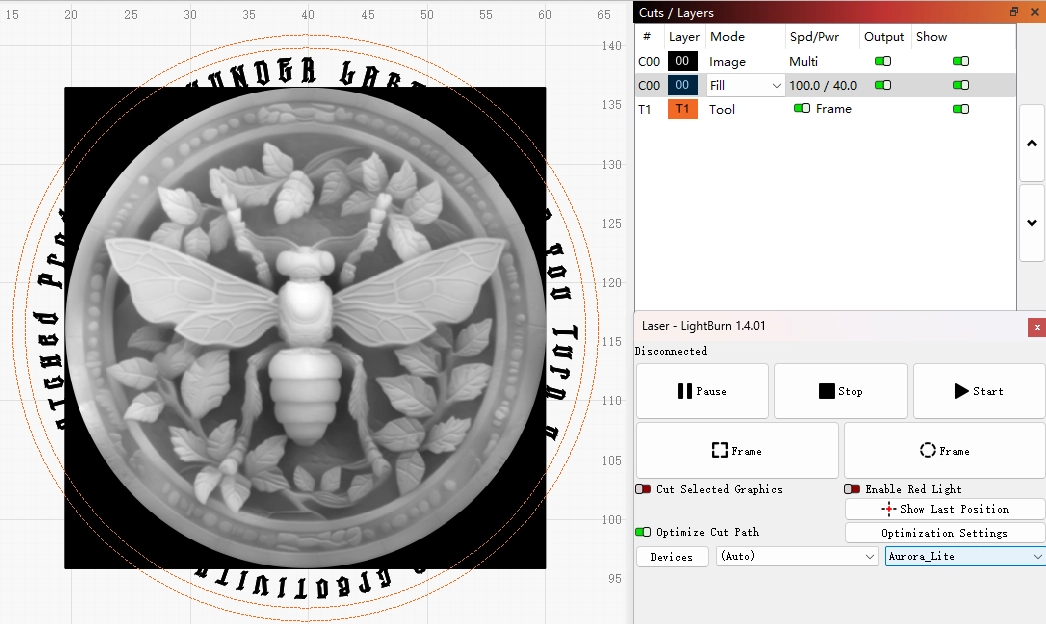
Open the file with LightBurn, adjust the design’s size to your coin.
In laser etching relief, the quality of the image is directly related to the final result. Depth picture (like the bee image below) is the best suitable design for 3D etching. Check out to ensure everything is in order.
TIPs: To position, set the outline of the coin by using a frame tool layer. Measure the brass coin and paint the circle of its shape with the tool, then put the depth picture in.
Step 3: Confirm the brass coin settings
Examine the suitable parameters to bring the hoped-for 3D coin result.
Check out bi-directional scanning on or off. We turn bi-directional on to save time.
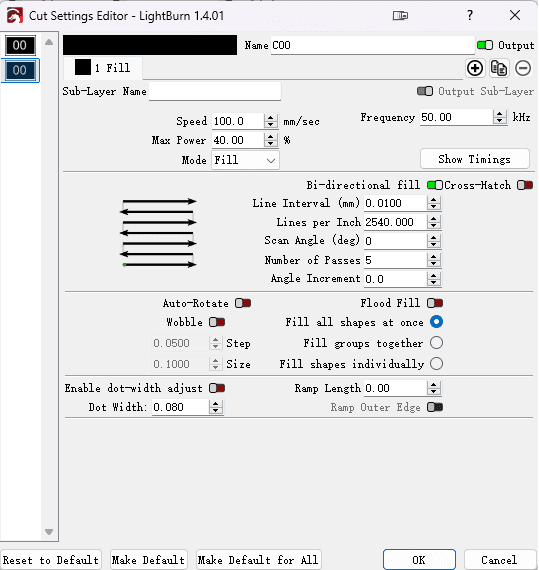
Laser etching brass coin requires a very high DPI, here we set 3D etching DPI 1270 and characters etching DPI 2540.
And for embossing layer, choose the 3D Sliced image mode.
Don’t be surprised, the number of passes can be set to dozens or even hundreds in the relief laser etching process, check that the settings are correct!
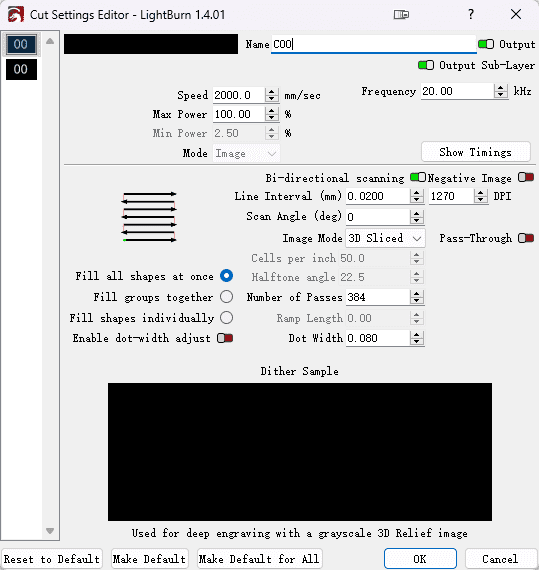
3D image etching’s parameters
Characters setting
Step 4: Focus the coin
Focus is the key to success. Once focus is ignored, the results may not be satisfying. Before you start, make sure you have finished focusing. Aurora Lite will automatically adjust in the 3D laser etching.
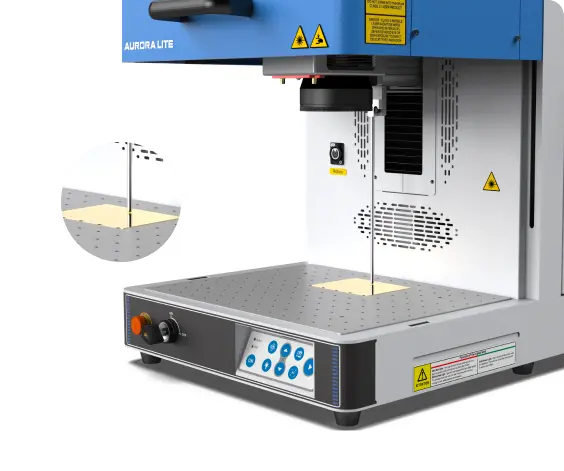
You can choose from two kinds of focus. The autofocus is as easy as push the AF button on Aurora Lite. And if you prefer manual focus, the focal stick is must in close contact with the coin.
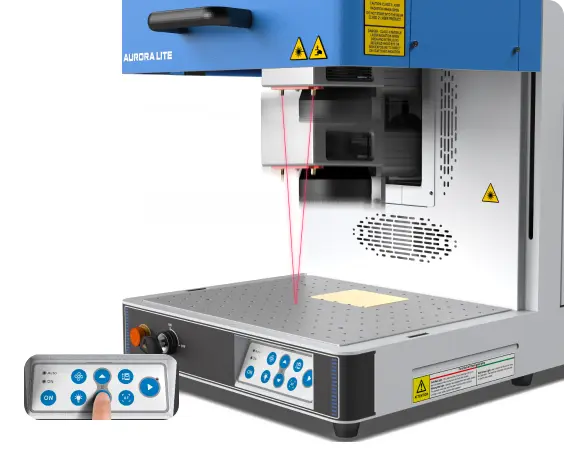
Auto focus
Manual focus
Step 5: Frame the design and start laser etching
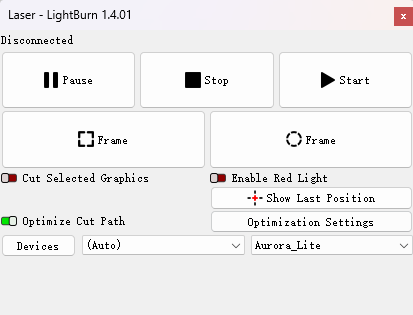
When we click the “Frame” , we can see red light show the outline of etching area. It’s safe, and the frame will be on the surface of brass coin. Once it isn’t, move your coin or design until they are at the same position.
If adjusted, we can hit ‘Start’ and begin Aurora Lite’s 3D brass coin laser etching!
Step 6: Monitor the 3D coin etching process
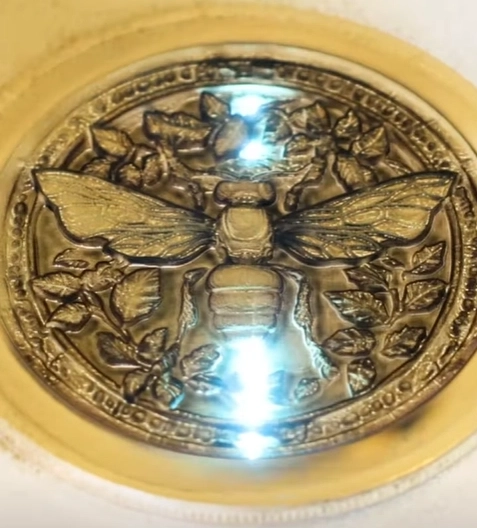
In case of any incidents, it’s necessary to keep an eye on the laser. Specially be aware of abnormal conditions such as alarms.
Considering the long time it takes to complete a 3D brass relief, you can do other work at the same time in the room where the Aurora Lite is placed. The Aurora Lite’s low noise and air purifier ensure that your work won’t be disturbed by it.
Since the laser etching energy is very strong, to ensure security, we recommend you avoid overly gazing at the laser etching, even with the door cap closed.
Step 7: Complete the laser etching
The 3D brass coin is finally finished, indulge yourself in your creation!
Laser etching metal reliefs produces a lot of powder. After opening the door and picking up your brass coin, don’t forget to clean the finished coin and the inside of the machine.
When you clean your coin. it’s OK to brush it under running water with a soft toothbrush. And when you clean Aurora Lite, clean the lens with 99% alcohol and a dust-free cloth, wiping in a circle from the center outward. There are also exhaust port and other stains inside of the machine that should be wiped down as well.
TIPs: Want a better result? After cleaning the brass coin, use a copper blackening agent to soak the 3D relief for more than 15 minutes, then cleaning and polishing the coin, you’ll love it.
Come and Try!
The custom 3D brass coin is perfect for metal embossing enthusiasts, craft merchants, or anyone who loves personalized gifts. You can give it to the important people in your life on their anniversary.
Whenever you pick up this laser etching brass coin, you will be reminded of the story and cultural significance behind it. It is more than just an object, it is an emotional attachment. Brass coins are often designed with a blend of traditional and modern elements, making them visually distinctive as well.
This laser etching brass coin can be a treasured addition to your display case and enhance your life. Whether as a gift or for your own use, souvenir brass coins add unique value to every moment.


.png) International
International
 United States
 Brasil
 Canada
 Costa Rica
 Mexico
 Česká
Česká
 Romania
 Polska
 Ireland
 Portugal
 Lietuva
 Россия
 Deutschland
 Britain
 Україна
 France
 Sverige
 Italia
 Norway
 Denmark
 Ελλάδα
 한국
한국
 中国
中国
 ประเทศไทย
 中国香港
中国香港
 Israel
 中國臺灣
中國臺灣
 India
India
 پاکستان
 پශ්රී ලංකා
 ジャパン
ジャパン
 Australia
 New Zealand
 South Africa